
Want to harness the power of SaltStack Config for configuration management without tying it to an existing VMware Aria Automation setup? Deploying SaltStack Config 8.17 as a standalone product via VMware Aria Suite Lifecycle Manager (by VMware by Broadcom) is an excellent solution. This step-by-step guide will walk you through the process, ensuring you can set up a standalone SaltStack environment efficiently. Perfect for IT administrators or DevOps teams, this tutorial makes deployment simple and scalable.
Prerequisites for Deploying SaltStack Config 8.17
Before diving in here’s what you’ll need:
- SaltStack Config 8.17 Binaries: Download the latest version from the VMware by Broadcom portal. You’ll need these files to deploy the product. Binaries can be downloaded from here.
- VMware Aria Suite Lifecycle Manager 8.17: Ensure you have Lifecycle Manager installed and updated to version 8.17 or above.
- VMware vSphere Environment: A functional vSphere setup (vCenter Server, ESXi hosts) is required to host the SaltStack Config VM.
- Permissions: Admin access to Lifecycle Manager.
For a smooth deployment, verify compatibility using the VMware by Broadcom Interoperability Matrix.
Step-by-Step Guide to Deploy SaltStack Config 8.17
Assuming your binaries are ready, let’s deploy SaltStack Config 8.17.
Step 1: Access Lifecycle Manager and Select Your Environment
- Log in to VMware Aria Suite Lifecycle Manager.
- Navigate to Environments in the left-hand menu.
- Locate your environment, click the Menu (three dots), and select Add Product.
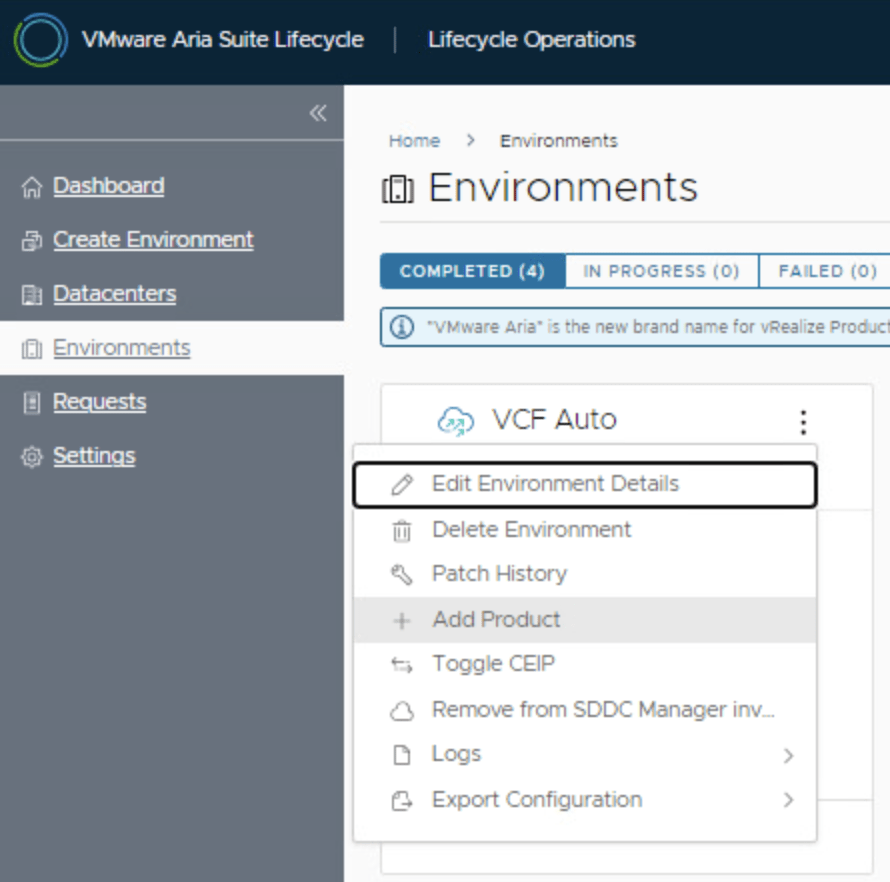
This opens the product addition wizard, where you’ll integrate SaltStack Config.
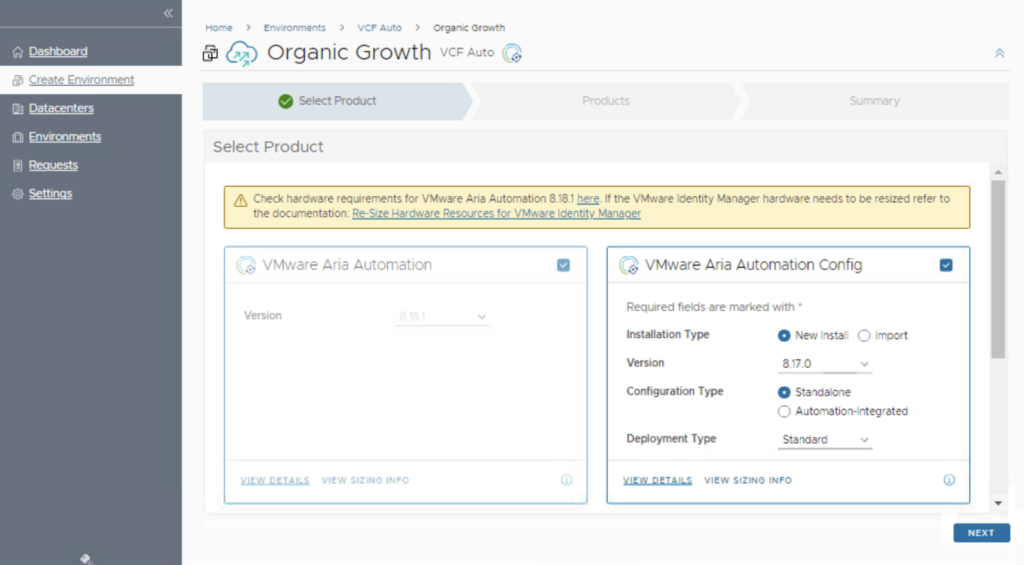
Step 2: Add SaltStack Config to Your Environment
- In the product list, check the box next to VMware Aria Automation SaltStack Config.
- Make sure the box for Standalone is selected.
- Click Next to proceed.
Step 3: Accept the End User License Agreement (EULA)
- Review the EULA for SaltStack Config 8.17.
- Scroll to the bottom, check the Agree box, and click Next.
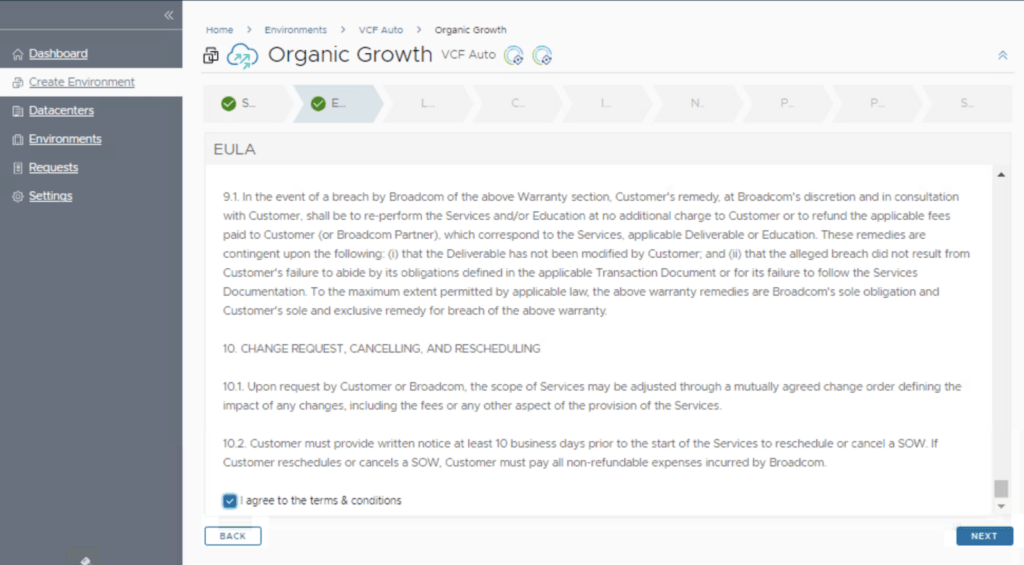
Read the EULA to understand the licensing terms
Step 4: Select Your License
- Click Select to choose your Aria Config license.
- Pick your license.
- Hit the Validate button to confirm compatibility, then click Next.
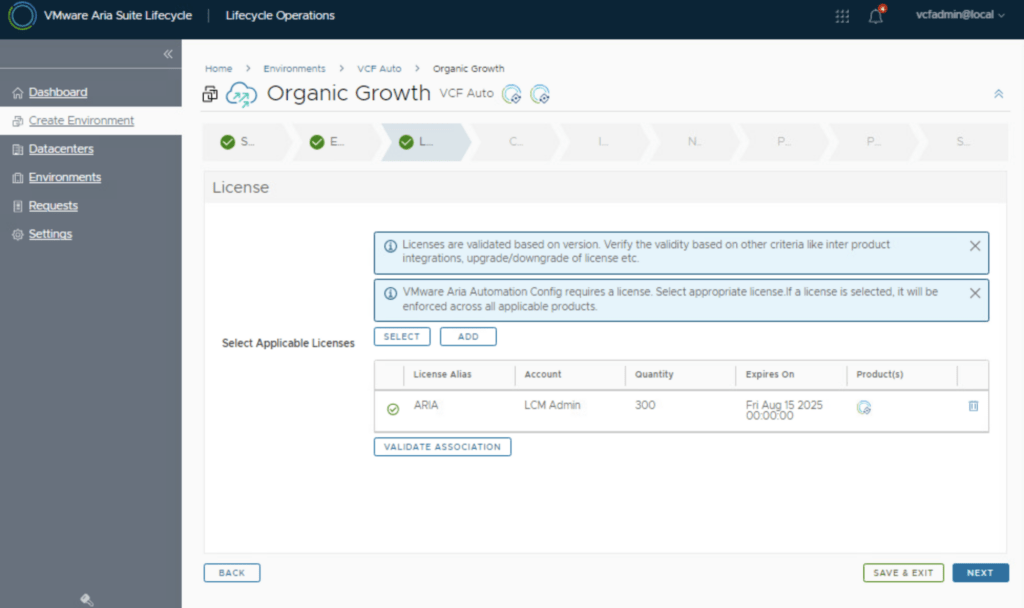
Validation ensures your environment supports SaltStack Config 8.17 without licensing issues.
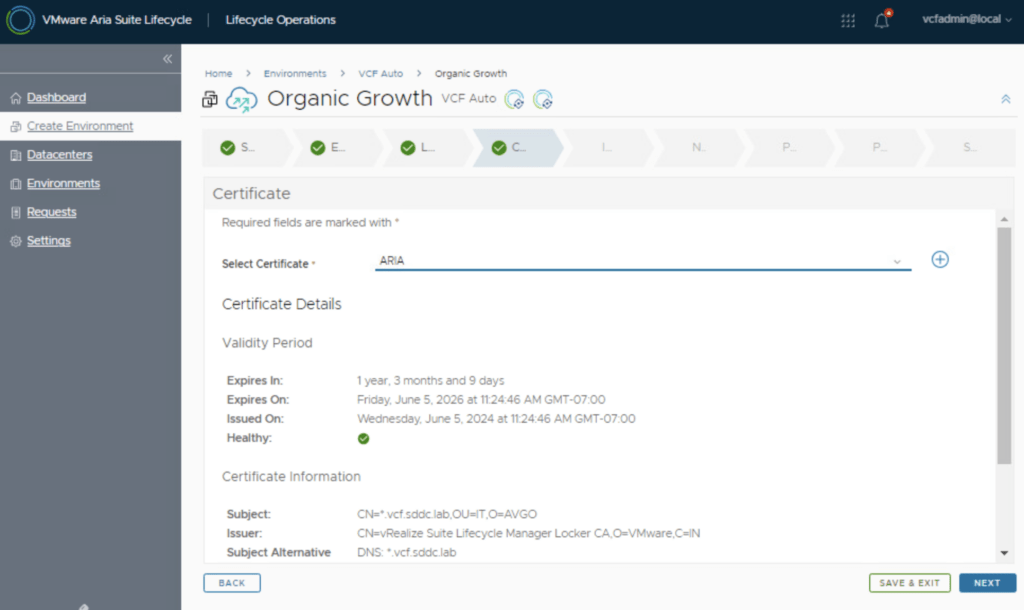
Step 5: Configure Certificates
- Choose an existing certificate from the list or generate a new one:
- To create a new certificate, click the + icon.
- Fill in the required fields (e.g., CN, SAN) and generate it.
- Once your certificate is ready, select it and click Next.
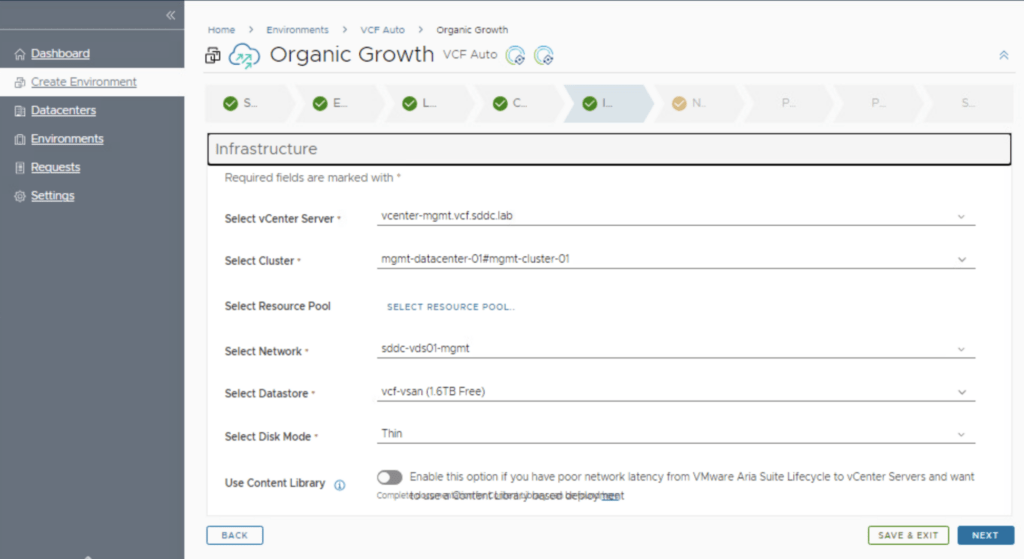
Step 6: Infrastructure Selection
- Select a vCenter Server, Cluster, Network, Datastore
- Click Next to navigate to configure the network.
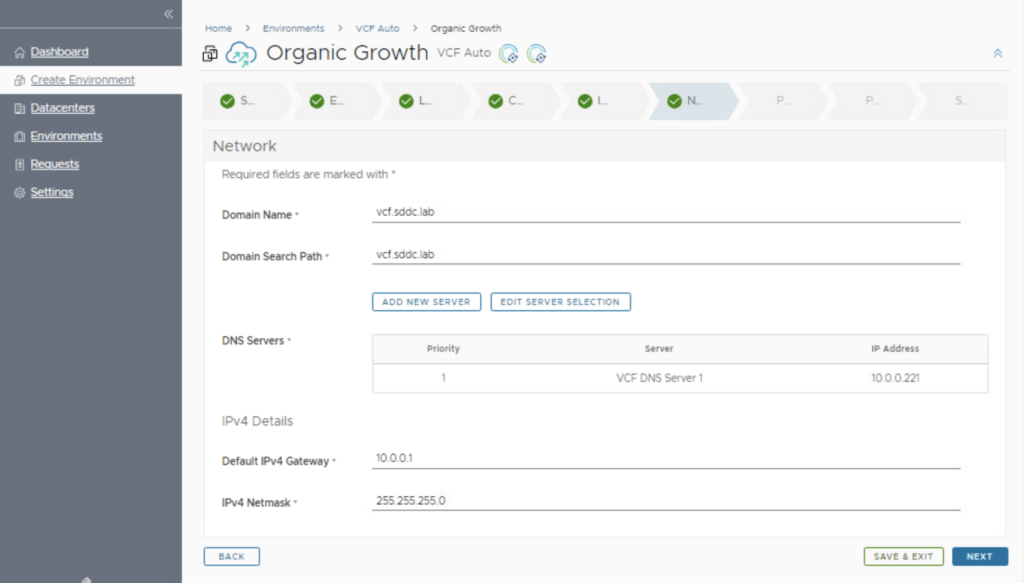
Step 7: Network Details
- Complete the network details.
- Click Next to navigate to the Products configuration page.
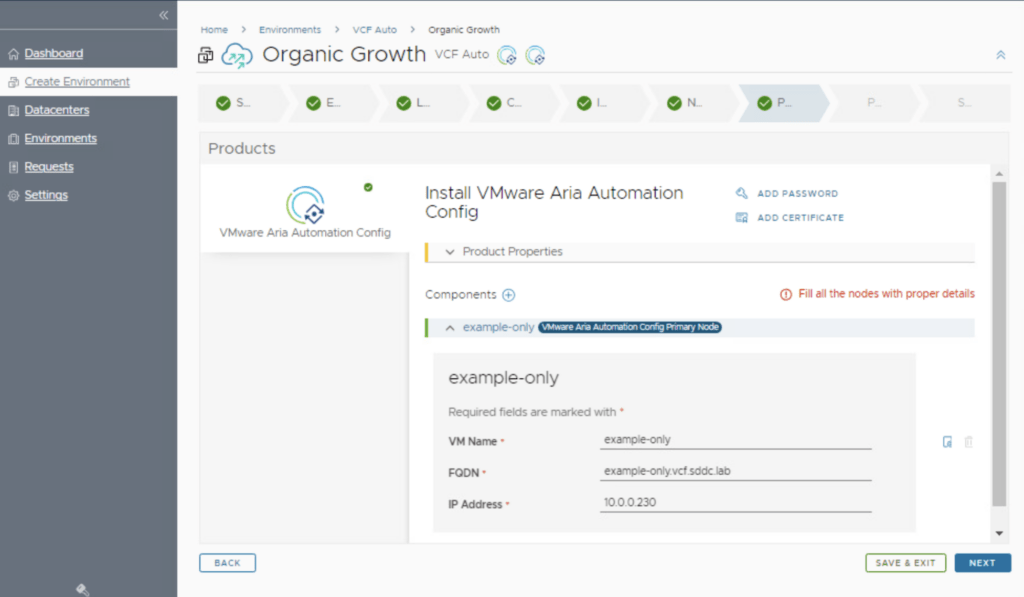
Step 8: Product Configuration
- Review your configuration settings (VM Name, certificate, FQDN, etc.).
- Click Next to navigate to the Precheck.
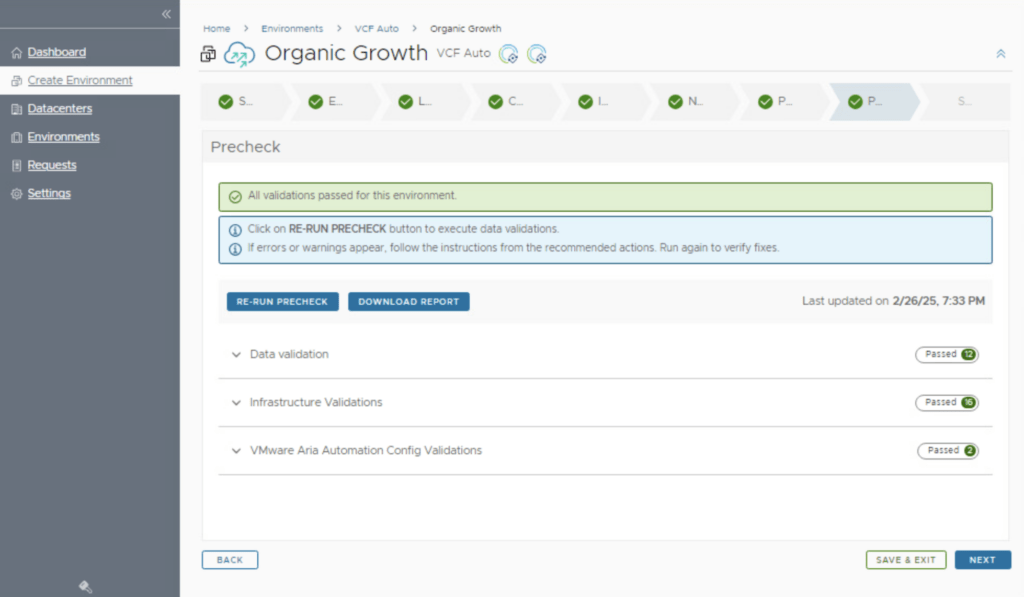
Step 9: Validate Precheck
- Click Run Precheck to initiate a recheck of the inputed configuration.
- Click Next to navigate to the Deployment review
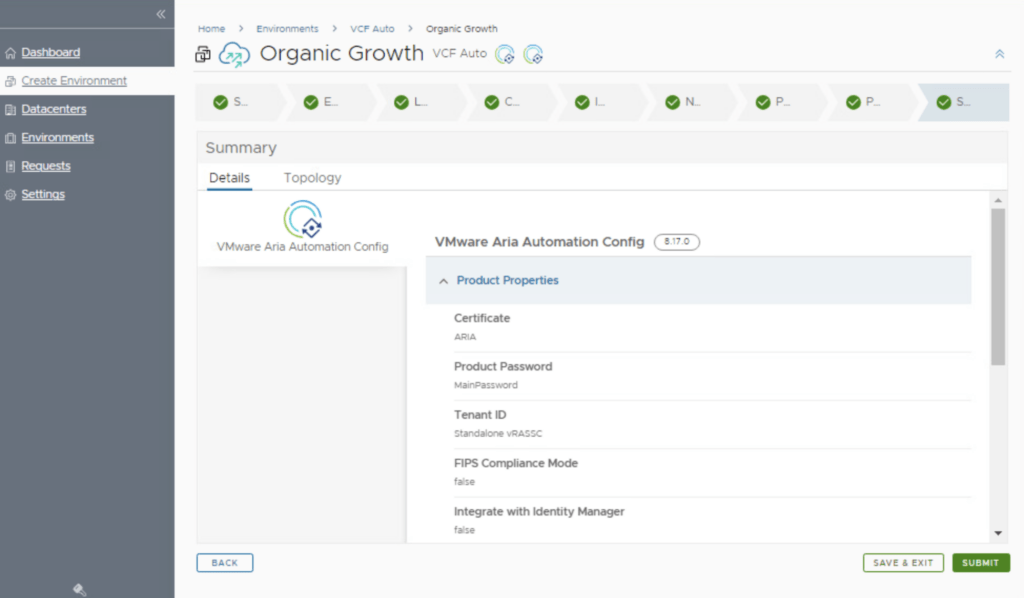
Step 10: Review and Submit the Deployment
- Review your configuration settings (product version, certificate, etc.).
- Click Submit to initiate the deployment.
Lifecycle Manager will now deploy SaltStack Config 8.17. You can monitor progress under the Requests tab.
Post-Deployment: Validation and Next Steps
After deployment, SaltStack Config 8.17 will appear in your Aria Automation environment. To validate:
- Access SaltStack Config: Use the provided FQDN or IP to log in to the SaltStack Config web interface.
- Install Salt Minions: Deploy Salt Minion agents on target systems (Windows, Linux, etc.) to start managing them.
- Test Functionality: Run a simple Salt command (e.g.,
salt '*' test.ping) to verify connectivity.
For advanced configuration, explore the VMware by Broadcom SaltStack Config Documentation or check out my other posts for tips on maintaining your setup.
Benefits of a Standalone SaltStack Config 8.17 Deployment
Deploying SaltStack Config 8.17 standalone offers unique advantages:
- Flexibility: Manage configurations independently of VMware Aria Automation.
- Scalability: Ideal for small to medium environments (up to 1,000 nodes) with room to grow.
- Powerful Automation: Leverage SaltStack’s event-driven automation without additional dependencies.
For larger-scale deployments, consider the multi-node SaltStack architecture instead.
Conclusion
Deploying SaltStack Config 8.17 standalone using VMware Aria Suite Lifecycle Manager is a straightforward way to bring advanced configuration management to your infrastructure. With this guide, you’re ready to set up a robust, independent SaltStack environment powered by VMware by Broadcom.
Related Posts: