
In a VMware Cloud Foundation (VCF) environment, managing logs effectively is crucial for monitoring, troubleshooting, and ensuring compliance. VMware Aria Operations for Logs (formerly vRealize Log Insight) provides centralized log collection, real-time analytics, and intelligent log correlation, making it an essential tool for proactive infrastructure management. This guide walks you through the step-by-step process of deploying VMware Aria Operations for Logs in a VCF 5.2.1 environment.
Prerequisites
- VMware Cloud Foundation (VCF) 5.2.1: Confirm that your VCF environment is operational.
- Aria Lifecycle Manager (ALCM): Aria Lifecycle Manager 8.18 or compatible version installed and accessible.
- Network and DNS Configurations: Proper DNS and network settings to allow seamless communication among VMware components.
- VMware Identity Manager (vIDM): Configured and deployed for unified authentication across VMware products. If needed a guide can be found here.
Step 1: Access Aria Lifecycle Manager
- Log in to the Aria Lifecycle Manager (ALCM) console with admin credentials.
- Ensure compatibility between ALCM and VCF 5.2.1 for a smooth deployment.
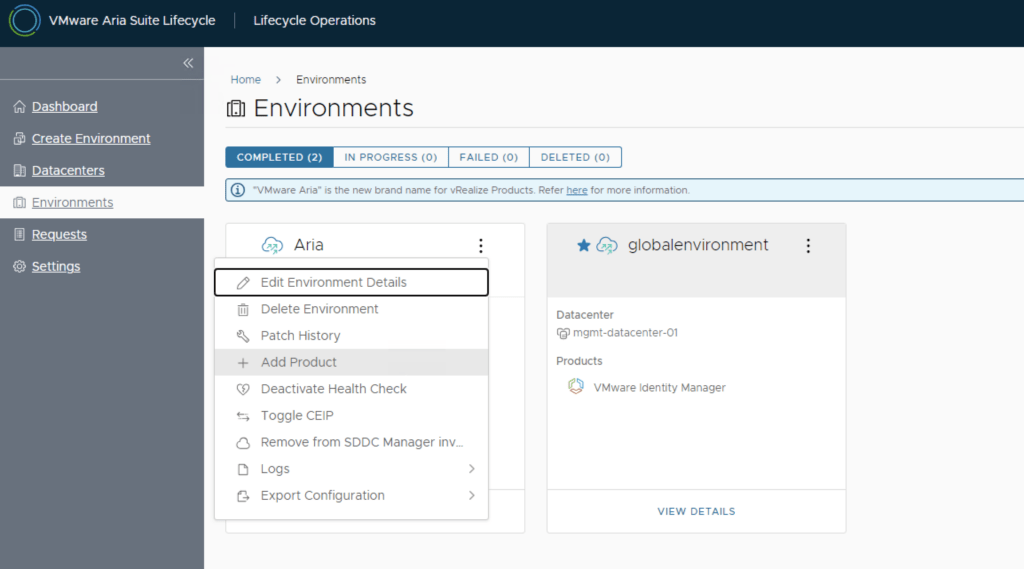
Step 2: Add product in existing environment.
- Navigate to Lifecycle Operations.
- Under the existing environment click on the ellipsis.
- Click Add Product.
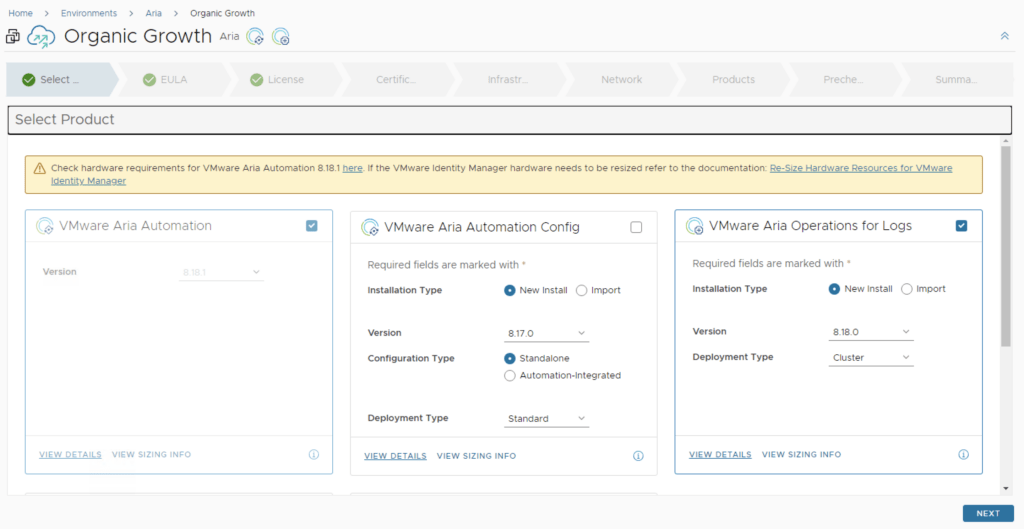
Step 3: Select Product
- From the Select Product tab, select VMware Aria Operations for Logs.
- Pick a support Version for deployment.
- Select a Size for the deployment. The sizing guide van be found here.
- Click Next.
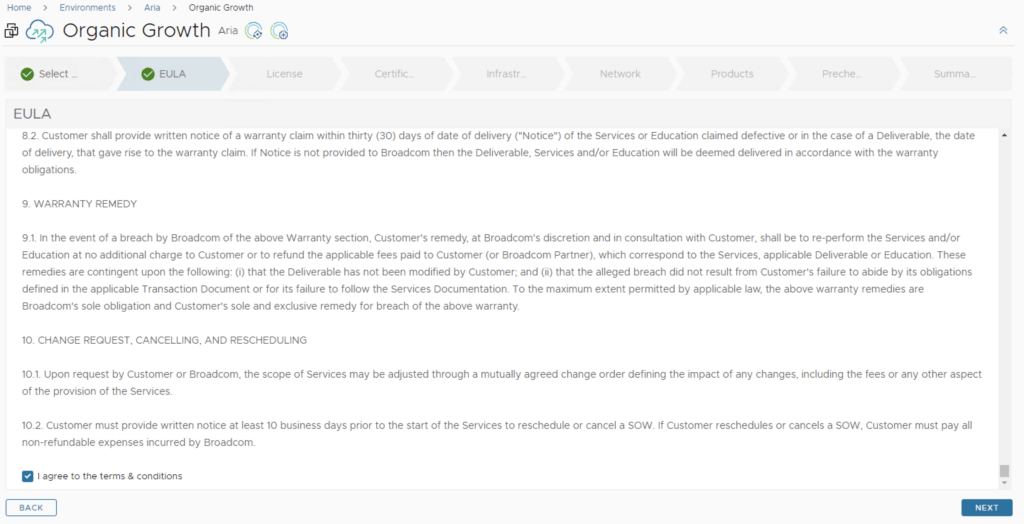
Step 4: EULA
- Review the EULA.
- Agree to the terms of the EULA.
- Click Next.
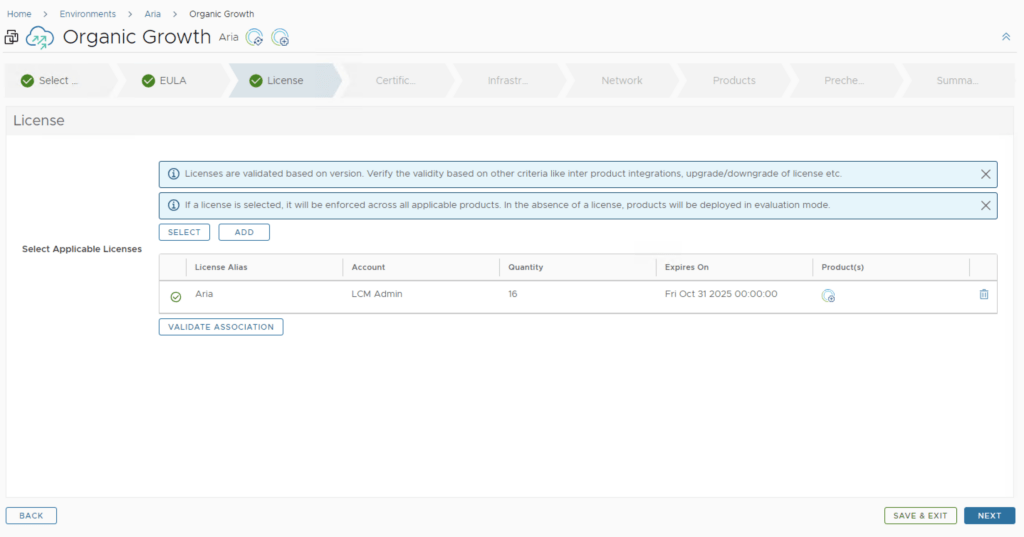
Step 5: Licensing
- In the Licensing tab we are able to Select or Add a new license using Locker.
- Once a license is selected click Validate Associations.
- Click Next to continue.
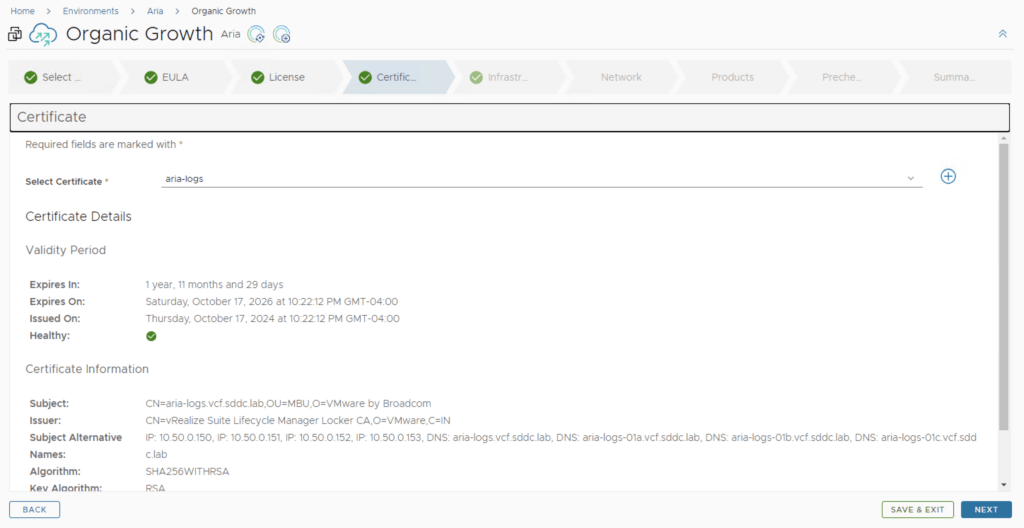
Step 6: Certificates
- In the Certificate tab we are able to select or generate a new certificate.
- Select a certificate.
- Click Next to continue.
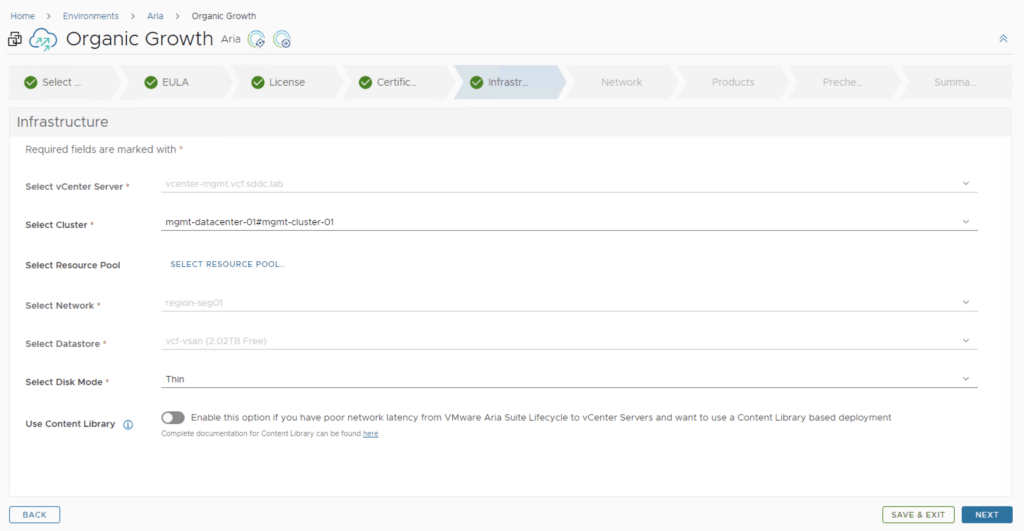
Step 7: Infrastructure
- From the Infrastructure tab, review the information. As we can see most of the fields are pre filled because we are deploying in VCF mode.
- Select a Cluster from the available list.
- Click Next to continue.
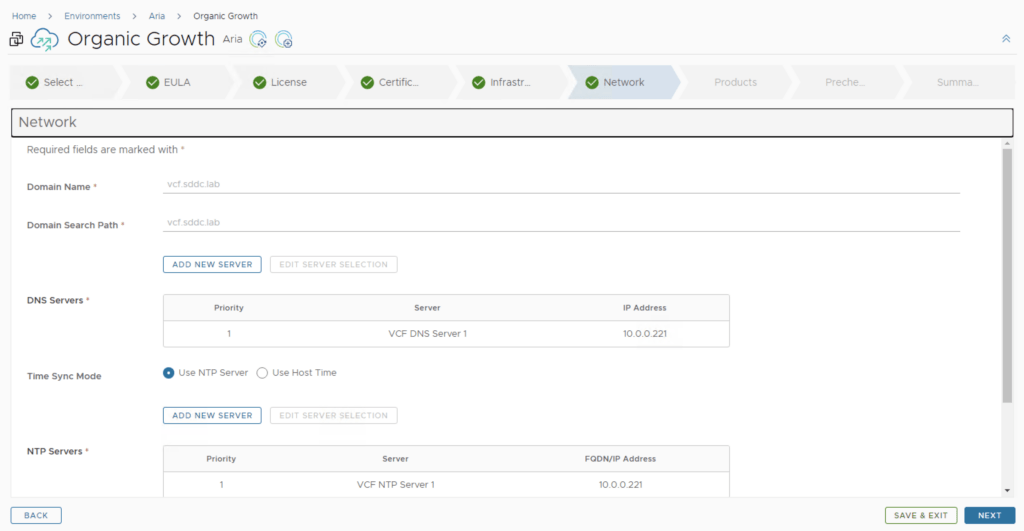
Step 8: Configure Network Settings for Aria Operations for Logs
- Most of the settings for the network should be pre filled because of the VCF mode.
- Review the selection and click Next.
Step 9: Configure product
- Select a Node Size.
- Select FIPS mode. Please note that once enabled it cannot be disabled.
- Select a Certificate for Aria Operations for Logs
- Enter the admin email.
- Select a Password from the Locker. This password will be used to log in post deployment.
- Integrate with Identity Manager for additional SSO integration.
- Enable Monitor with Operations in order to automatically configure the integration.
- Enter an IP Address to server as the Cluster Virtual IP.
- Enter an FQDN to server as the Cluster FQDN.
- Select a Cluster Virtual IP.
- Complete the VM configuration details.
- Click Next.

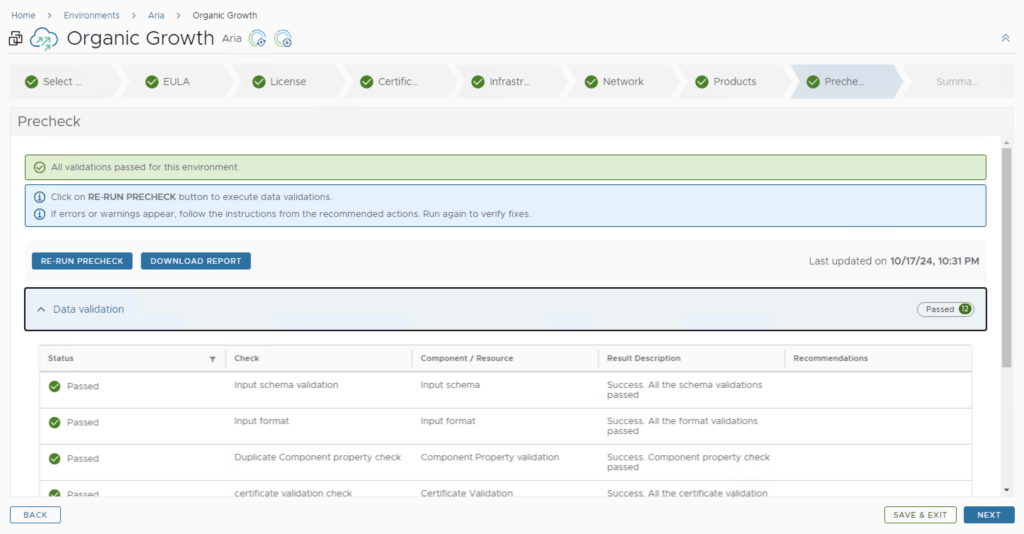
Step 10: Precheck
- Click on Run Precheck to make sure the configurations are correct.
- Review the generated report.
- Click Next.
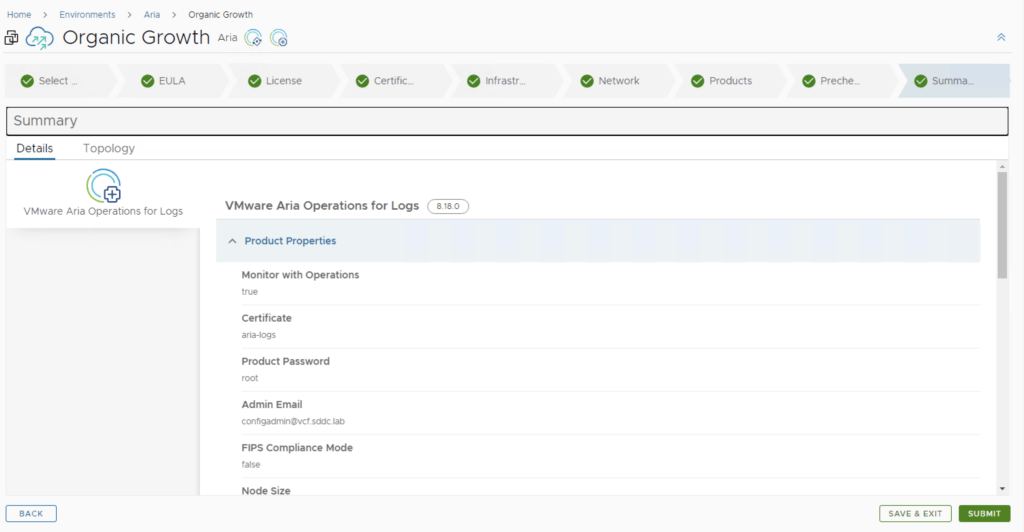
Step 11: Summary
- Review the Summary.
- Click on Topology.
- Review the Topology.
- Click Submit.
Step 12: Post-Deployment Configuration
- Log In: After deployment is complete, log in to the Aria Operations for Logs UI using the management URL.
- Initial Configuration: Set up:
- Log retention policies to ensure optimal storage usage.
- Time synchronization (NTP) settings for accurate log timestamps.
- Agent Deployment: If necessary, deploy agents to additional VMware components like vSAN or vIDM to enable log forwarding from those sources.
Step 13: Set Up Alerts, Dashboards, and Custom Content
- Dashboards:
- Navigate to Dashboards within the Aria Operations for Logs UI and set up predefined content packs for vSphere, NSX-T, and other VMware products. These provide predefined dashboards, queries, and alerts for each integrated product.
- Build custom dashboards based on your specific log analysis needs.
- Alerts:
- Configure alerts for specific log events, such as critical system failures, warnings, or network issues.
- Set up email or SNMP notifications to ensure that administrators are alerted in real time.
Step 10: Fine-Tune and Optimize
- Retention Policies: Go to Administration > Retention to configure log retention policies based on your storage capacity and compliance requirements.
- Monitoring: Use interactive analytics to drill down into logs and identify trends, issues, or anomalies across the environment.
Conclusion
Deploying VMware Aria Operations for Logs in a VCF 5.2.1 environment using Aria Lifecycle Manager provides a robust, centralized log management solution. This integration allows for enhanced visibility, real-time troubleshooting, and improved performance monitoring across your entire VMware infrastructure.