
VMware Cloud Foundation (VCF) 9 brings a suite of powerful automation tools, and for many administrators, deploying the Operations Orchestrator (formerly vRO) as a standalone, external appliance provides greater flexibility and isolation.
In this guide, I will walk you through the process of deploying VCF Operations Orchestrator 9 using the OVA method, followed by the necessary command-line configurations to get your authentication up and running.
Prerequisites
Before you begin, ensure you have the following:
- Broadcom Support Portal Access: You will need entitlements to download VCF software.
- vSphere Environment: Access to a vCenter server with permissions to deploy OVF templates.
- Networking Details: An available static IP, Gateway, Netmask, and DNS settings for the new appliance.
- SSH Client: To perform the final configuration steps.
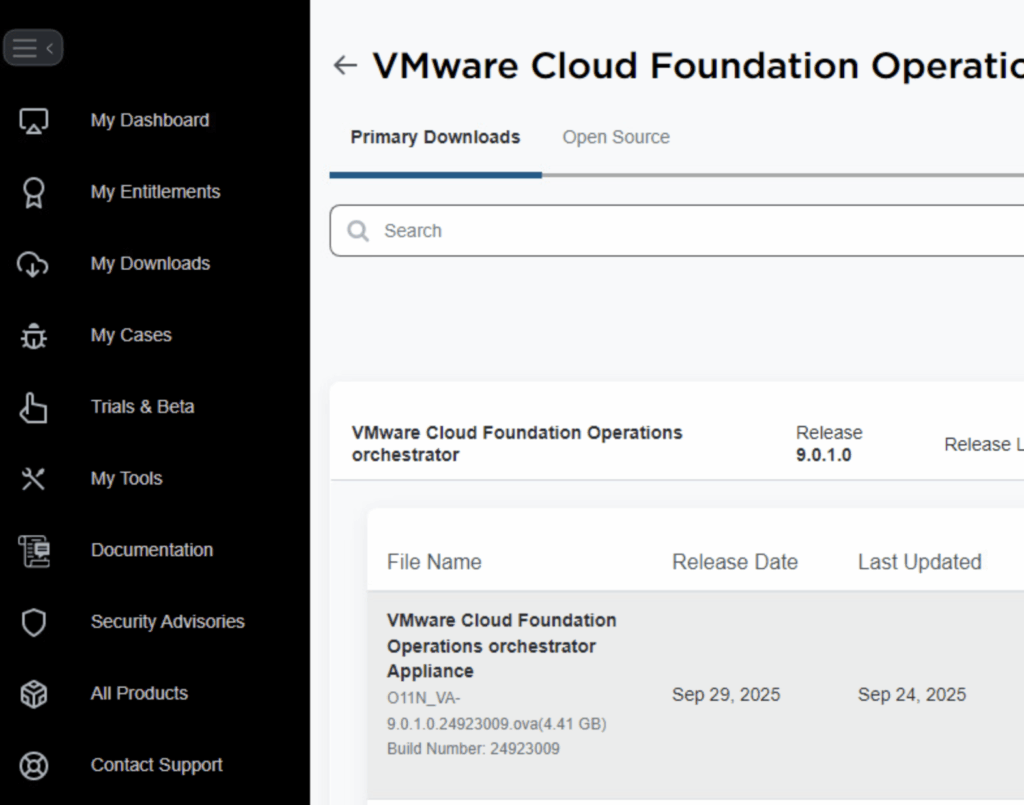
Phase 1: Download the Appliance
First, you need to acquire the installation media.
- Log in to the Broadcom Support Portal.
- Navigate to My Downloads -> VMware Cloud Foundation.
- Select VMware Cloud Foundation Operations Orchestrator.
- Download the Release 9 OVA file to your local machine.
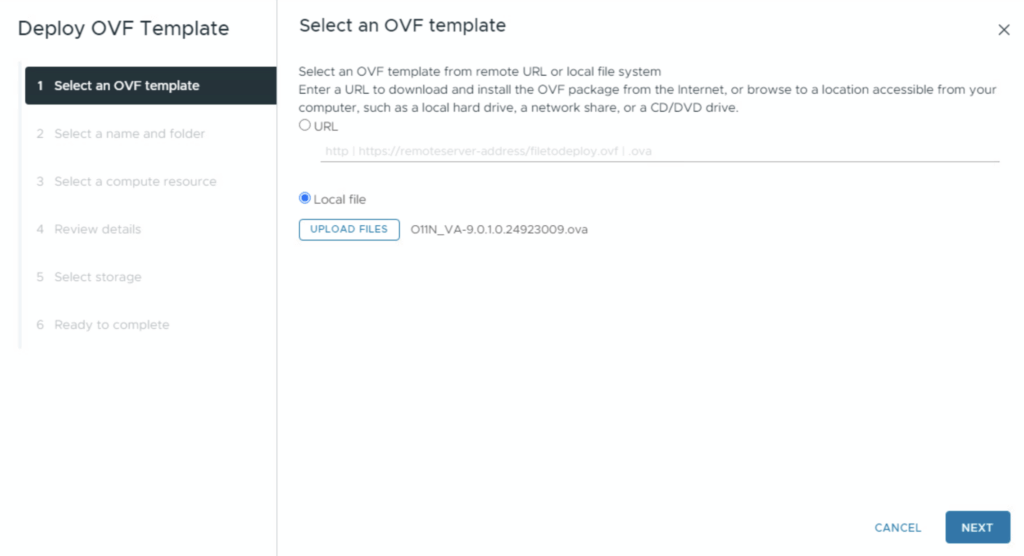
Phase 2: Deploying the OVA
Once the download is complete, head over to your vSphere Client to start the deployment.
Start the Wizard: Right-click your desired cluster or host and select Deploy OVF Template. Upload the OVA file you just downloaded.
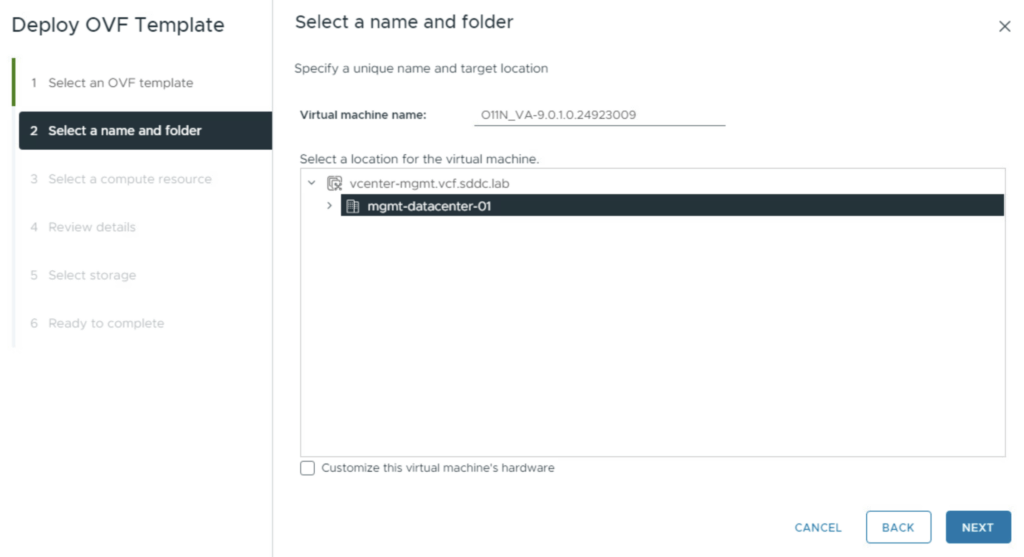
Naming: Choose a descriptive name for the VM (e.g., vcf-orchestrator-01) and select the target folder.
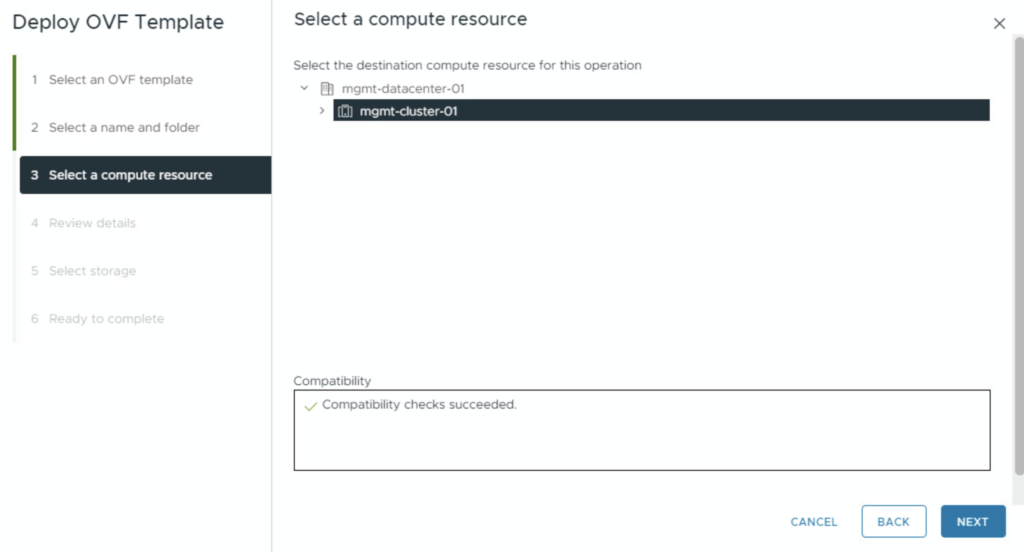
Compute: Select the compute resource (Cluster or specific Host) where the appliance will run.
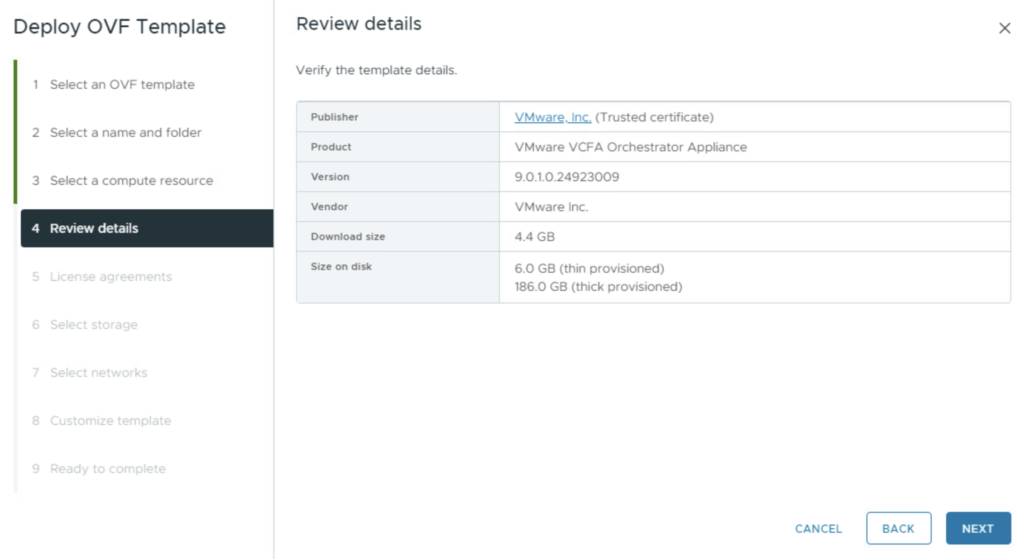
Review Details: Verify the appliance details on the review screen and click Next.
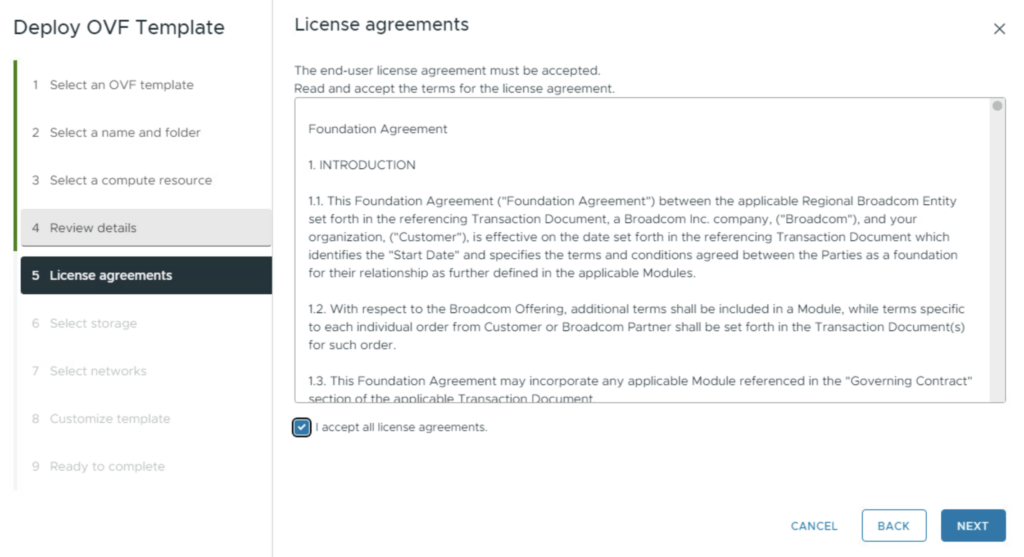
License Agreement: Read through the EULA and check the box to accept it.
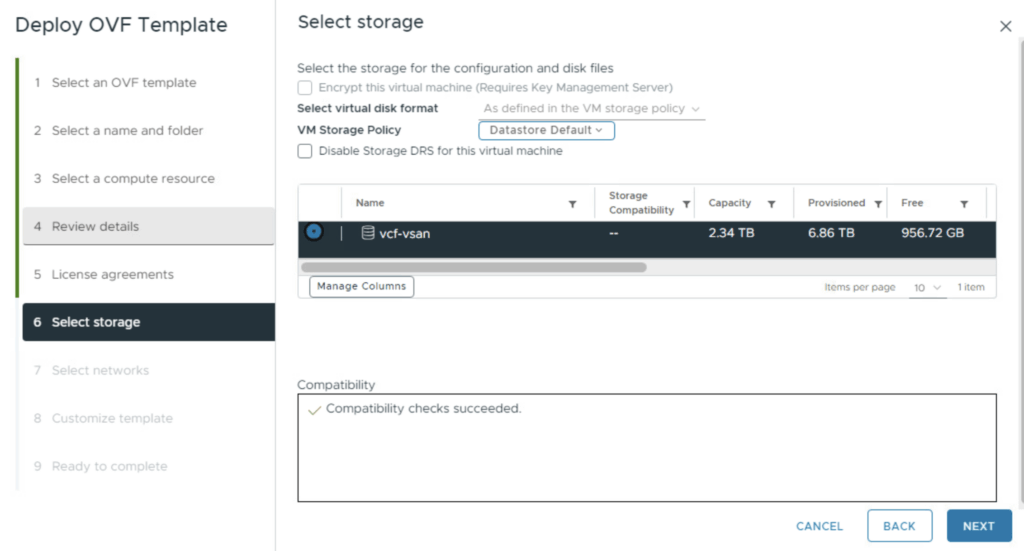
Storage: Choose your target datastore. For production environments, ensure you select a storage policy that offers redundancy.
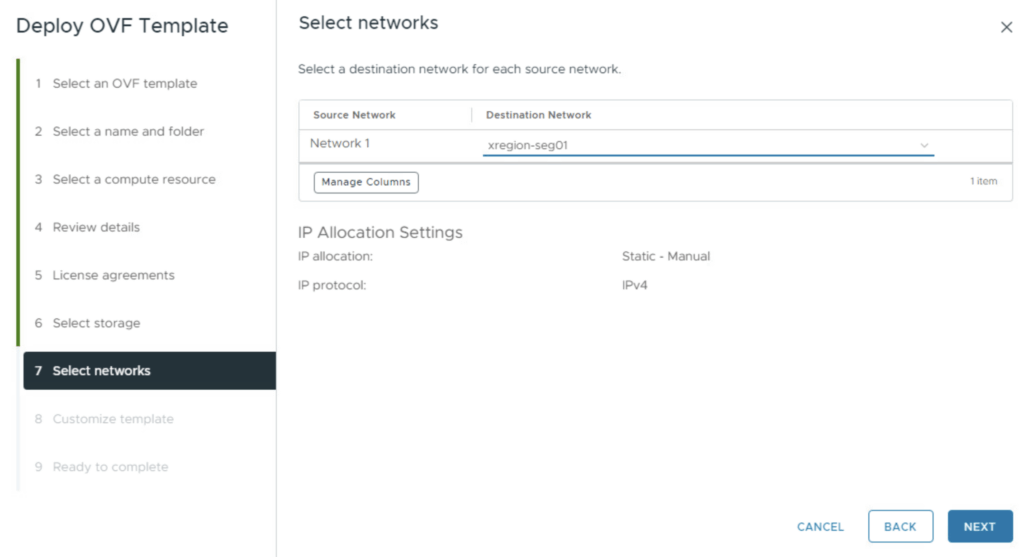
Networking: Connect the VM to the appropriate port group.
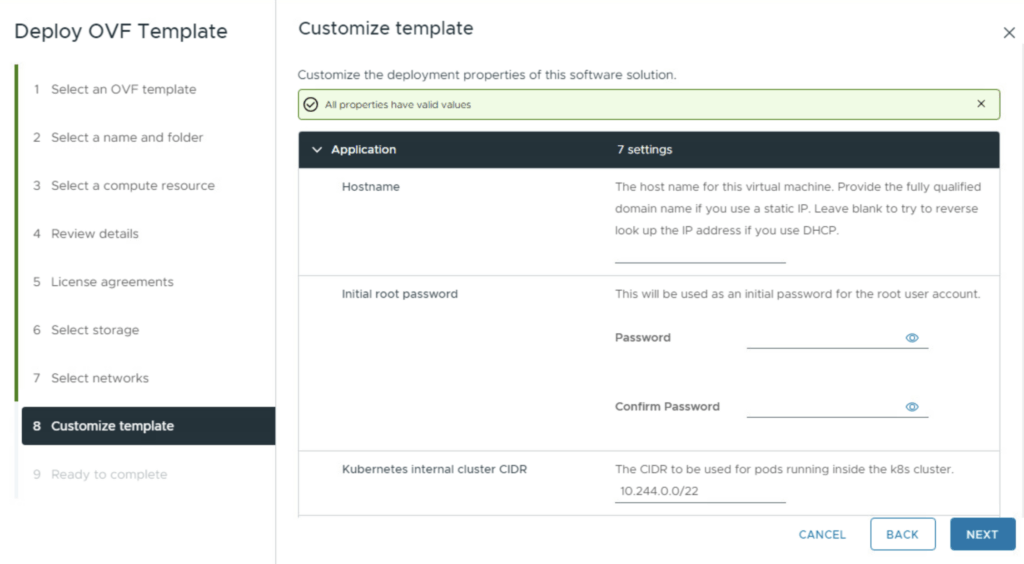
Configuration: You will be prompted to enter the appliance specific details:
Network Properties: Enter the IP address, netmask, gateway, and DNS servers.
Hostname: Enter the FQDN.
Passwords: Set a strong root password.
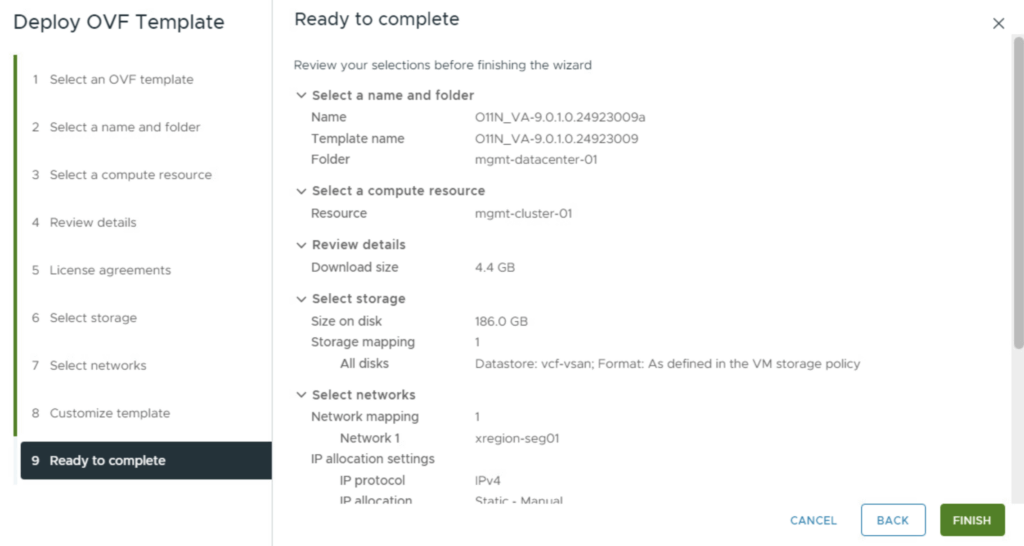
Finish: Review your settings on the final screen and click Finish to begin the deployment.
Phase 3: Initialization
Once the task completes in vCenter:
- Power On: Start the VM.
- Wait: The appliance will now initialize and automatically deploy the necessary internal containers.
- Note: In my environment, this process took approximately 20 minutes for the UI to become available. Be patient!
Phase 4: Configuring Authentication
Unlike previous versions where much of this could be done via a GUI wizard, VCF 9 requires you to configure the authentication provider via the Command Line Interface (CLI).
1. Connect via SSH
Log in to your new appliance using the root credentials you created during deployment
2. Set the Authentication Provider
Choose one of the following methods depending on your infrastructure.
Option A: vSphere Authentication (Most Common) Use this if you want to authenticate against your existing vCenter SSO domain.
vracli vro authentication set -p vsphere --hostname https://vcenter_url --username [email protected] --tenant vsphere.local --admin-group Administrators --admin-group-domain vsphere.localAccept the certificate and enter the password
Option B: VCF Automation (All Apps Org)
vracli vro authentication set -p tm -u SERVICE_PROVIDER_ACCOUNT -hn https://FQDN_VCF_AUTOMATION --tenant ALL_APPS_ORG_NAMEOption C: VCF Automation (VM App Org)
vracli vro authentication set -p tm -u SERVICE_PROVIDER_ACCOUNT -hn https://FQDN_VCF_AUTOMATION --tenant VM_APPS_ORG_NAMEOption D: VCF SSO (Identity Broker)
vracli vro authentication set -p vidb --hostname https://FQDN_IDENTITY_BROKER/acs/t/CUSTOMER --client-id 'CLIENT_ID_OF_ABOVE_OIDC_CLIENT' --client-secret 'CLIENT_SECRET_OF_ABOVE_OIDC_CLIENT' --admin-group O11N_ADMIN_GROUP@DOMAIN3. Verify Settings
Before applying changes, it is good practice to review the staged configuration:
vracli vro authentication4. Apply Changes
Finally, run the deployment script to apply the authentication settings. This will restart the necessary services.
/opt/scripts/deploy.shOnce the script finishes and services restart, you will be able to log in to the VCF Operations Orchestrator UI using the authentication method you just configured.