This walkthrough records a VCF Operations 9.0.1 upgrade with a .pak file and the checks I use to verify the cluster afterward.
If you are still on an older release, I covered the initial jump in Upgrading Aria Operations to 9.0 Using a .PAK File.
Before You Begin
Prerequisites
Before starting the upgrade, ensure the following prerequisites are met:
Backup the Existing Deployment:
Take a snapshot of all nodes in the Aria Operations (Master, Cloud proxies, and any other nodes).
Confirm backups.
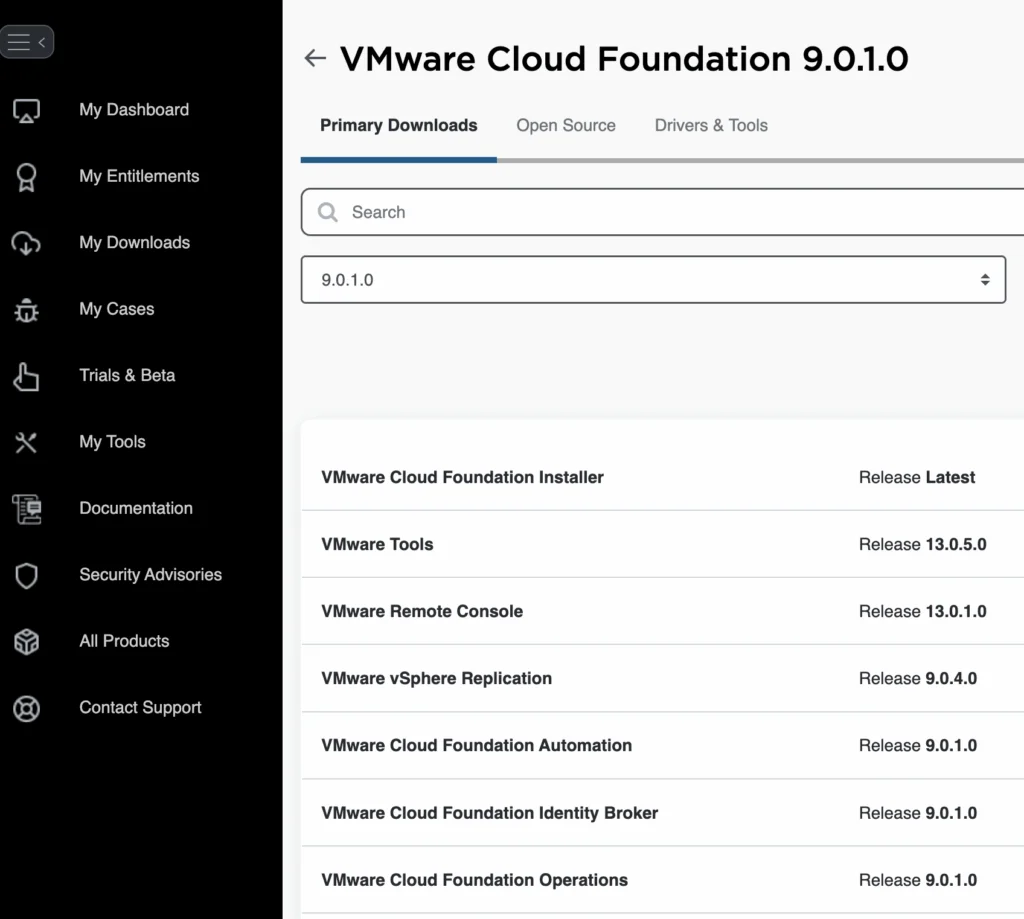
Download the .PAK File:
Log in to the Broadcom Support Portal.
Navigate to the My Downloads section.
Search for VMware Cloud Foundation under VMware Aria Suite and download the appropriate
.pakfile for your version. Use the Broadcom Support Portal; the file used in this example isOperations-Upgrade-9.0.1.0.24960352.pak.

Verify Compatibility:
- Confirm that the .pak file is compatible with your current version by reviewing the compatibility matrix. Compatibility matrix can be found here.
Administrative Access:
- Ensure you have access to the VCF Operations admin interface with appropriate permissions.
Logging In and Initiating the Upgrade
Step 1: Log in to the VCF Operations Admin UI
Open a browser and navigate to the Aria Operations admin interface.
- Example:
https://<your-operations-host>/admin.
- Example:
Log in with an account that has administrative privileges.
Step 2: Initiate the Upgrade
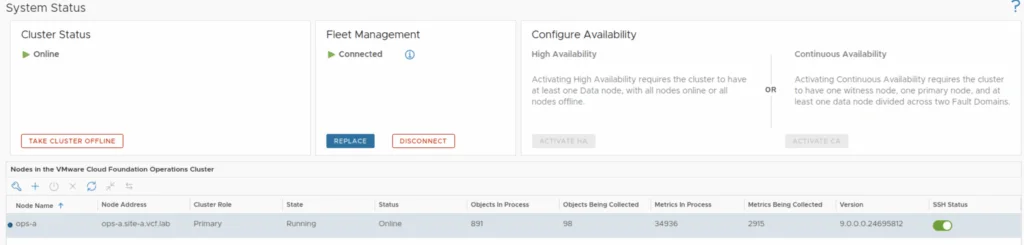
Node status:
Once logged in, go to System Status.
Review the current status of all nodes. Ensure they are healthy and online.
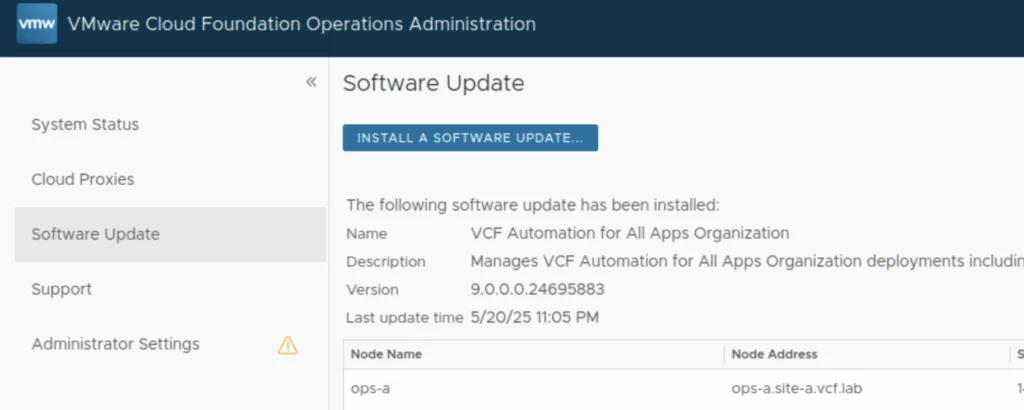
Select the Software Update Option:
- In the Software Update section, click the Install a Software Update button.
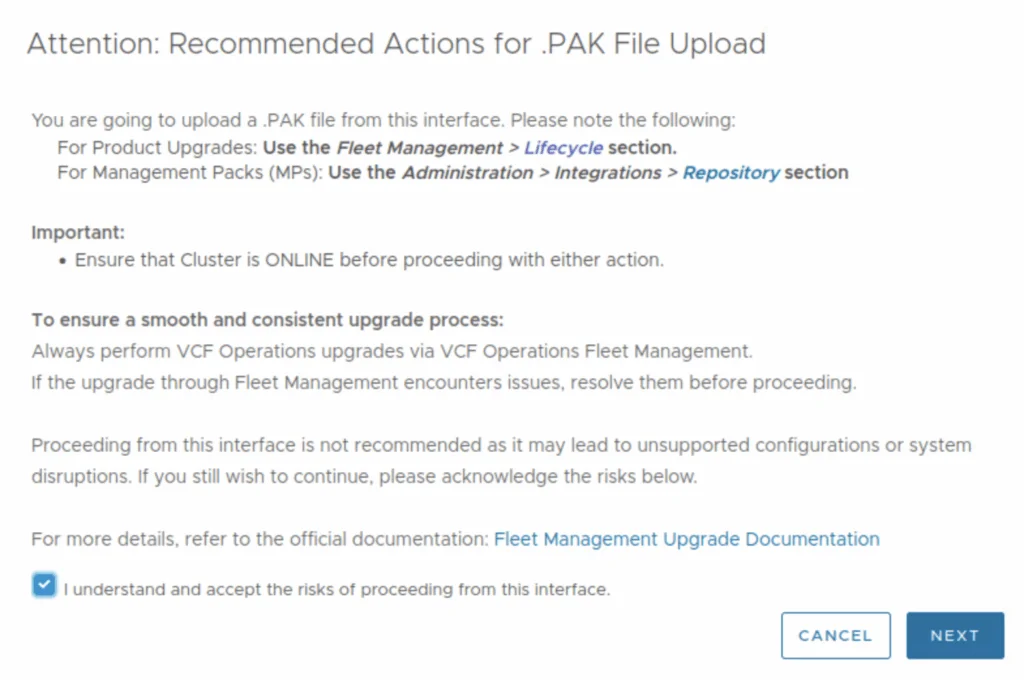
Step 3: Accept the warning and click Next.
Uploading the .PAK File
Step 4: Upload the .PAK File
Choose the .PAK File:
- Click Browse and locate the downloaded .pak file on your local system.
Upgrade using the File:
- Select the .pak file and click Upload.
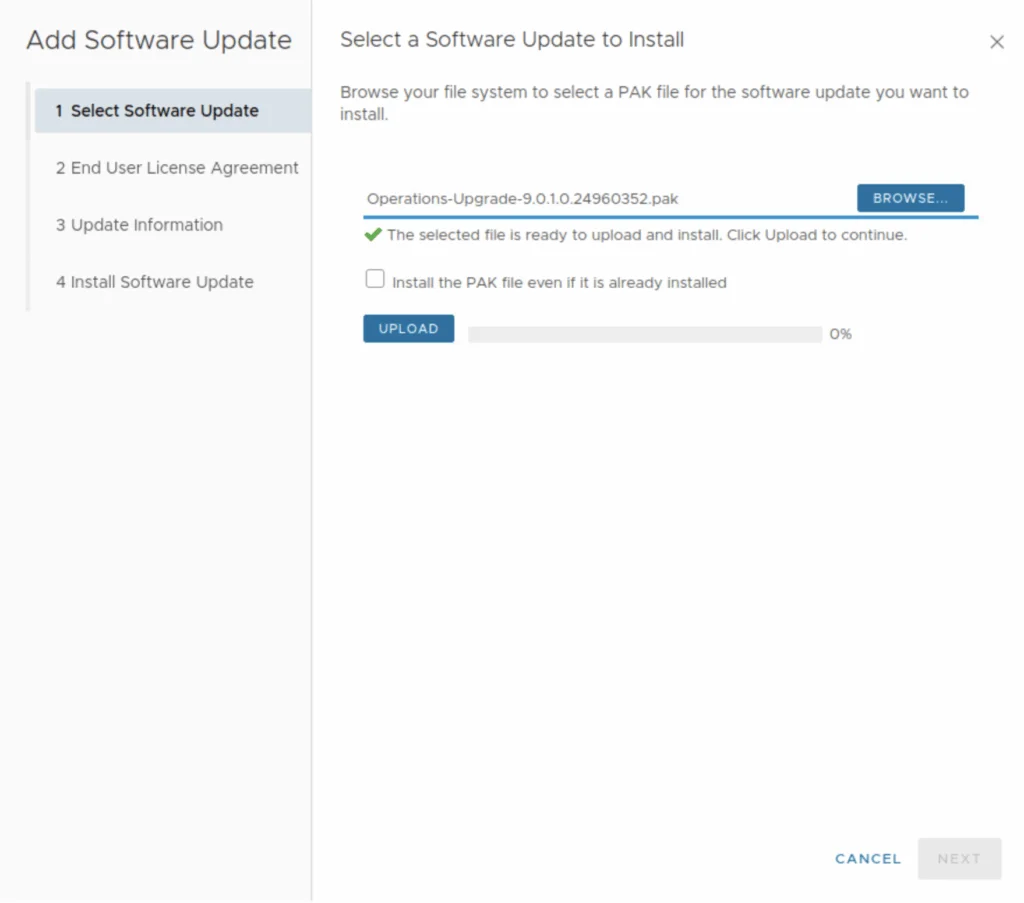
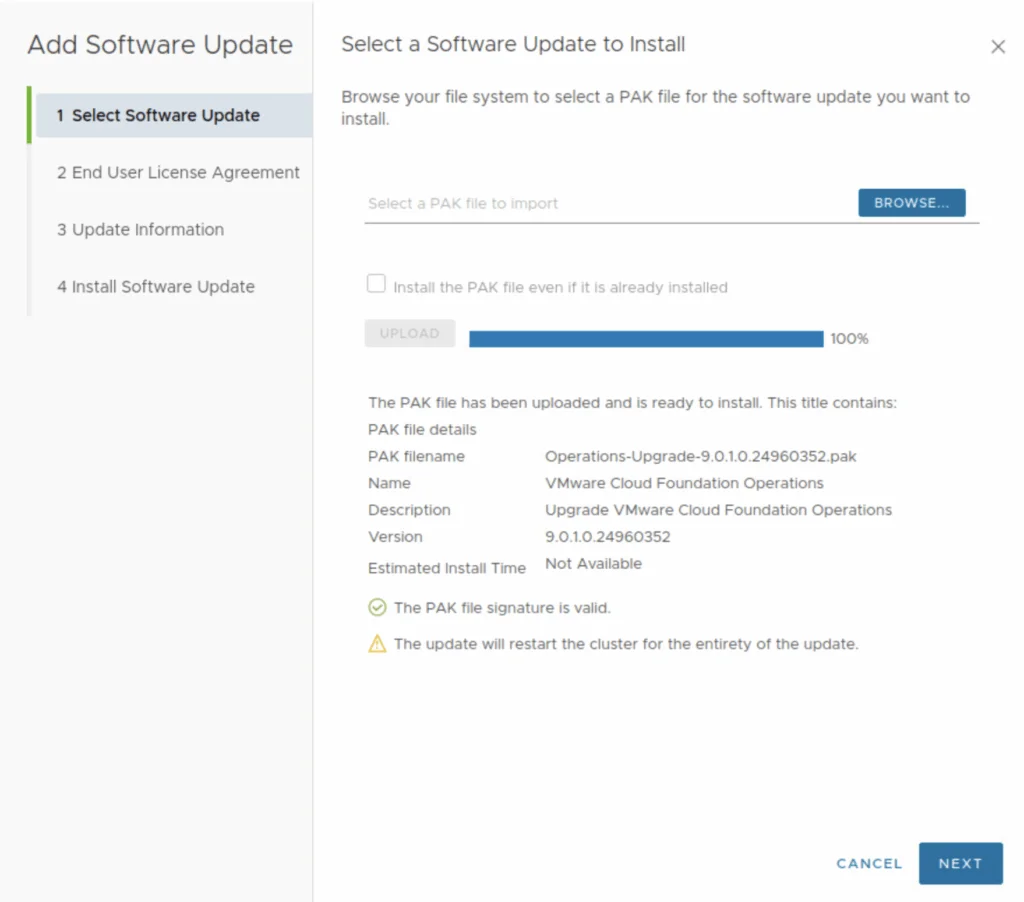
- The system will upload and validate the .pak file for compatibility.
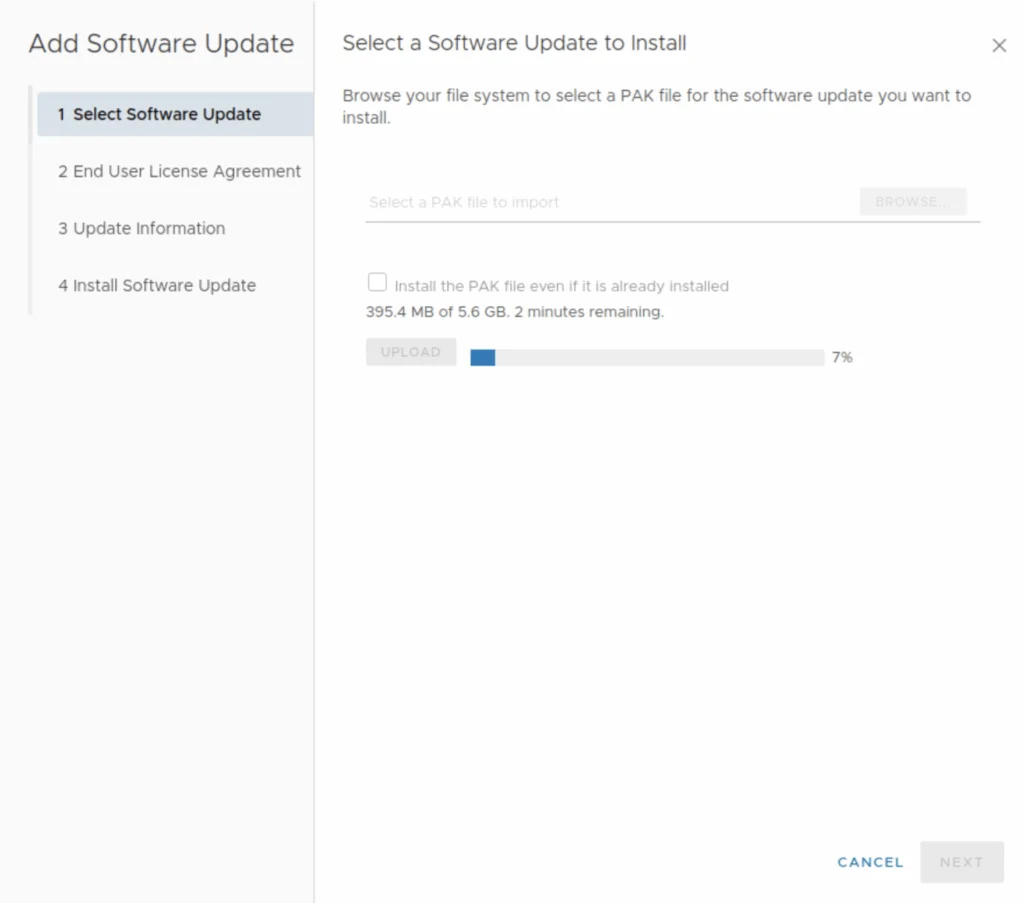
Accept the EULA:
- Once upload and staging completes, click Next
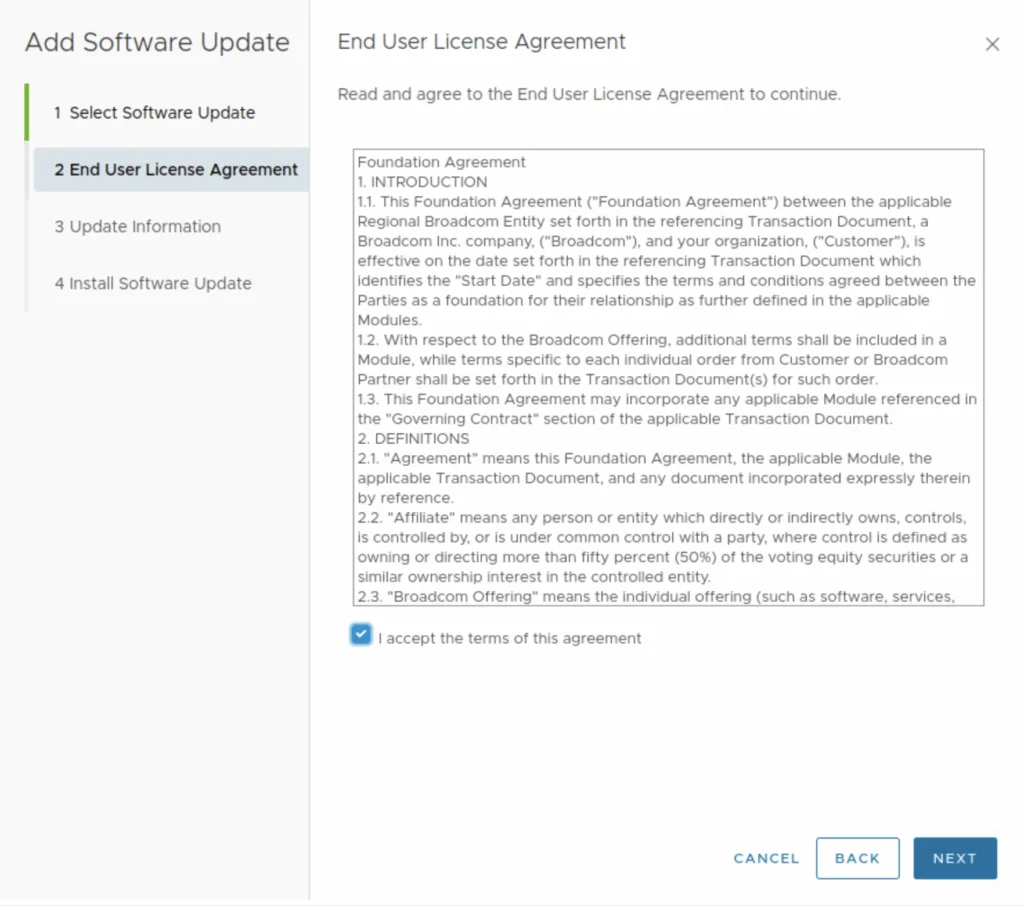
- Review and accept the End User License Agreement (EULA). Click next.
Review the Upgrade information and Release notes. Click Next
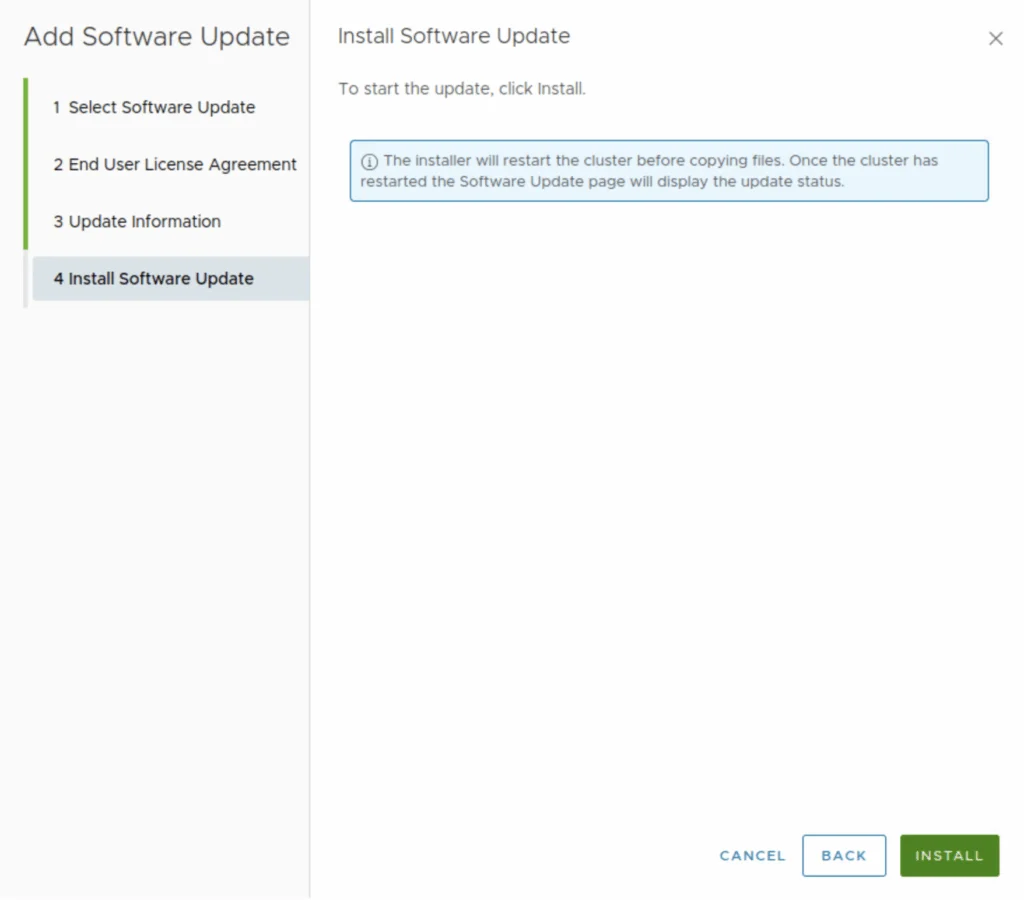
Click Install.
Monitoring the Upgrade
Step 5: Monitor the Upgrade Process
Upgrade Progress:
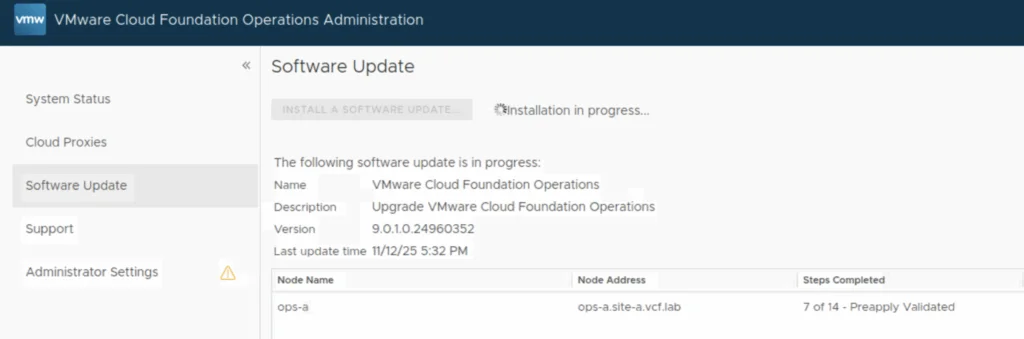
The system will upgrade the Master node first, followed by the rest of the nodes.
Monitor the progress in the Software update window.
Cluster Restart:
- As the nodes get upgraded, the system will automatically restart the cluster.
Verifying Cluster Health and Version
Step 6: Verify the Upgrade
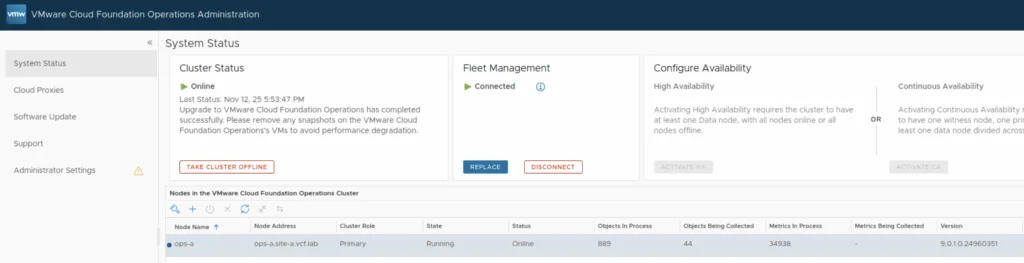
Check Cluster Health and Version:
- Navigate to System Status to ensure all nodes are online and healthy.
Verify Metrics and Dashboards:
- Validate that metrics are being ingested and dashboards function as expected.
Post-Upgrade Cleanup
Step 7: Post-Upgrade Tasks
Reapply Customizations:
- If you had custom configurations or integrations, verify and reapply them as necessary.
Remove Snapshots:
- After confirming the upgrade is successful and stable, remove the snapshots.
Review Release Notes:
- Check the release notes for the upgraded version to explore new features or deprecations.
Troubleshooting
Common Issues and Troubleshooting
Upgrade Fails During Validation:
- Ensure the .pak file matches your current version and meets prerequisites.
Cluster Nodes Do Not Restart Automatically:
- Manually reboot nodes from the vSphere client or CLI.
Verification
After the .pak workflow completes, verify that every node is healthy and that the installed build is the intended target. If validation or a reboot fails, use the matching Broadcom procedure or support channel before retrying.
If you encounter issues, consult Broadcom’s official documentation or reach out to Broadcom support for assistance.