
In this post I will go over upgrading my 8.x vRA appliance to 8.7. As a pre requirement we do need to have vRSLCM (vRealize Lifecycle Manager) upgraded to 8.7. Instructions can be found here. The upgrade already includes the latest Product Support Pack so an update to the Product Support Pack is not required.
Adding the vRA 8.7 Upgrade Binaries
To get started we can go to vRealize Lifecycle Manager -> Lifecycle Operations -> Settings -> Binary Mapping. (If you haven’t added your My VMware credentials you will need to do that first by going to vRealize Lifecycle Manager -> Lifecycle Operations -> Settings -> My VMware)

Click on Add Binaries under Product Binaries

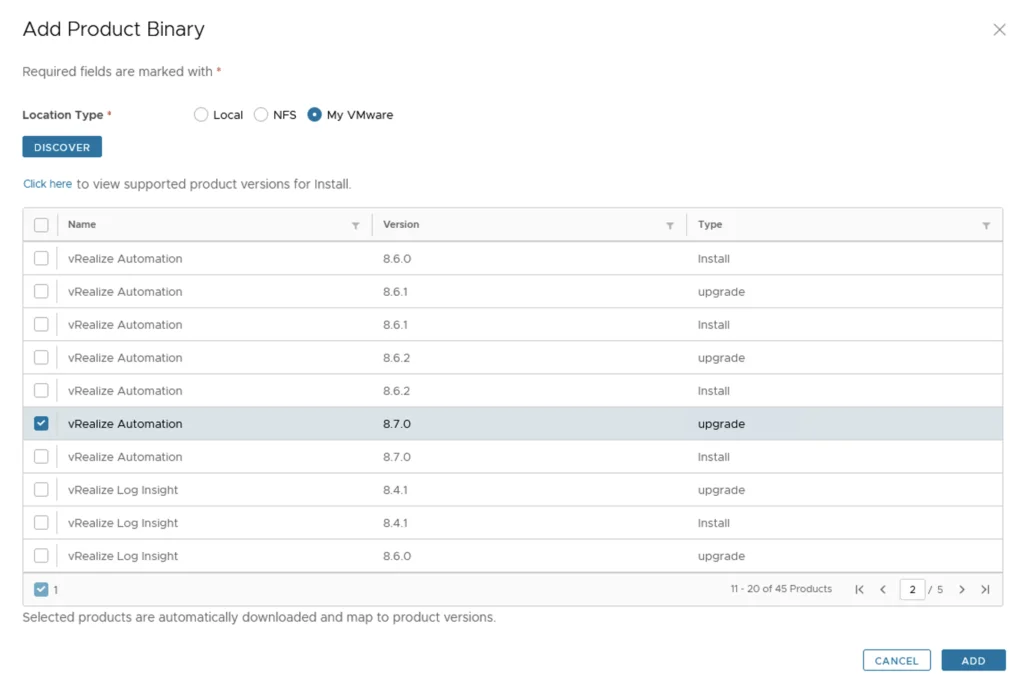
Select My VMware and click on Discover

We can see a list of binaries that have been discovered. We can select what we need and click on Add
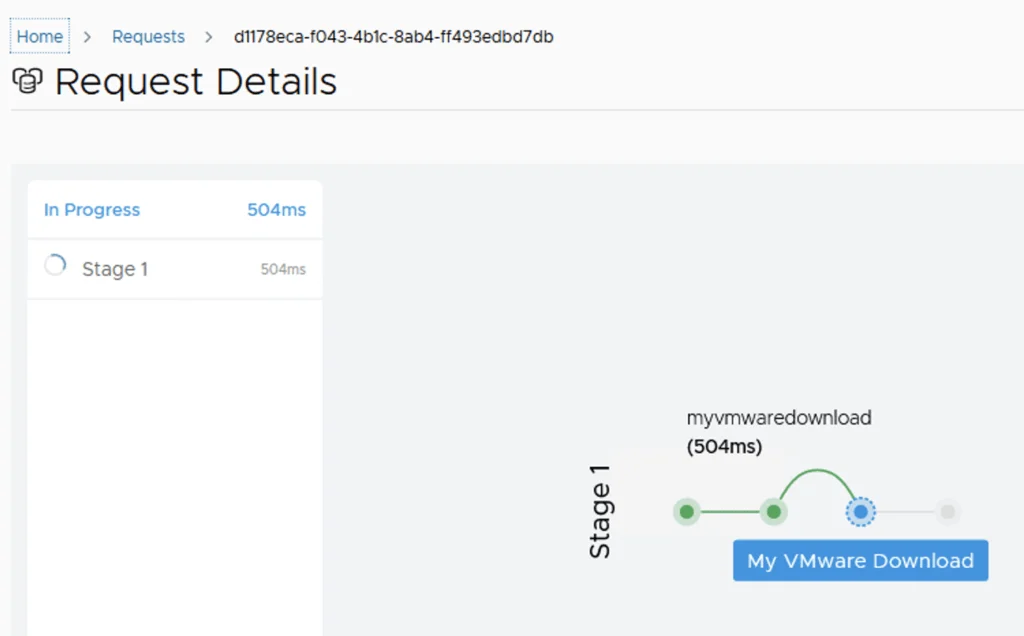
This will create a request and start downloading the package. To view the progress we can click on the Click Here hyperlink

Click on the in Progress button to view the details

We now have to wait for the download to complete
Starting the Upgrade from the Environment
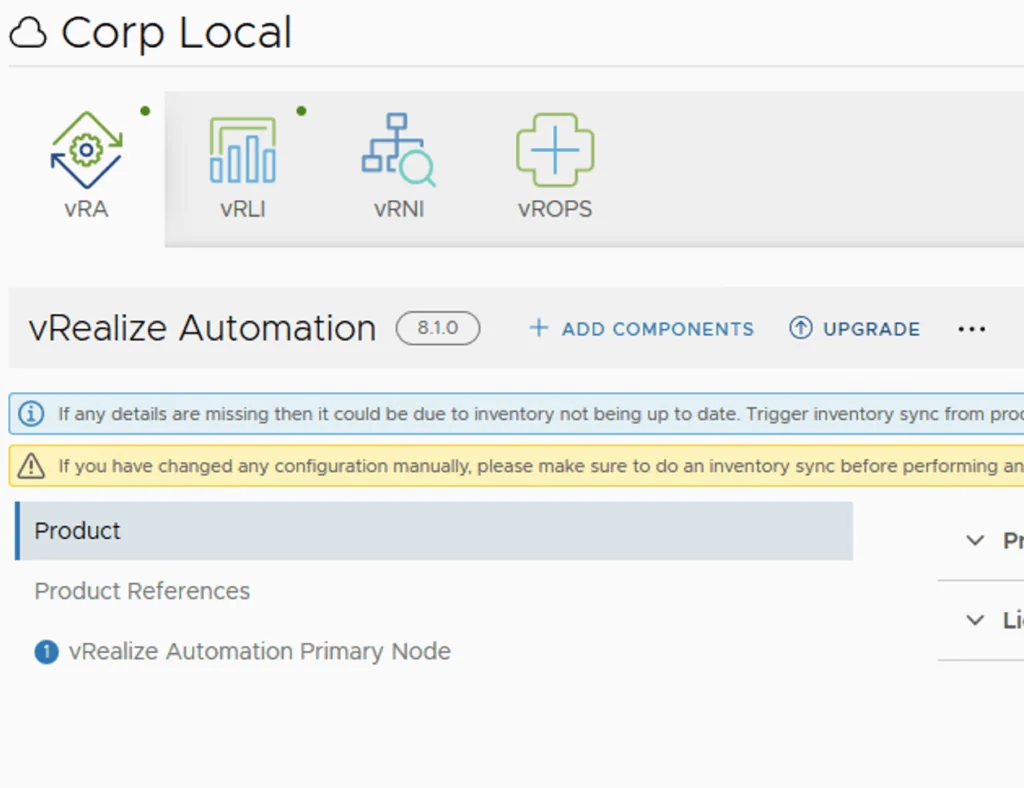
After the download is complete we can go to Environments -> View Details on the environment that includes vRA

Click on Upgrade
Inventory Sync, Version, and Snapshot Options
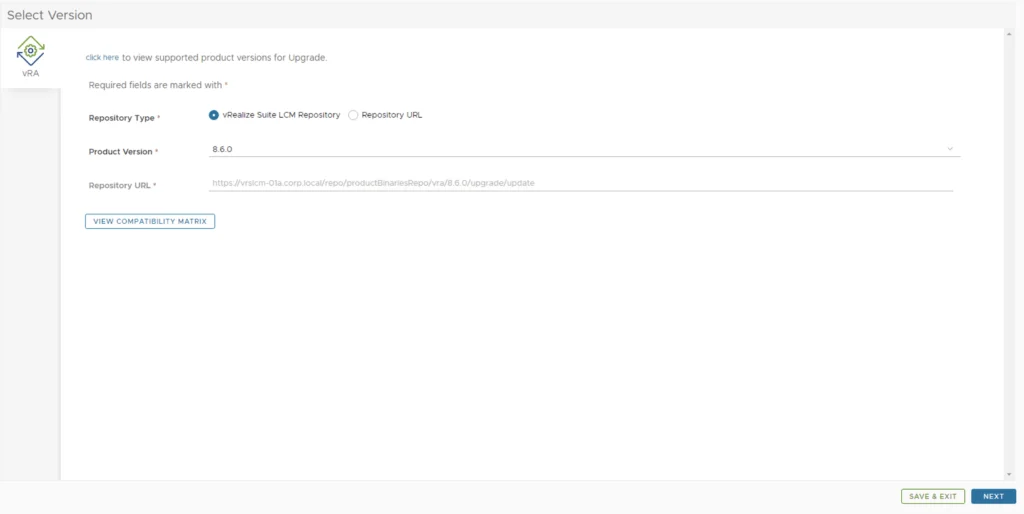
An Inventory sync is recommended if the environment has changed since LCM performed the last sync. We trigger the sync from the UI or click on Proceed to continue

Select product Version 8.7.0 and click Next. We can also review the compatibility matrix to make sure the environment is compatible.
Anew feature that was added was the capability to automatically create a snapshot prior to the upgrade and remove it after the upgrade. On this screen we also have the ability to chose if we want to keep the snapshots post upgrade for validation testing for example. Click next

Running the Precheck
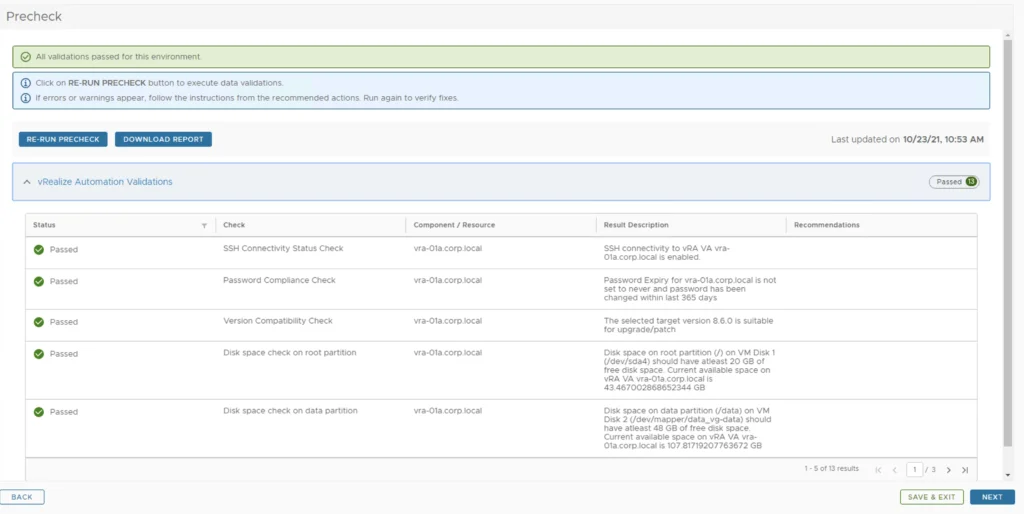
Run the Precheck to make sure there are no errors

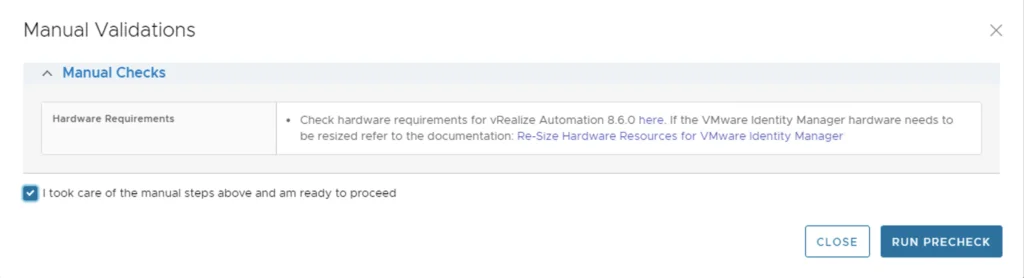
The next screen remind us of hardware requirements for vRA and vIDM which can be checked here for vRA and vIDM which can be checked here. As far as I can tell they haven’t changed since the 8.3 release. Check the I took care of the manual steps above and am ready to proceed check mark and click on Run Precheck
Once the check is complete we can review the checks that were performed and we can continue by clicking Next.
Submitting and Monitoring the Upgrade
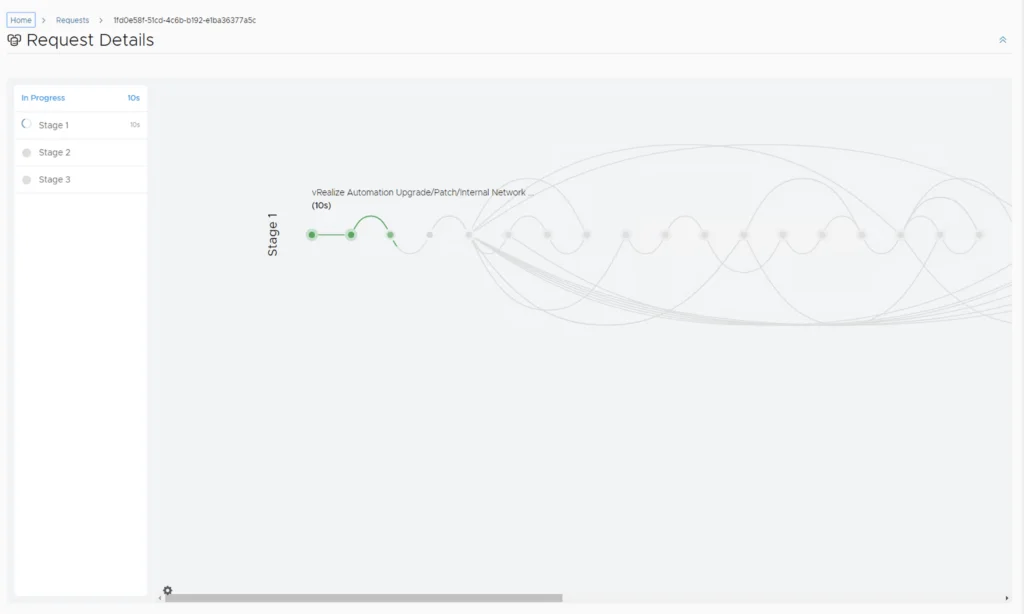
Review the upgrade details and click on Next. We are taken to the progress screen where we can follow the progress.
The system will get rebooted and once its back up we will be on 8.7
Since we are doing a major upgrade I strongly recommend to clean the cache before using the new vRA version.