With the release of VCF 4.0.1 i wanted to go through the patch in my lab.
The release notes can be found here: https://docs.vmware.com/en/VMware-Cloud-Foundation/4.0.1/rn/VMware-Cloud-Foundation-401-Release-Notes.html
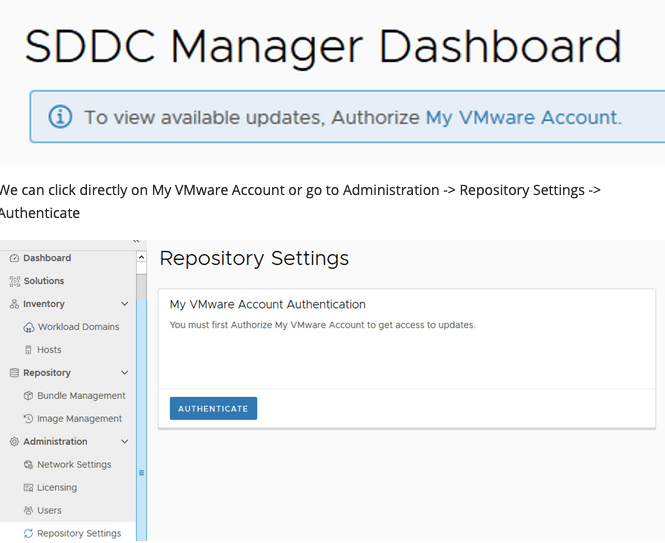
When i logged on to my SDDC Manager i noticed that there weren’t any updates available and i was prompted with an information bar To view available updates, Authorize My VMware Account.

We can click directly on My VMware Account or go to Administration -> Repository Settings -> Authenticate
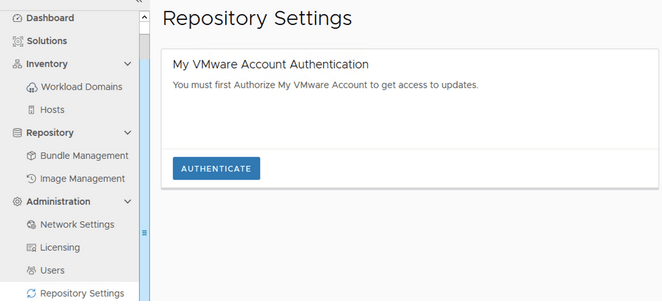
Once you enter the credentials the system will take a couple of minutes to perform a check with the permissions that are assigned to the user and download the metadata for the updates. If no updates show up verify that the specific user has the entitlement do download the updates.
After waiting a couple of minutes the bundle becomes available and can be downloaded by going to Repository -> Bundle Management -> Download now

In my case i was on the 4.0.0 release and path forward was to go to 4.0.0.1 first.
Once the download is complete we can go to Inventory -> Workload Domains, Select the Management domain and go to the Update/Patches Tab
Run a pre check to make sure the system is ready

Check the precheck details and make sure that if there are failures they can either be fixed or they are safe to ignore in order to continue with the upgrade. In my case i have a few failures because im running on hardware that is not on the HCL list

Once the issues are resolved we can go back to the previous screen and click on update now or schedule the update on an off hours time when more convenient

Once the upgrade starts you will be redirected to an upgrade page that will go through upgrading the SDDC Manager and its related services
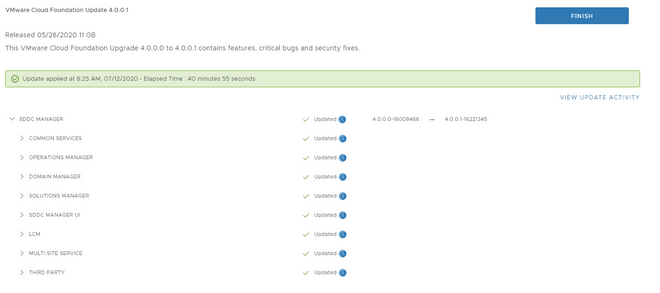
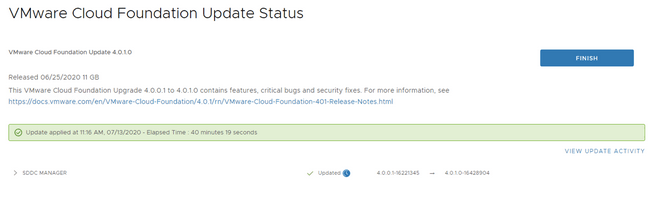
After the upgrade is complete and we click finish we are redirected the main dashboard. The next step is to upgrade the rest of the components. For that we will go back to Inventory -> Workload Domains, Select the Management domain and go to the Update/Patches Tab. We will notice that a new package is available thats applicable for the vCenter Server. Click on download and once the download is complete we can click on update now

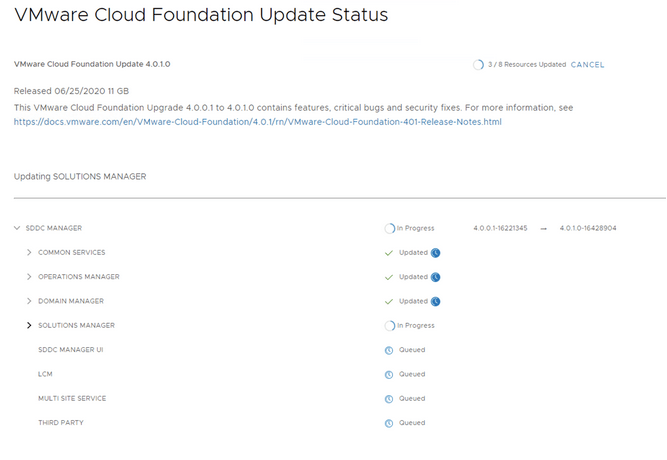
Once the update starts we will be presented with the following screen to track the update status
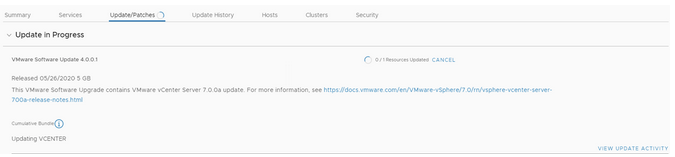
As well as the details about the upgrade:
To be continued…after the vCenter upgrade is complete we can proceed with SDDC Manager to 4.0.1. Click on Update now

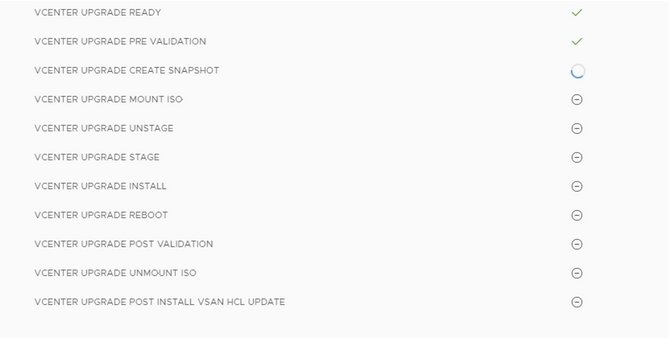
Once the update starts we are redirected to the Update status page and we can follow each one of the steps in the update status page
Once the update is complete, verify that all steps have been successful and click finish to be returned to the main dashboard.
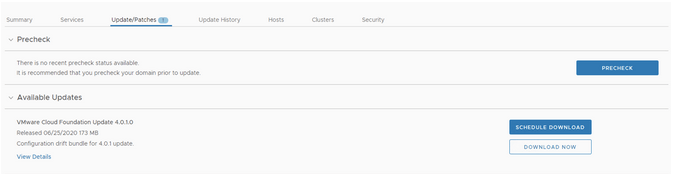
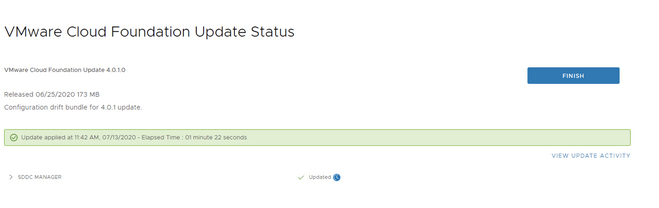
The last step for the management domain is to apply the configuration drift bundle. Go to Inventory -> Workload Domains -> Select the management domain -> Update/Patches. Under the Available updates there should be a Configuration drift bundle for 4.0.1 update. Click on Download now
Once the download is complete and verified we can click on Update Now. In my case the system redirected me to the Update status page and completed the upgrade. The next step was to click finish and move on the next step.
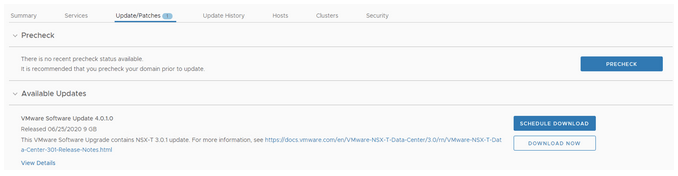
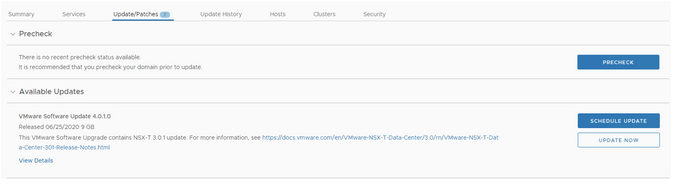
Going to Inventory -> Workload Domains -> Management Domain -> Update/Patches reveals that an upgrade for NSX-T 3.0.1 is available. Click on download now.
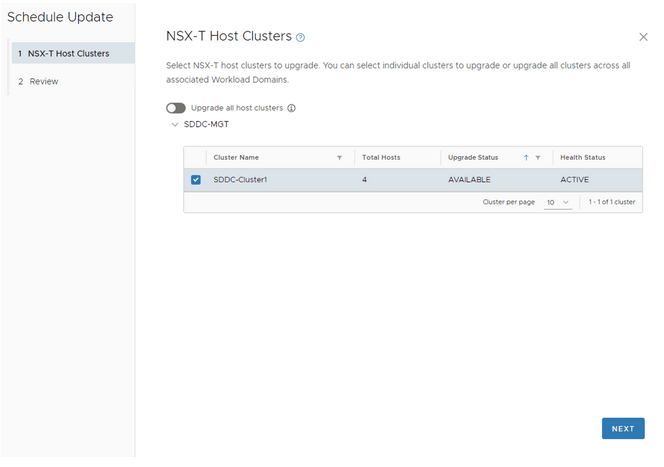
Once complete click on Update now. We will get presented with a selection of clusters that can be upgraded. Click next and Finish.
Once the upgrade has started we can follow the progress by expanding the tabs
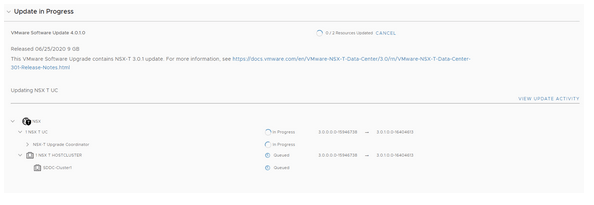
After the upgrade coordinator is complete we can do the same for the NSX Manager. Click on Update now
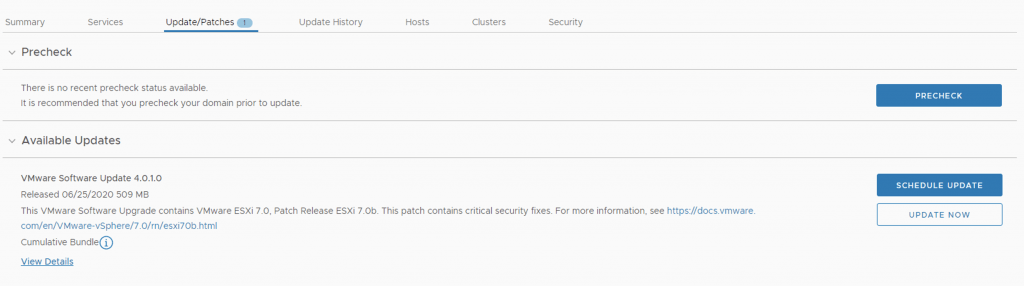
Next next step is to upgrade the vCenter server to 7.0.0b. We can go to Inventory -> Workload Domains -> Select the workload domains -> Update/Patches Under available updates there should be a VMware Software update 4.0.1.0. Click on Download Now followed by Update Now
Once the vCenter upgrade is complete we can proceed with the ESXi server upgrades. We can proceed to Inventory -> Workload Domains -> select the management domain -> Update/Patches. Under available updates we can see the ESXi patch. Click on Download now followed by Update now.
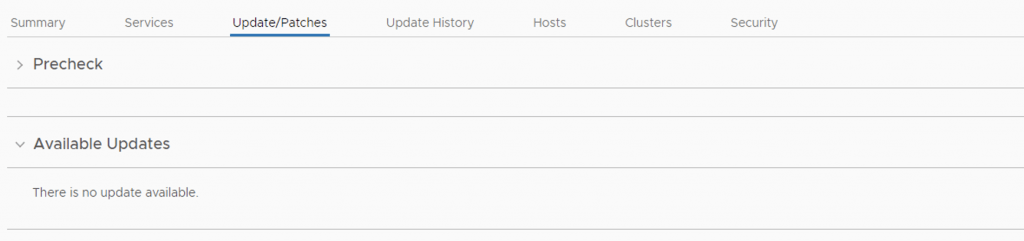
Once the ESXi servers are patched the upgrade of the management domain should be complete. We can verify this by going to Inventory -> Workload Domains -> Management domain -> Update/Patches and verify there are no updates available under the available updates section
The next step is to continue with virtual infrastructure domain. We can follow the same steps as above to upgrade the rest of the infrastructure like vCenter and ESXi servers