Customizing Windows guest instances in VMware environments has traditionally been handled by the VMware Guest Customization Specification (Sysprep-based). While this approach works, it has limitations — especially when you need cloud-agnostic blueprints that work across vCenter, Azure, AWS, and GCP cloud accounts.
Enter Cloudbase-Init — the Windows equivalent of Cloud-Init. It provides powerful guest customization capabilities including user creation, password injection, hostname configuration, SSH public keys, and user-data script execution. This guide walks through the full process of installing and configuring Cloudbase-Init on a Windows Server template for use with VCF Automation (formerly VMware Aria Automation / vRealize Automation).
What is Cloudbase-Init?
Cloudbase-Init is an open-source Windows guest initialization service, designed to be the Cloud-Init equivalent for Windows operating systems. Key features include:
- User creation and password management — Create local accounts, inject passwords, and enforce password change on first logon
- Hostname customization — Set the Windows computer name during provisioning
- SSH public key injection — Deploy SSH keys for remote access
- User-data scripts — Execute PowerShell, batch, or cloud-config YAML scripts at first boot
- Disk extension — Automatically extend volumes to use all available disk space
- MTU configuration — Set network MTU values via DHCP
When paired with VCF Automation’s cloudConfig and remoteAccess blueprint properties, Cloudbase-Init enables fully automated Windows provisioning with zero manual intervention.
Prerequisites
Before you begin, ensure you have:
- A Windows Server ISO (2016, 2019, 2022, or 2025) mounted in vCenter
- vCenter access with permissions to create VMs and templates
- VCF Automation (or Aria Automation / vRealize Automation 8.x+) deployed and configured
- An RDP client for accessing the Windows VM during setup
- A vCenter Cloud Account configured in VCF Automation (ideally using a custom vCenter role)
Part 1: Preparing the Windows Template
Step 1: Create a Base Windows VM
- Log in to vCenter and create a new Virtual Machine
- Mount your Windows Server ISO and complete the OS installation
- Install VMware Tools (required for OVF metadata transport)
- Apply all Windows Updates and install any additional software packages your organization requires (e.g., monitoring agents, antivirus)
- Power on the VM and log in via RDP
Tip: Install all prerequisite software before installing Cloudbase-Init. Once Cloudbase-Init runs Sysprep, the VM will shut down and should be converted to a template immediately.
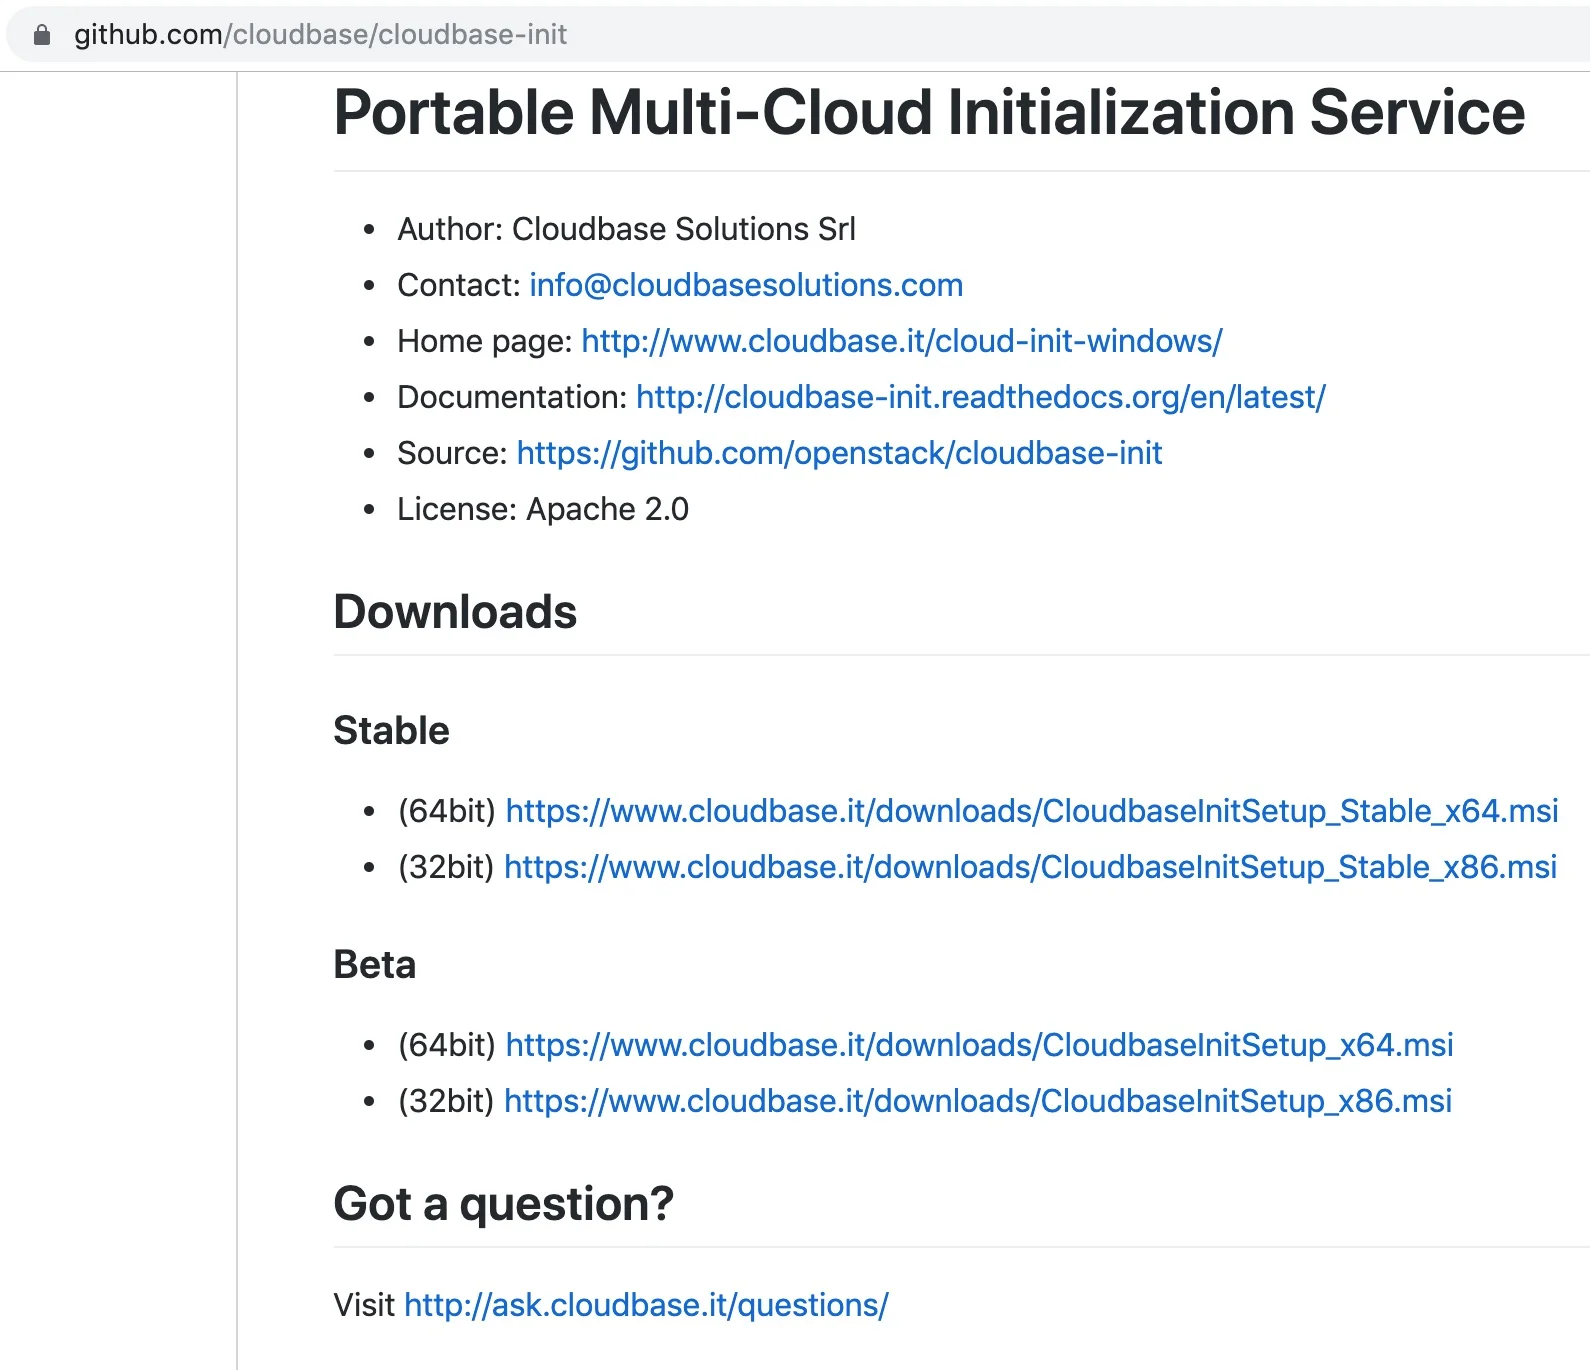
Step 2: Download Cloudbase-Init
Download the Cloudbase-Init installation binaries from one of these locations:
- GitHub: https://github.com/cloudbase/cloudbase-init
- Official Downloads: https://cloudbase.it/cloudbase-init/#download
Important: Ensure you are using version 0.9.12.dev72 or greater, which includes the OvfService metadata provider required for vCenter integration. The OvfService is what allows Cloudbase-Init to receive customization data from VCF Automation via VMware Tools.
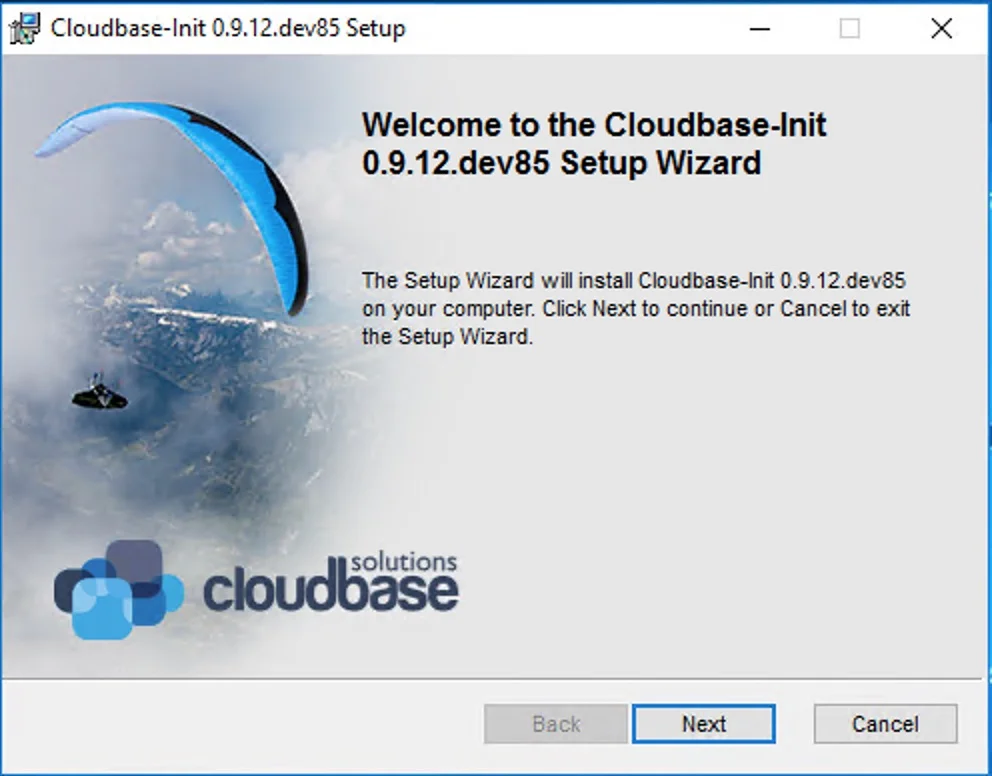
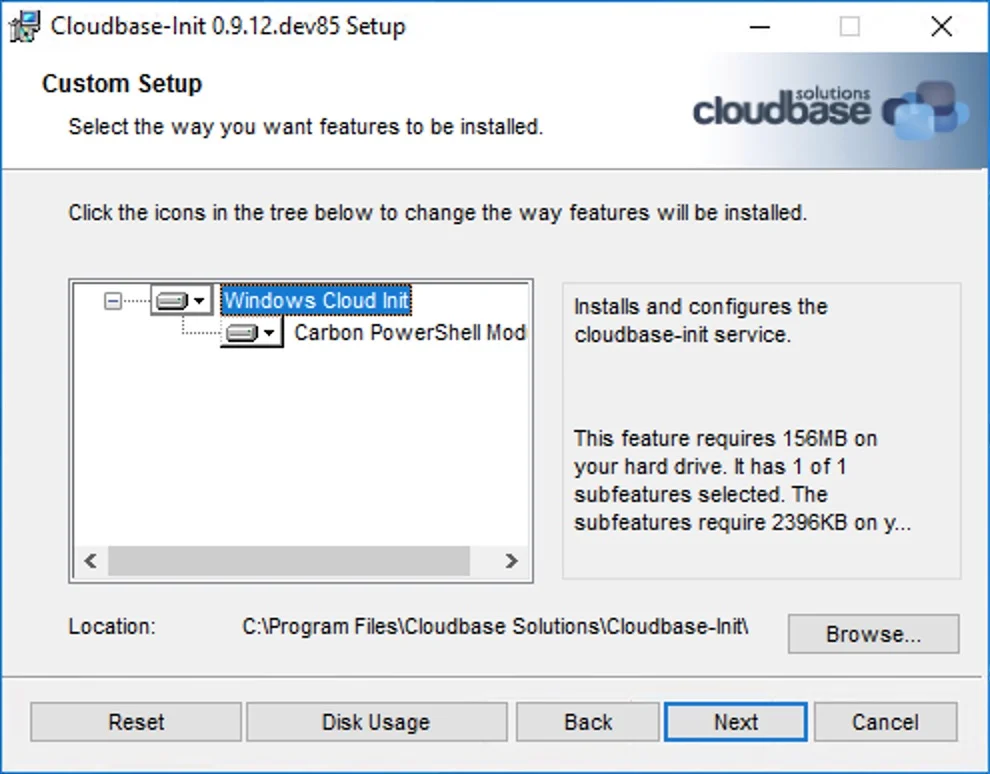
Step 3: Run the Cloudbase-Init Installer
- Run the CloudbaseInitSetup_x64.msi installer on the Windows VM
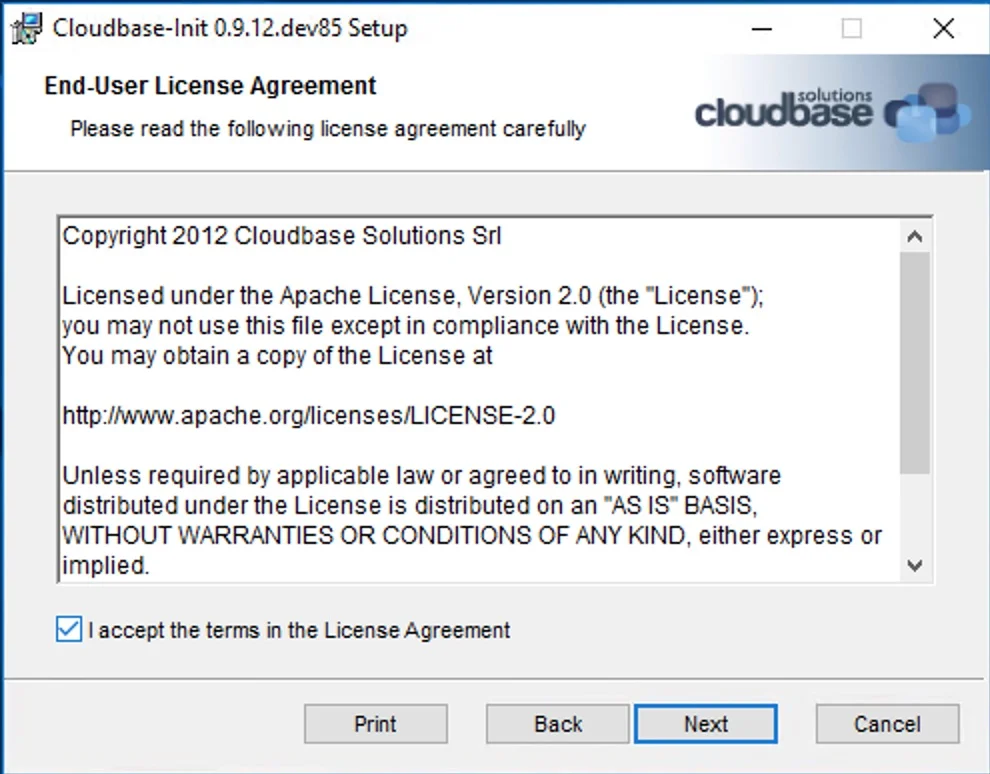
- Accept the license agreement and click Next
- On the configuration page, set the following options:
- Username:
Administrator - Check: ✅ Run Cloudbase-Init service as LocalSystem
- Leave all other defaults as-is
- Username:
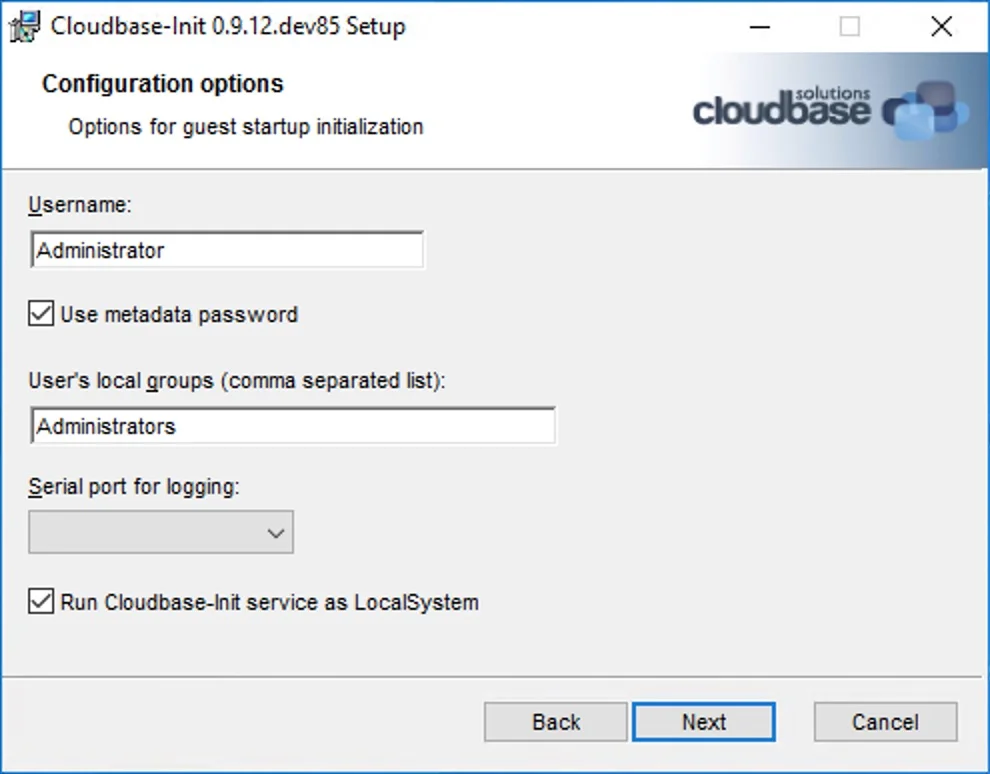
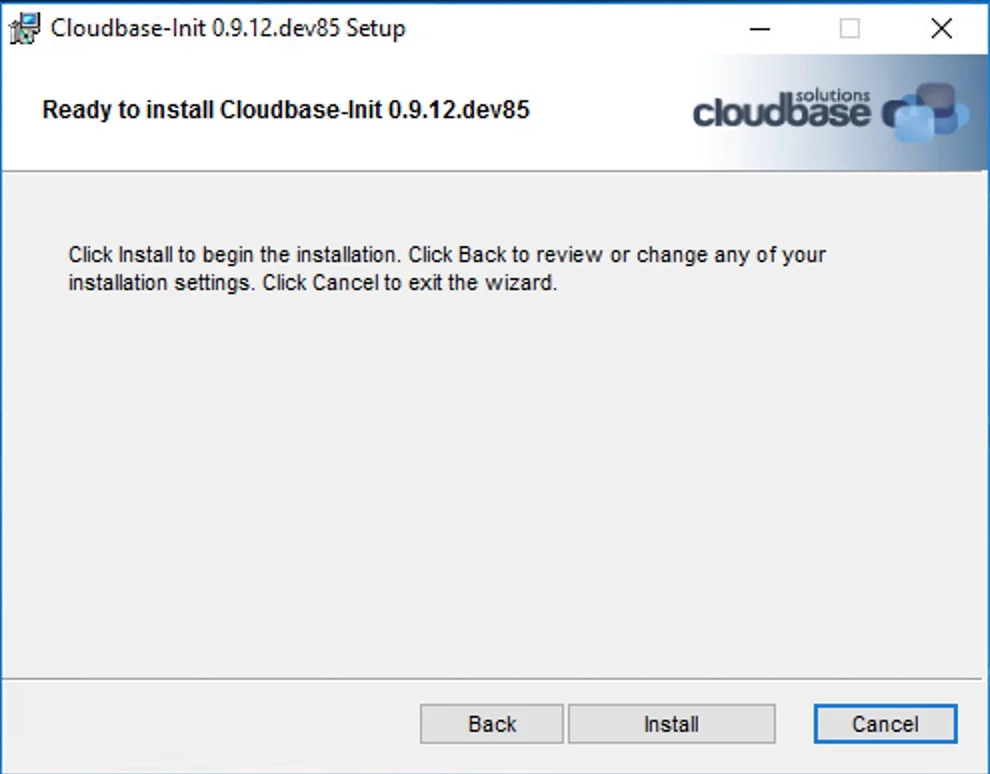
- Click Next, then click Install
Note: Some advanced user-data scripts may require Cloudbase-Init to run under a dedicated administrator account rather than LocalSystem. If this applies to your environment, create and select a dedicated service account at install time.
- Do NOT finalize the installer yet — when prompted with the “Completing the Cloudbase-Init Setup Wizard” dialog, leave the checkboxes unchecked for now. We need to edit the configuration files first.
Step 4: Configure cloudbase-init-unattend.conf
Navigate to the Cloudbase-Init installation directory (typically C:\Program Files\Cloudbase Solutions\Cloudbase-Init\conf\) and edit the file cloudbase-init-unattend.conf.
This configuration file controls the behavior during the specialize phase of Windows setup (before the first user logon). Replace its contents with:
[DEFAULT]
username=Administrator
groups=Administrators
inject_user_password=true
config_drive_raw_hhd=true
config_drive_cdrom=true
config_drive_vfat=true
bsdtar_path=C:\Program Files\Cloudbase Solutions\Cloudbase-Init\bin\bsdtar.exe
mtools_path=C:\Program Files\Cloudbase Solutions\Cloudbase-Init\bin\
verbose=true
debug=true
logdir=C:\Program Files\Cloudbase Solutions\Cloudbase-Init\log\
logfile=cloudbase-init-unattend.log
default_log_levels=comtypes=INFO,suds=INFO,iso8601=WARN,requests=WARN
logging_serial_port_settings=
mtu_use_dhcp_config=true
ntp_use_dhcp_config=true
local_scripts_path=C:\Program Files\Cloudbase Solutions\Cloudbase-Init\LocalScripts\
metadata_services=cloudbaseinit.metadata.services.ovfservice.OvfService
plugins=cloudbaseinit.plugins.common.mtu.MTUPlugin,cloudbaseinit.plugins.common.sethostname.SetHostNamePlugin,cloudbaseinit.plugins.windows.extendvolumes.ExtendVolumesPlugin
allow_reboot=false
stop_service_on_exit=false
check_latest_version=false
Key settings explained:
| Setting | Value | Purpose |
|---|---|---|
metadata_services | OvfService | Only use the OVF metadata provider (vCenter). Prevents Cloudbase-Init from iterating through unsupported providers and cluttering logs |
plugins | MTU, SetHostName, ExtendVolumes | Specialize-phase plugins: configure network MTU, set hostname, extend disk volumes |
allow_reboot | false | Prevent unexpected reboots during the specialize phase |
stop_service_on_exit | false | Keep the service running for the next phase |
Step 5: Configure cloudbase-init.conf
In the same conf directory, edit cloudbase-init.conf. This file controls the behavior during the first logon phase.
Replace its contents with:
[DEFAULT]
username=Administrator
groups=Administrators
inject_user_password=true
first_logon_behaviour=always
config_drive_raw_hhd=true
config_drive_cdrom=true
config_drive_vfat=true
bsdtar_path=C:\Program Files\Cloudbase Solutions\Cloudbase-Init\bin\bsdtar.exe
mtools_path=C:\Program Files\Cloudbase Solutions\Cloudbase-Init\bin\
verbose=true
debug=true
logdir=C:\Program Files\Cloudbase Solutions\Cloudbase-Init\log\
logfile=cloudbase-init.log
default_log_levels=comtypes=INFO,suds=INFO,iso8601=WARN,requests=WARN
logging_serial_port_settings=
mtu_use_dhcp_config=true
ntp_use_dhcp_config=true
local_scripts_path=C:\Program Files\Cloudbase Solutions\Cloudbase-Init\LocalScripts\
metadata_services=cloudbaseinit.metadata.services.ovfservice.OvfService
plugins=cloudbaseinit.plugins.windows.createuser.CreateUserPlugin,cloudbaseinit.plugins.windows.setuserpassword.SetUserPasswordPlugin,cloudbaseinit.plugins.common.sshpublickeys.SetUserSSHPublicKeysPlugin,cloudbaseinit.plugins.common.userdata.UserDataPlugin
Key settings explained:
| Setting | Value | Purpose |
|---|---|---|
first_logon_behaviour | always | Forces the user to change the password after first logon |
metadata_services | OvfService | Same as unattend — only use OVF metadata for vCenter |
plugins | CreateUser, SetUserPassword, SetUserSSHPublicKeys, UserData | First-logon plugins: create user account, set password, inject SSH keys, execute user-data scripts |
Important: The
username=Administratorsetting combined withSetUserPasswordPluginand theremoteAccesspassword in the blueprint allows Cloudbase-Init to change the initial blank password created after Sysprep.
Step 6: Understanding the Plugin Order
Cloudbase-Init executes plugins in the order they are listed in the configuration. Here is a breakdown of both phases:
Specialize Phase (cloudbase-init-unattend.conf):
- MTUPlugin — Configures network MTU based on DHCP
- SetHostNamePlugin — Sets the Windows computer name
- ExtendVolumesPlugin — Extends disk volumes to use all available space
First Logon Phase (cloudbase-init.conf):
- CreateUserPlugin — Creates the local user account
- SetUserPasswordPlugin — Sets the user password from metadata
- SetUserSSHPublicKeysPlugin — Injects SSH public keys
- UserDataPlugin — Executes user-data scripts (PowerShell, batch, cloud-config)
Tip: Only list plugins with capabilities supported by OvfService. This keeps logs clean and avoids error messages from plugins that cannot find their expected metadata.
Step 7: Complete the Installation with Sysprep
Now return to the Cloudbase-Init installer “Completing” dialog and check both boxes:
- ✅ Run Sysprep to create a generalized image
- ✅ Shutdown when Sysprep terminates
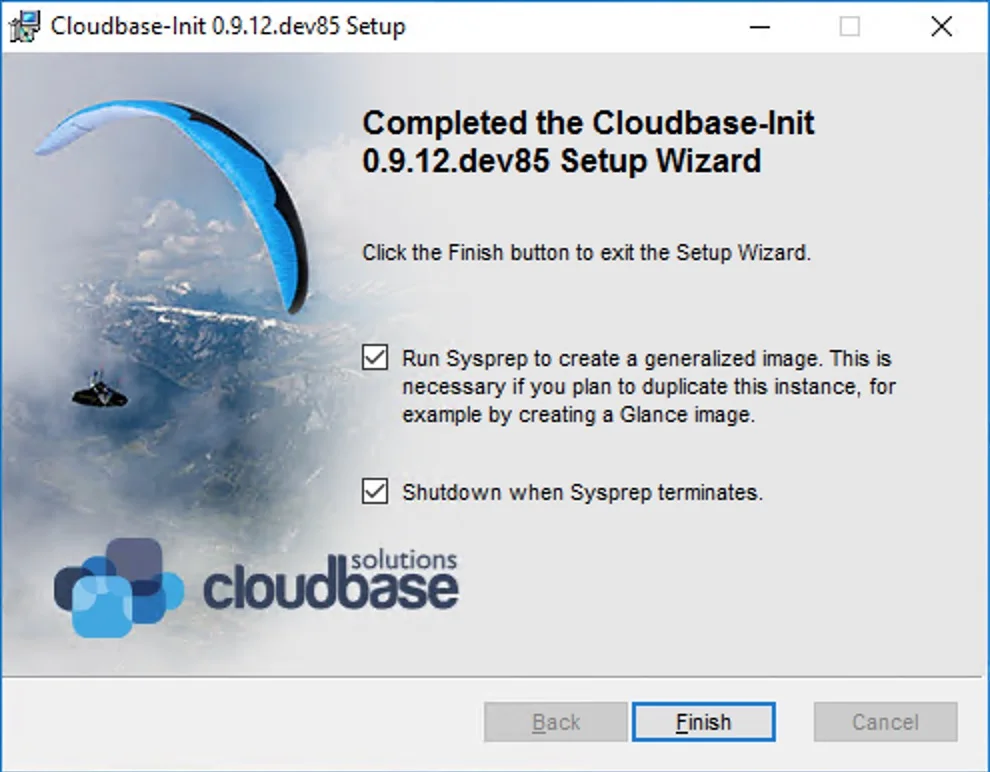
Click Finish. The system will run Windows Sysprep to generalize the image and then automatically shut down the VM.
Note: If Sysprep appears to hang or the VM does not shut down, try uninstalling Cloudbase-Init, re-downloading the installer, and repeating the process. This can occur with certain Windows Server 2016 builds.
Step 8: Convert to Template
Once the VM has shut down:
- In vCenter, right-click the VM
- Select Template → Convert to Template
Your Windows template is now ready for use with VCF Automation.
Silent Installation (Alternative)
For automated template builds (e.g., with Packer or other automation tools), Cloudbase-Init supports silent installation:
# Download Cloudbase-Init
Invoke-WebRequest -Uri "https://cloudbase.it/downloads/CloudbaseInitSetup_x64.msi" -OutFile "C:\CloudbaseInitSetup_x64.msi"

# Silent install
msiexec /i C:\CloudbaseInitSetup_x64.msi /qn /l*v C:\cloudbase-init-install.log ^
  LOGGINGSERIALPORTNAME=COM1 ^
  USERNAME=Administrator ^
  INJECTMETADATAPASSWORD=TRUE ^
  LOCALSYSTEMSERVICE=TRUE

# Copy custom configuration files
Copy-Item "cloudbase-init.conf" "C:\Program Files\Cloudbase Solutions\Cloudbase-Init\conf\cloudbase-init.conf" -Force
Copy-Item "cloudbase-init-unattend.conf" "C:\Program Files\Cloudbase Solutions\Cloudbase-Init\conf\cloudbase-init-unattend.conf" -Force

# Run Sysprep
& "C:\Windows\System32\Sysprep\sysprep.exe" /generalize /oobe /shutdown /unattend:"C:\Program Files\Cloudbase Solutions\Cloudbase-Init\conf\Unattend.xml"
Part 2: Deploying and Customizing Windows in VCF Automation
Now that the template is prepared, let’s create a cloud-agnostic blueprint in VCF Automation to deploy and customize Windows instances.
Step 1: Verify Infrastructure Setup
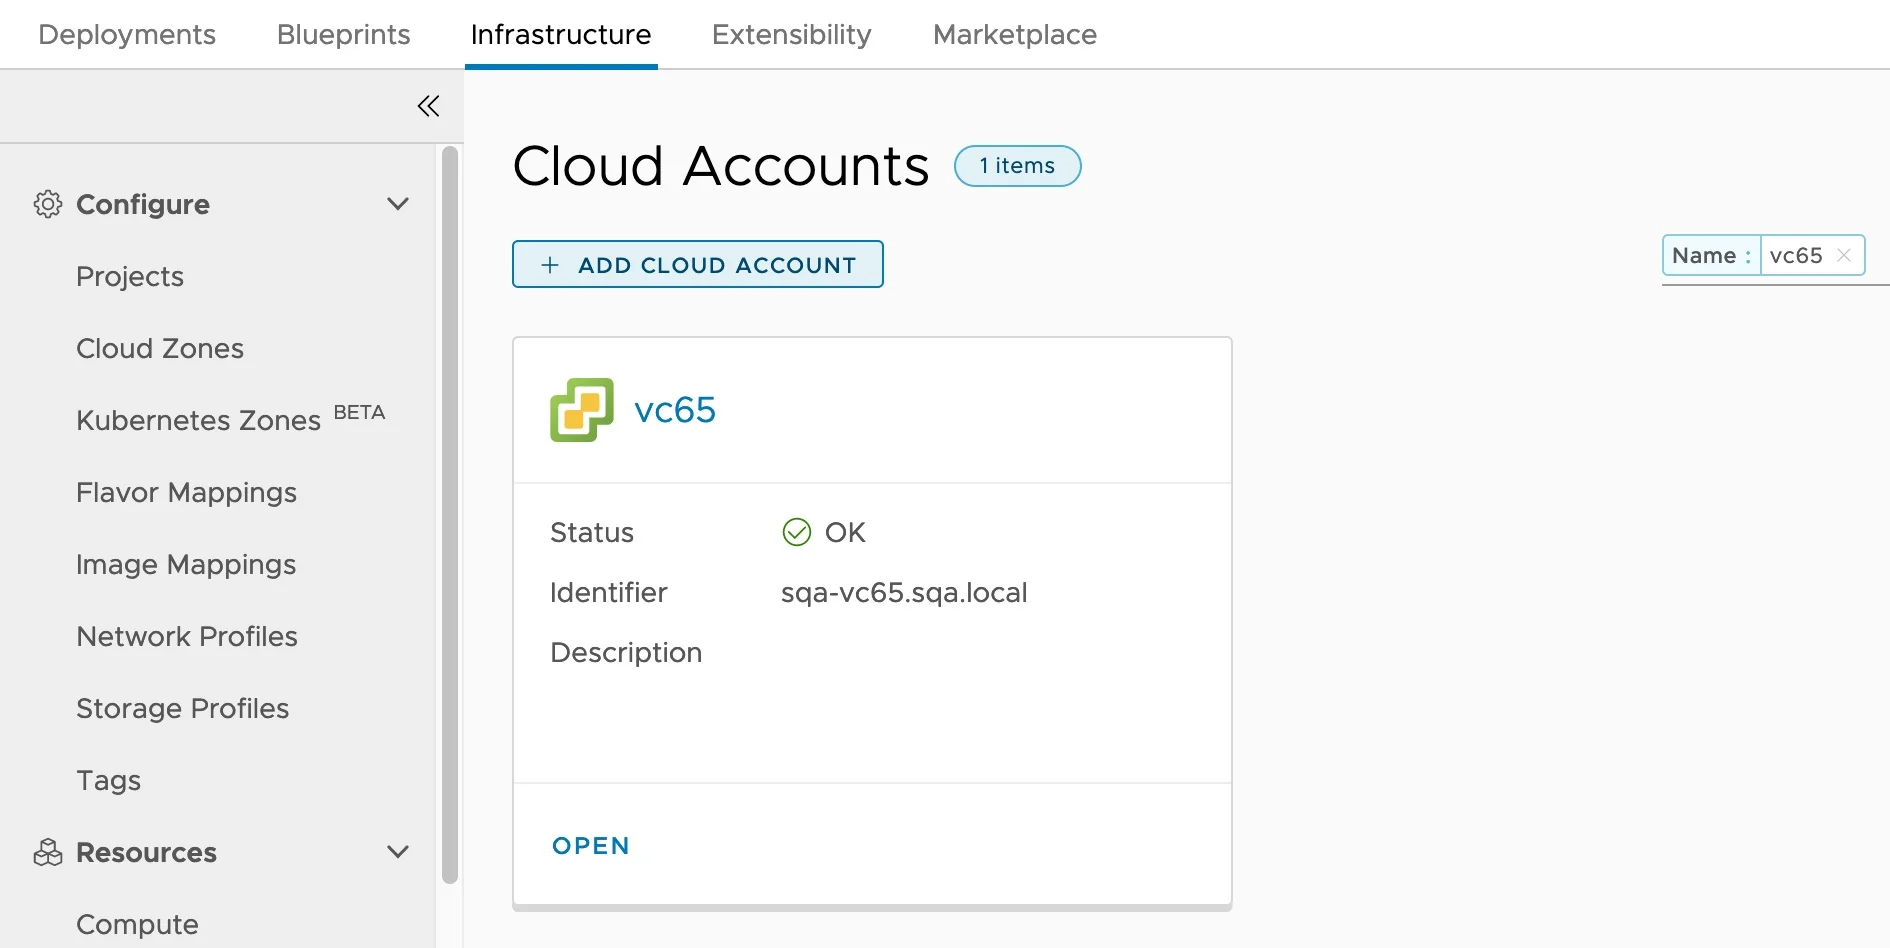
Ensure the following are configured in VCF Automation:
- Cloud Account — A vCenter Cloud Account is connected
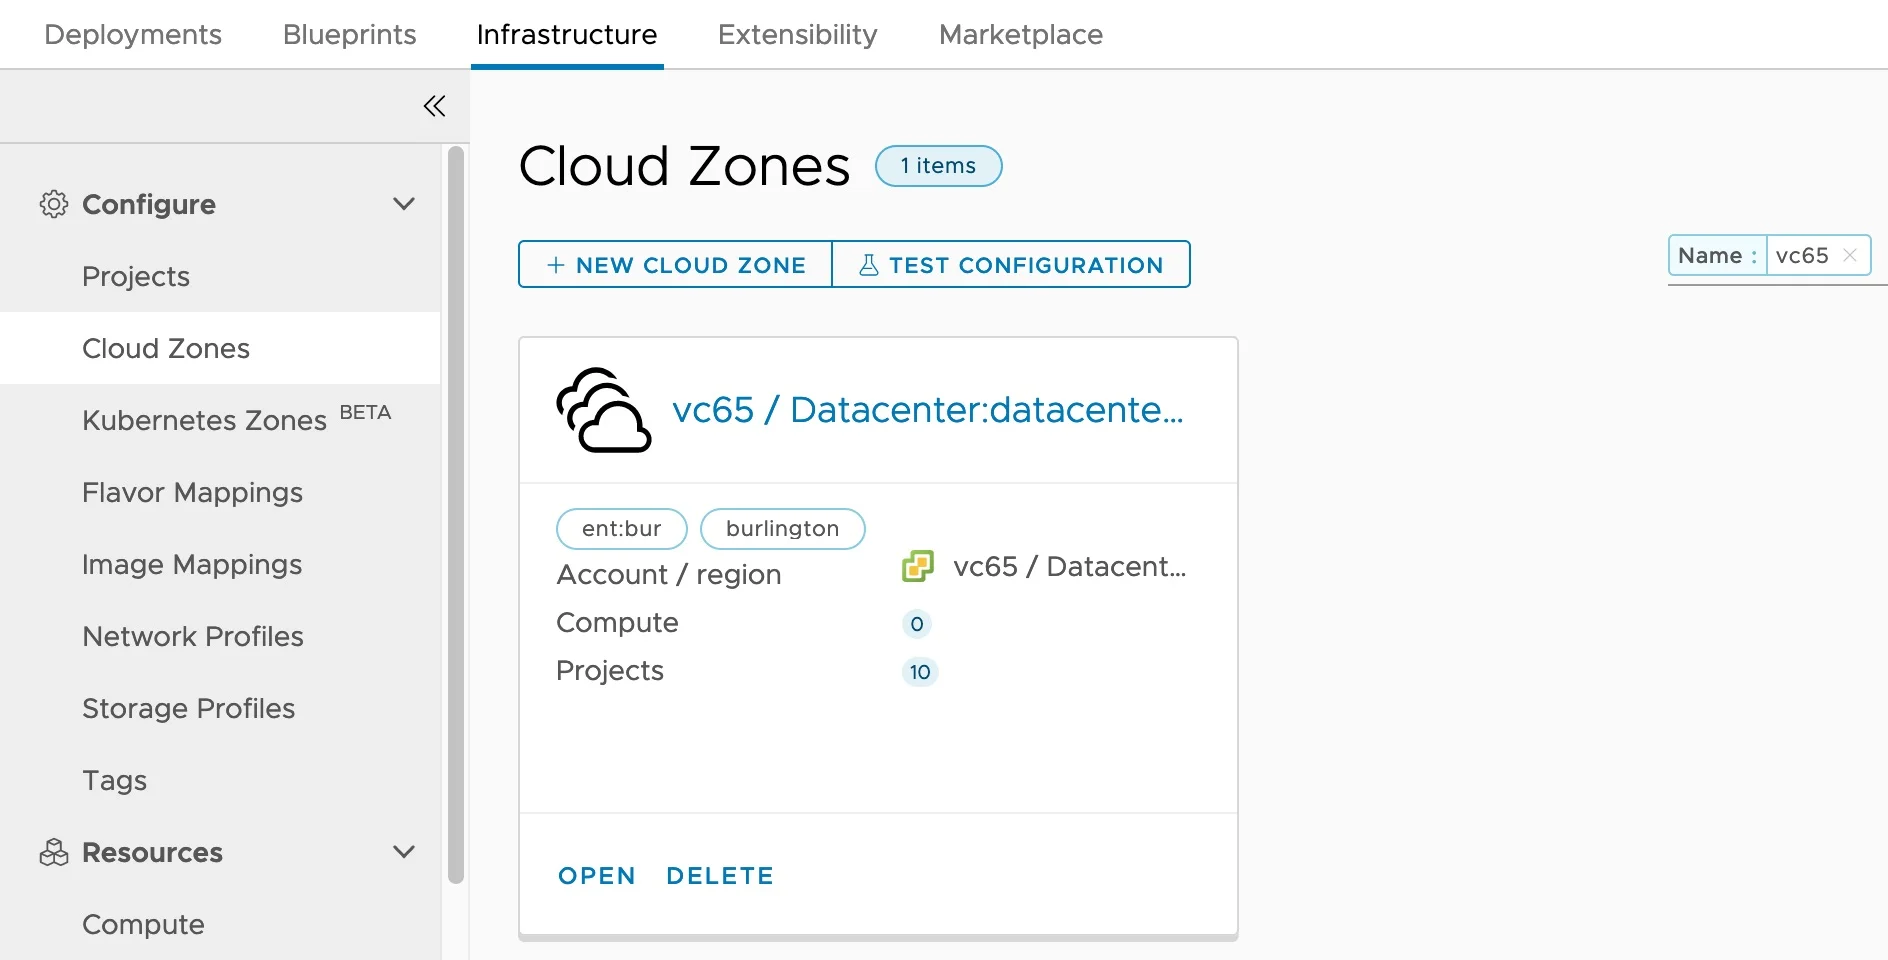
- Cloud Zone — A Cloud Zone is associated with the Cloud Account
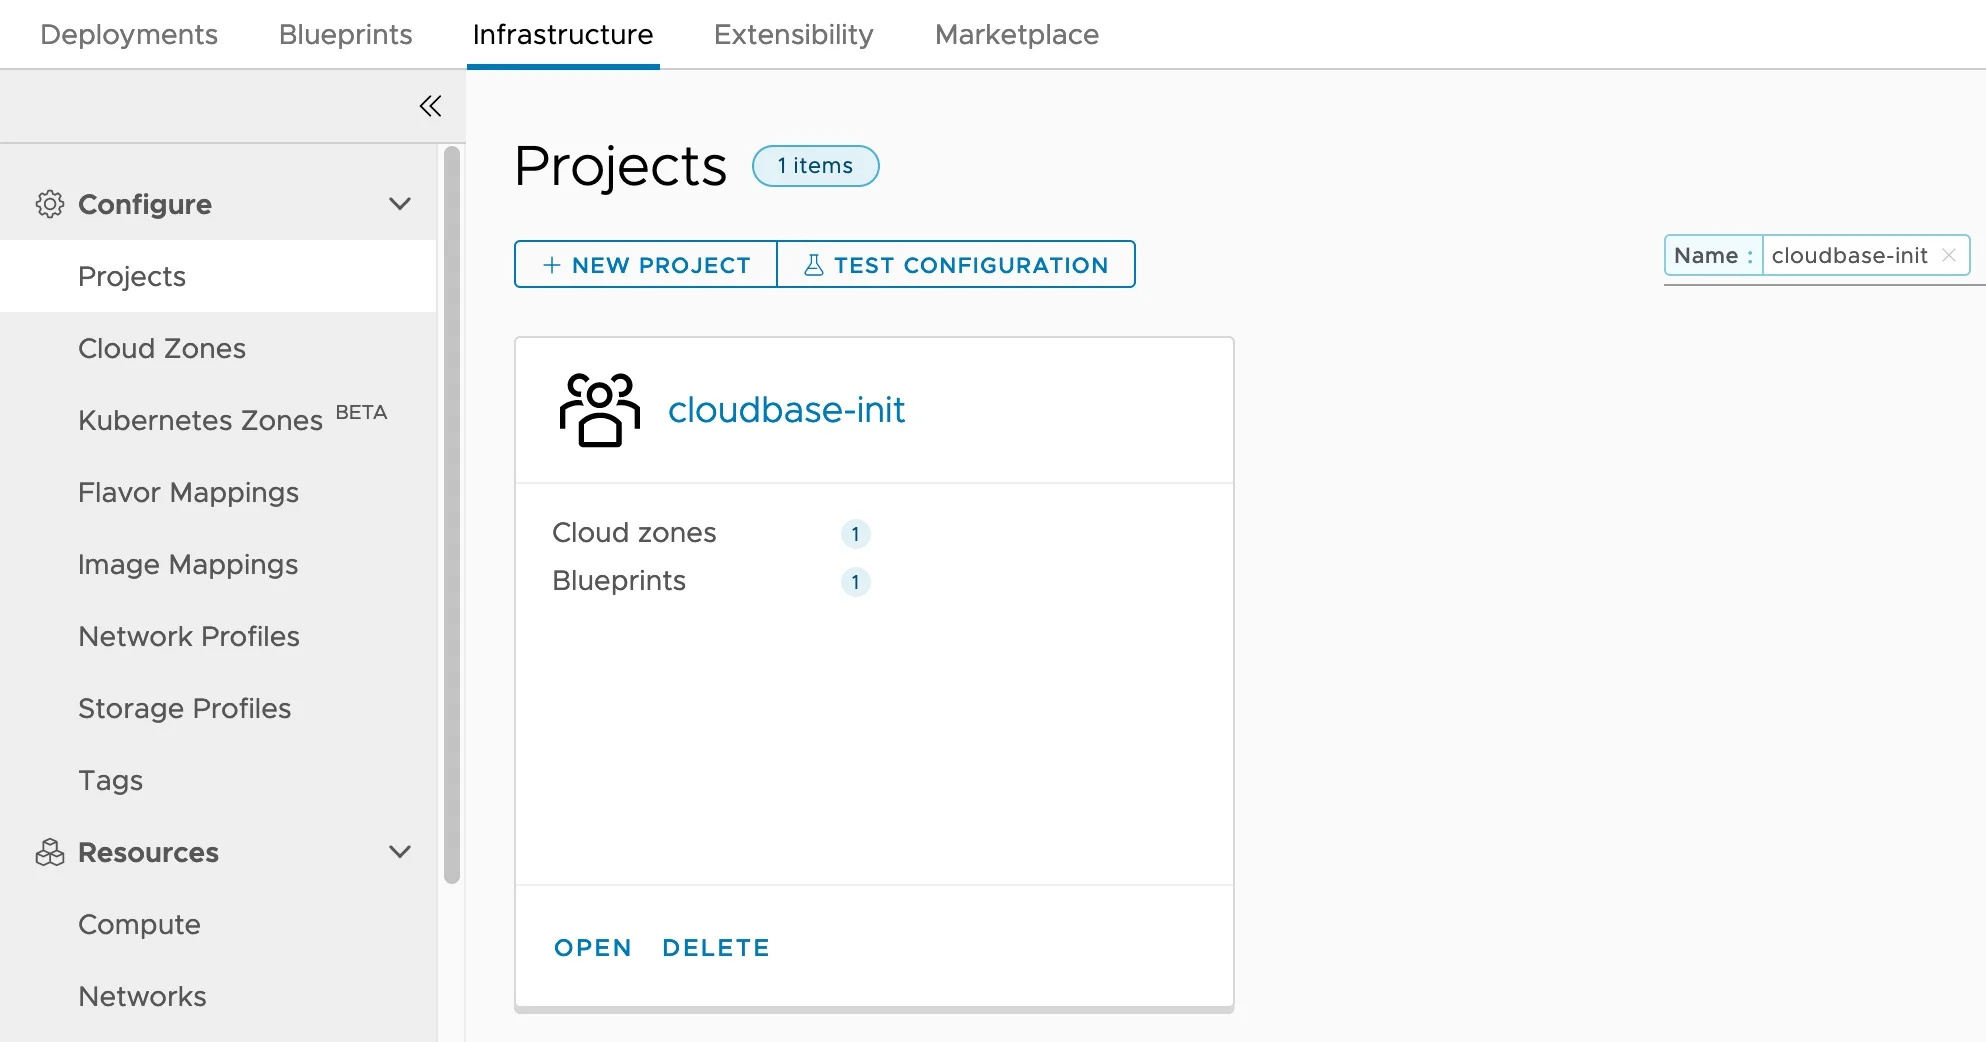
- Project — A Project is linked to the Cloud Zone with appropriate users/groups
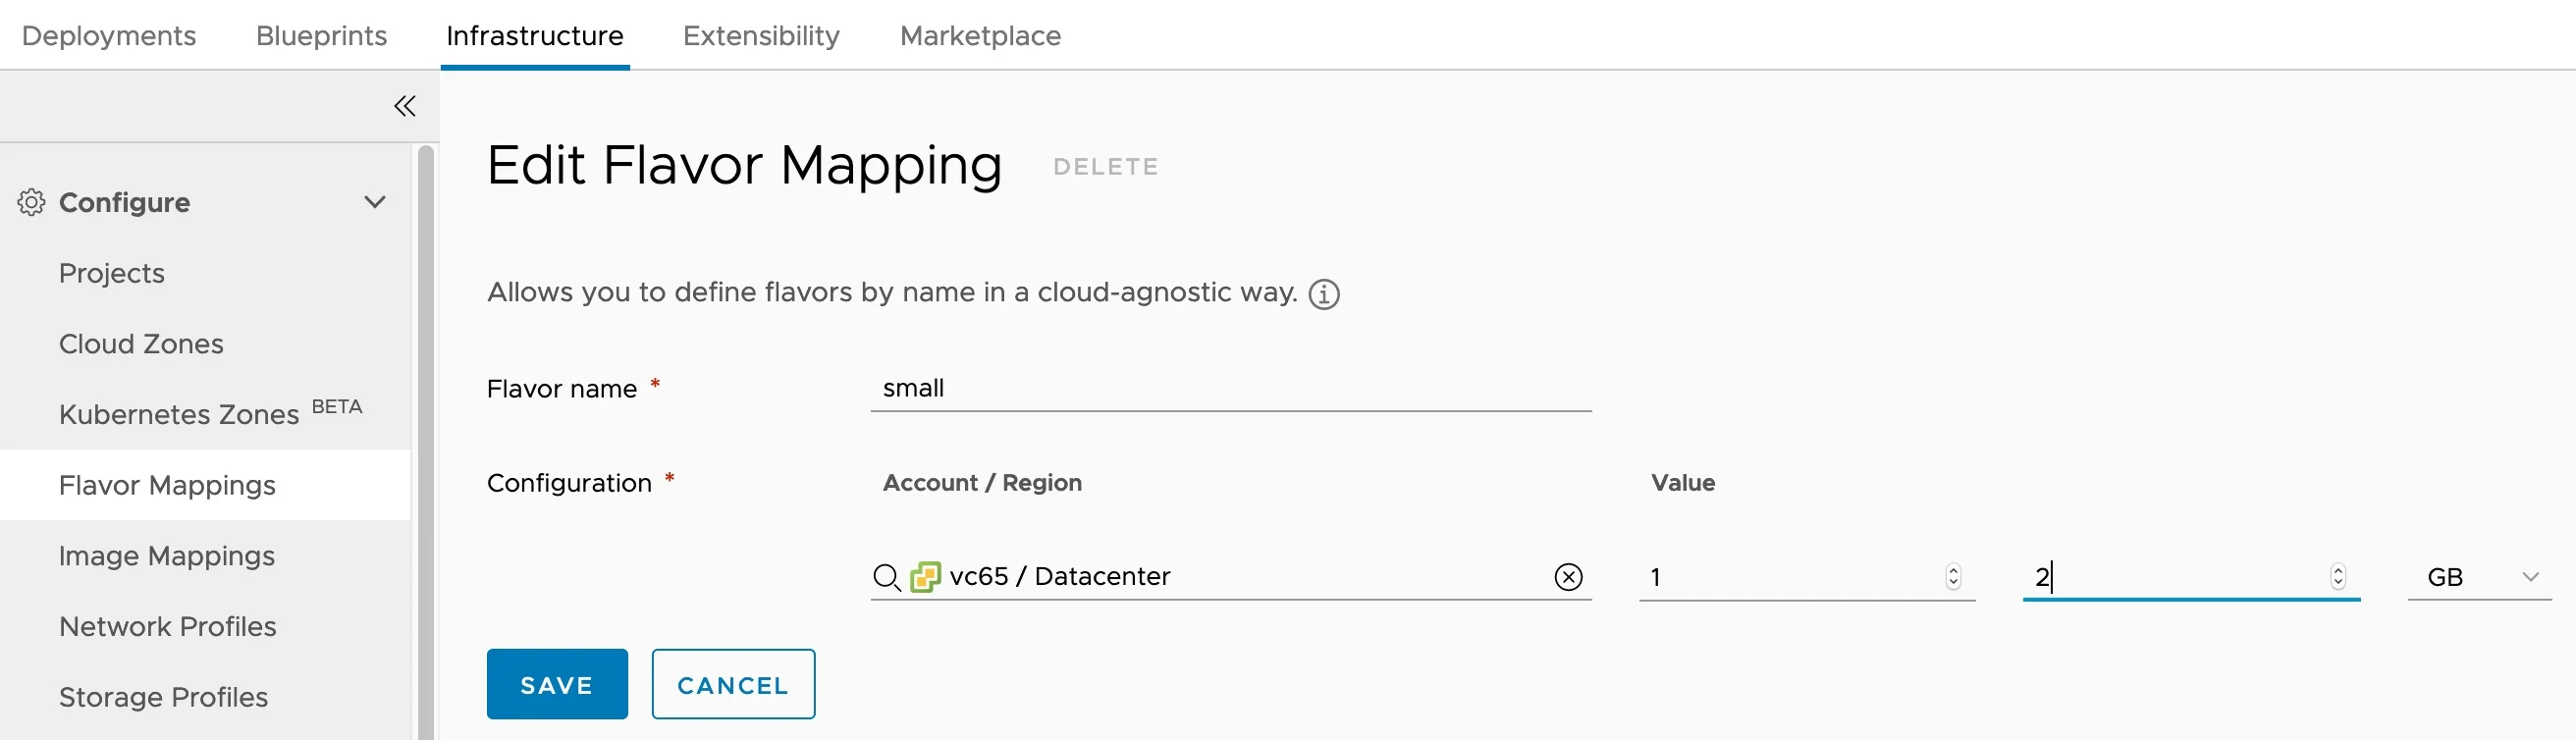
- Flavor Mapping — At least one flavor mapping (e.g.,
small= 1 vCPU, 2 GB RAM)
- Image Mapping — An image mapping pointing to your Cloudbase-Init Windows template
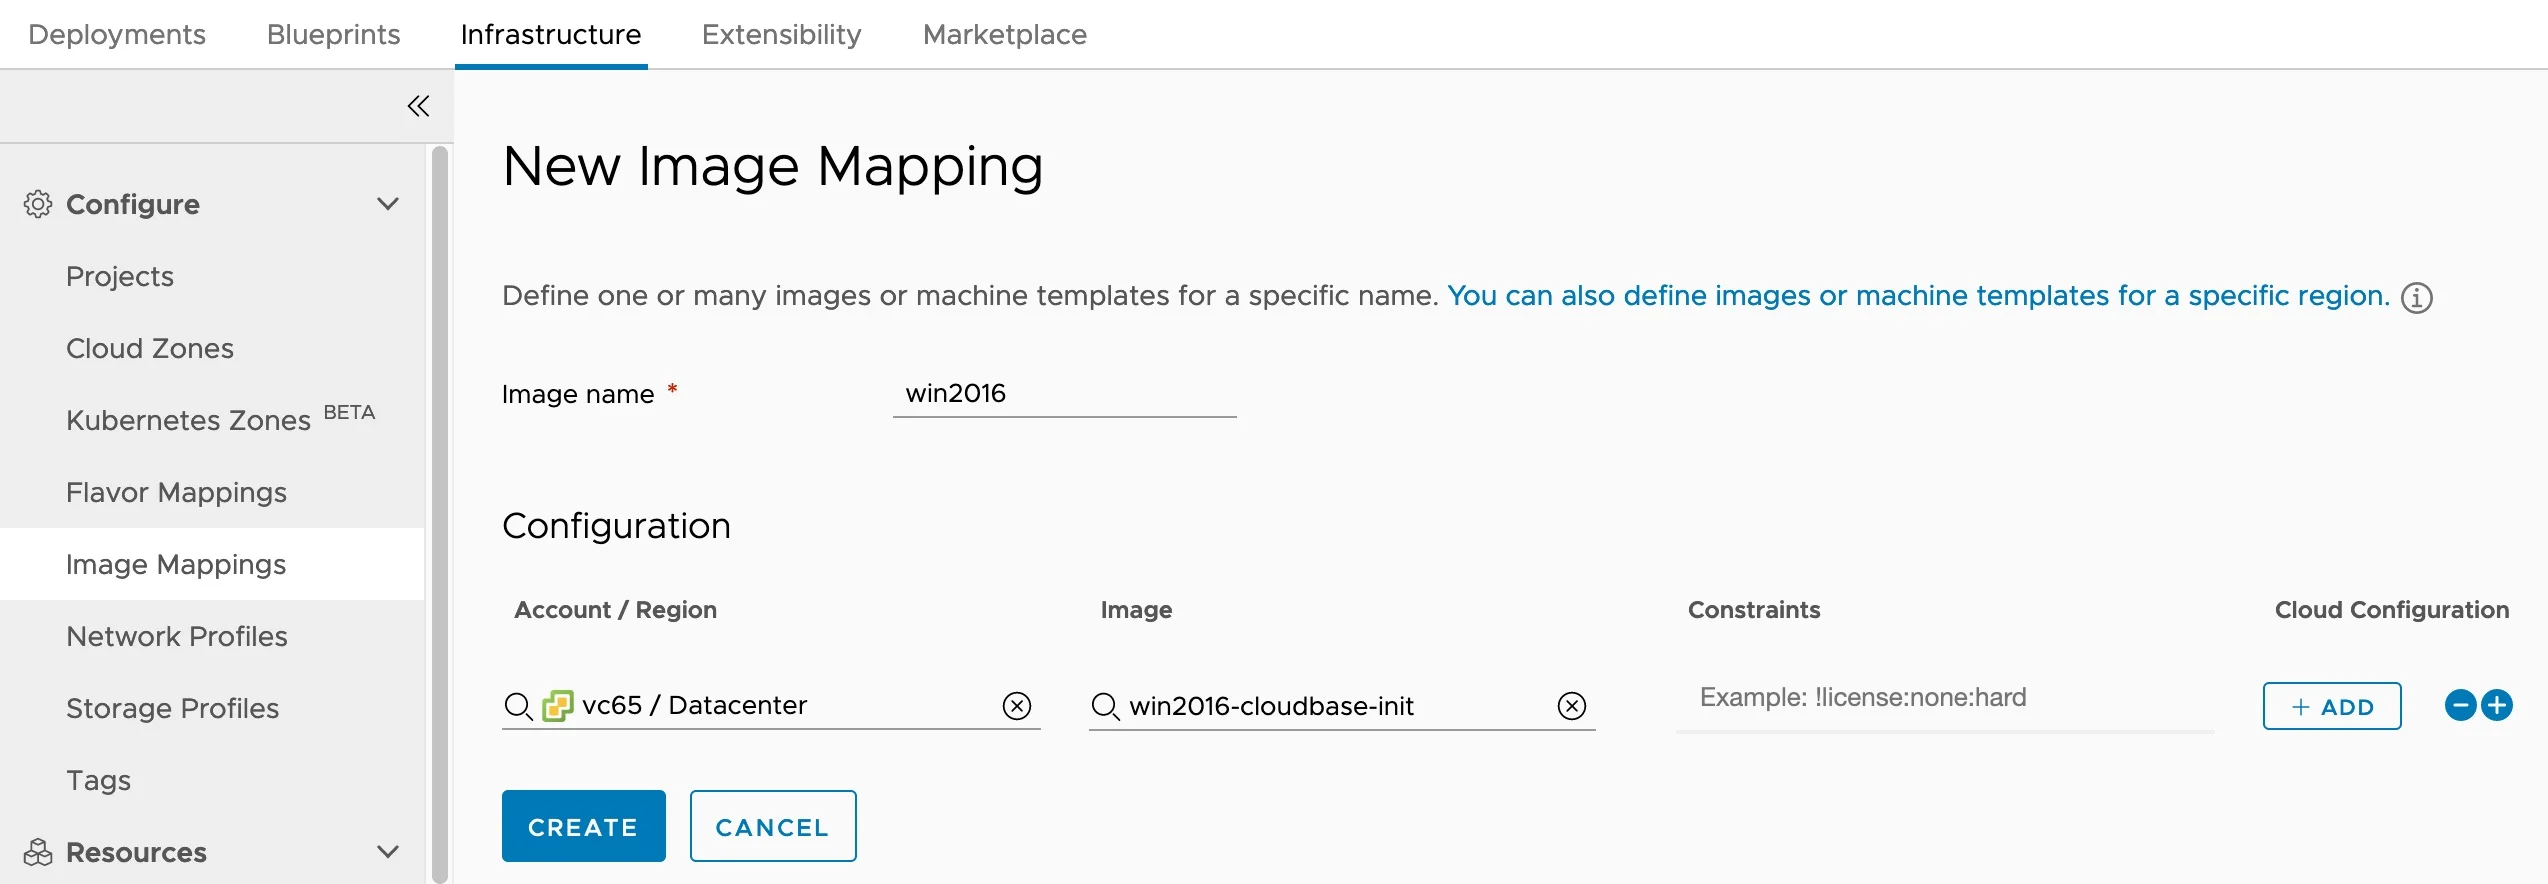
Tip: If you don’t see your template in the Image Mapping dropdown, navigate to Cloud Accounts and click Sync Images. By default, image collection runs automatically every 24 hours.
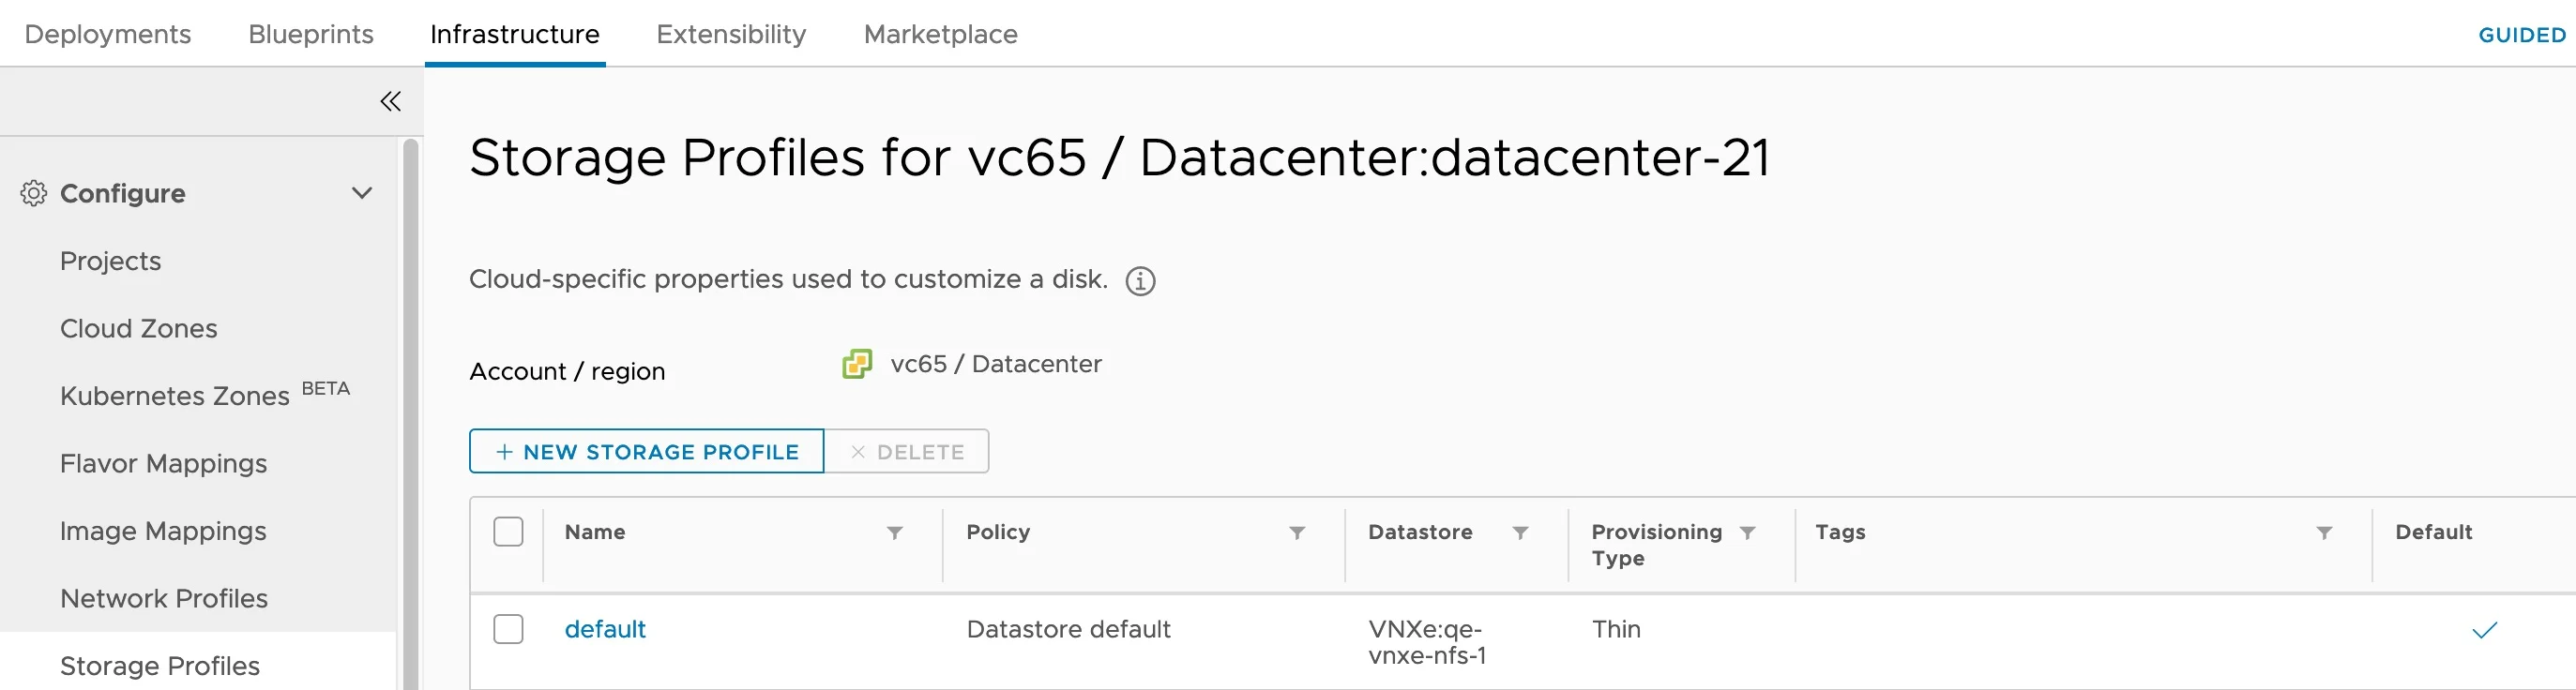
- Storage Profile — A storage profile for your vCenter datastore(s)
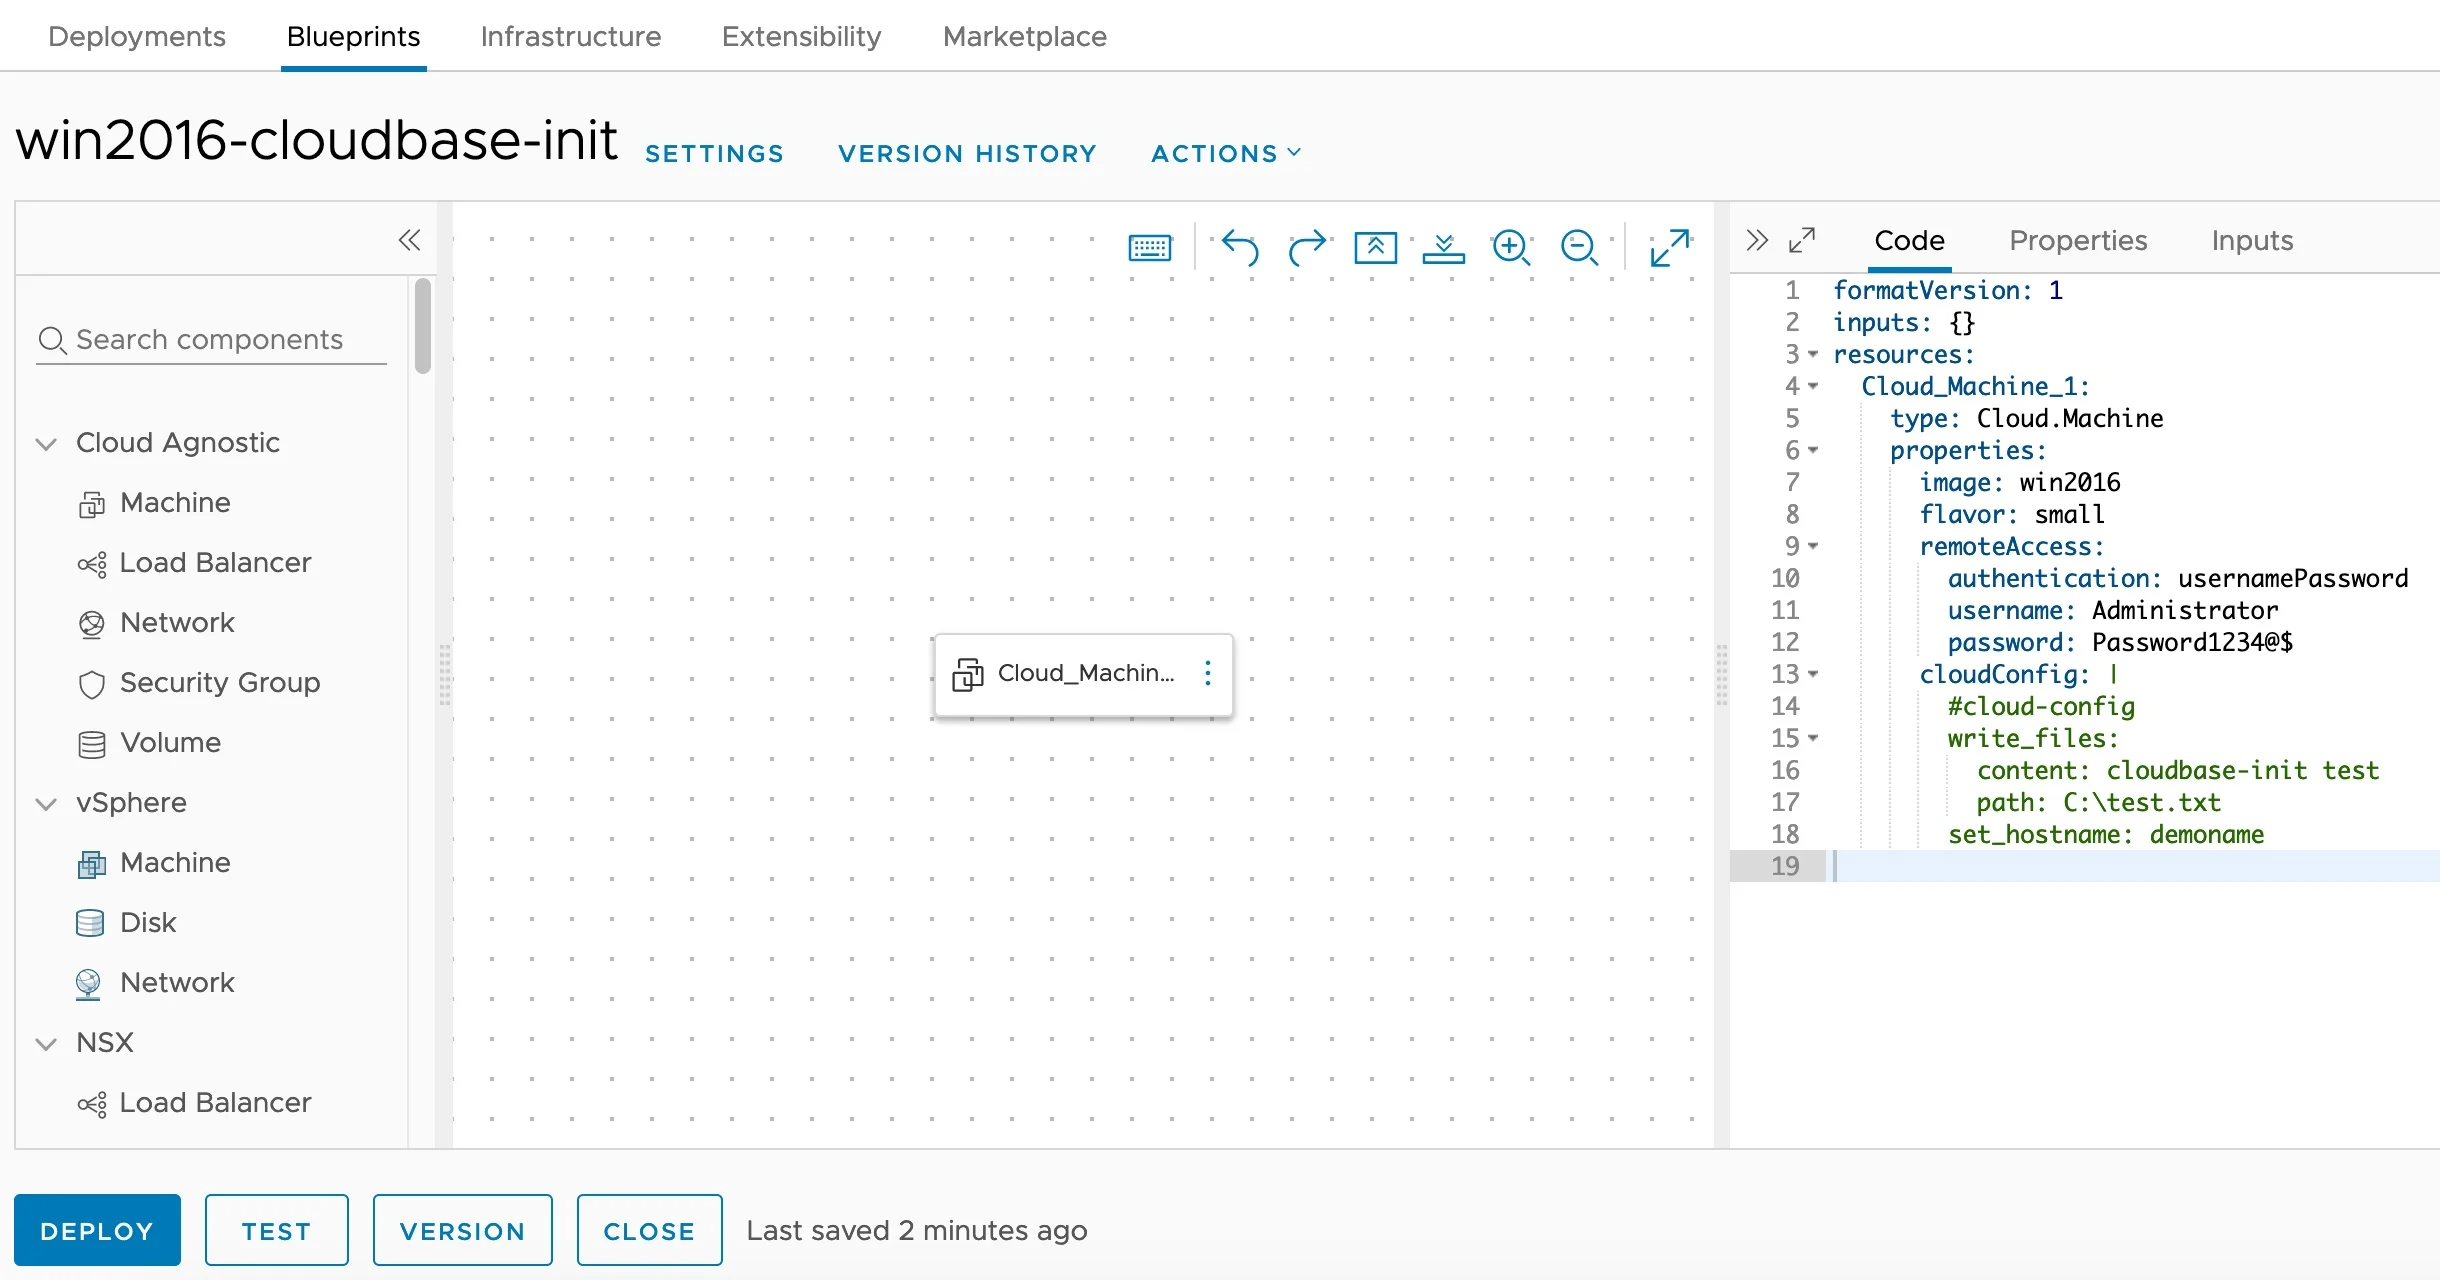
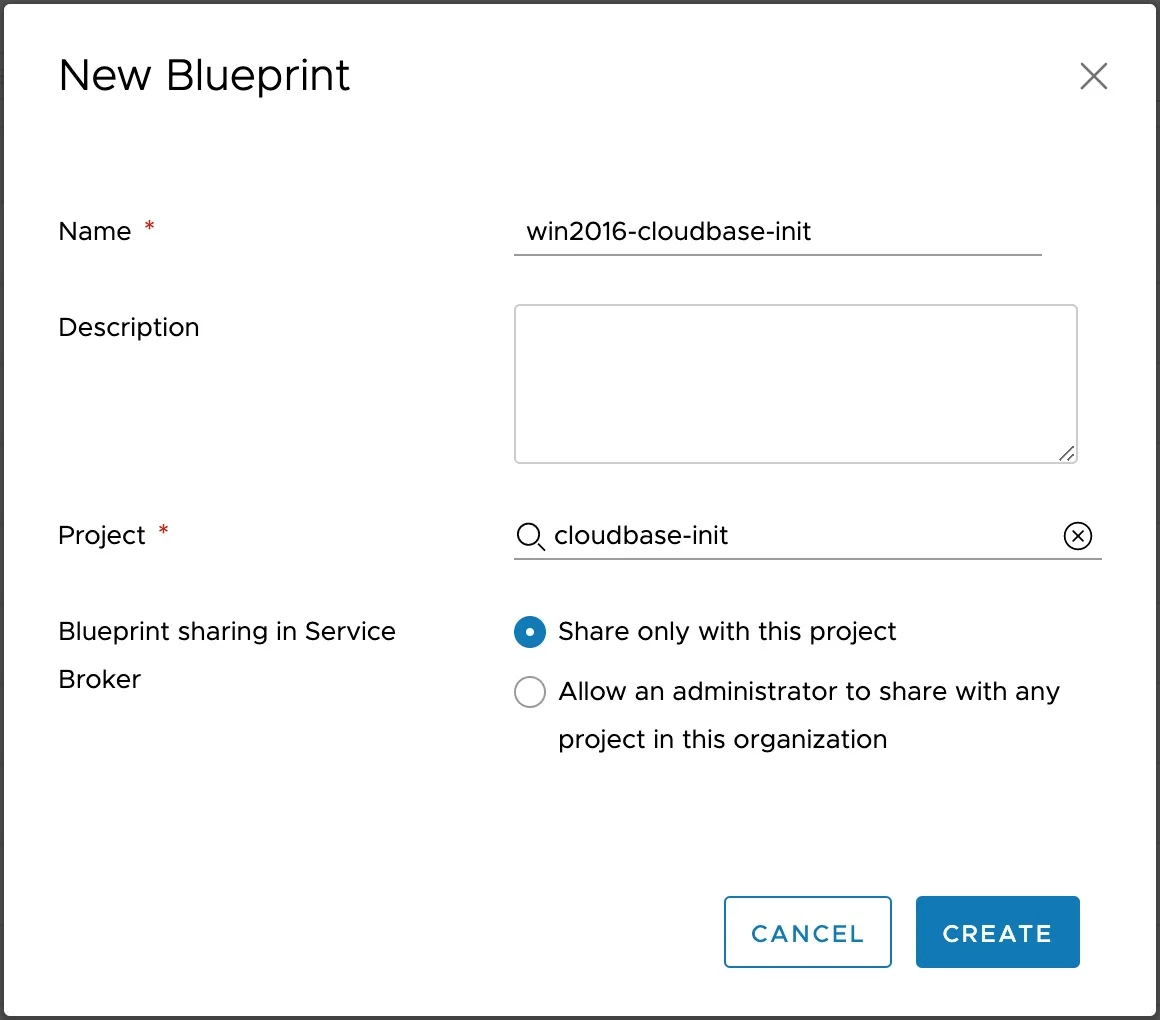
Step 2: Create the Blueprint
Navigate to Design → Cloud Templates and create a new template for your project.
Here is an example cloud-agnostic blueprint that deploys the Windows image with guest customization:
formatVersion: 1
inputs:
  hostname:
    type: string
    title: Hostname
    default: win-demo
  password:
    type: string
    title: Administrator Password
    encrypted: true
    default: P@ssw0rd!2024
resources:
  Cloud_Machine_1:
    type: Cloud.Machine
    properties:
      image: win2022
      flavor: small
      remoteAccess:
        authentication: usernamePassword
        username: Administrator
        password: ${input.password}
      cloudConfig: |
        #cloud-config
        set_hostname: ${input.hostname}
        write_files:
          - content: |
              Cloudbase-Init deployment successful!
              Deployed by VCF Automation
              Hostname: ${input.hostname}
            path: C:\deployment-info.txt

If you also need extra data disks in your Windows blueprints, I covered adding custom disks with drive letters and labels in Aria Automation separately.
Understanding the Blueprint Properties
remoteAccess
The remoteAccess section provides credentials to the guest instance:
| Property | Description |
|---|---|
authentication | Authentication type: usernamePassword, generatedPublicPrivateKey, or publicPrivateKey |
username | The local account name (matches username in cloudbase-init.conf) |
password | The password to set (must meet Windows password policy requirements) |
The OVF metadata service picks up these values and exposes them to the CreateUserPlugin and SetUserPasswordPlugin.
cloudConfig
The cloudConfig property sets the user-data payload. The metadata service picks it up and passes it to the UserDataPlugin. The plugin interprets the data based on the first line:
| First Line | Script Type |
|---|---|
#cloud-config | Cloud-config YAML (hostname, write_files, etc.) |
#ps1 or #ps1_sysnative | PowerShell script |
#cmd | Windows batch/cmd script |
rem cmd | Windows batch/cmd script (alternative) |
Example: PowerShell user-data
cloudConfig: |
  #ps1_sysnative
  # Install Chocolatey
  Set-ExecutionPolicy Bypass -Scope Process -Force
  [System.Net.ServicePointManager]::SecurityProtocol = [System.Net.ServicePointManager]::SecurityProtocol -bor 3072
  iex ((New-Object System.Net.WebClient).DownloadString('https://community.chocolatey.org/install.ps1'))

  # Install common tools
  choco install notepadplusplus 7zip git -y

  # Create a marker file
  Set-Content -Path "C:\deployment-complete.txt" -Value "Deployment completed at $(Get-Date)"
Example: Cloud-config with multiple write_files
cloudConfig: |
  #cloud-config
  set_hostname: myserver
  write_files:
    - content: |
        Server provisioned by VCF Automation
        Date: 2026-04-16
      path: C:\info.txt
    - content: |
        # Custom PowerShell profile
        Set-Alias ll Get-ChildItem
      path: C:\Users\Administrator\Documents\WindowsPowerShell\profile.ps1
Step 3: Deploy the Blueprint
- Click Deploy (or Test)
- Provide a Deployment Name
- Fill in the input parameters (hostname, password)
- Select Current Draft as the version
- Click Deploy
VCF Automation will:
- Clone the Windows template
- Power on the VM
- VMware Tools will transport the OVF metadata to the guest
- Cloudbase-Init will pick up the metadata and execute the configured plugins
- The hostname will be set, user account configured, and user-data scripts executed
Step 4: Verify the Customization
Once the deployment completes successfully:
- Open an RDP client and connect to the new VM using the credentials from the blueprint
- On first login, you will be prompted to change the password (due to
first_logon_behaviour=always)

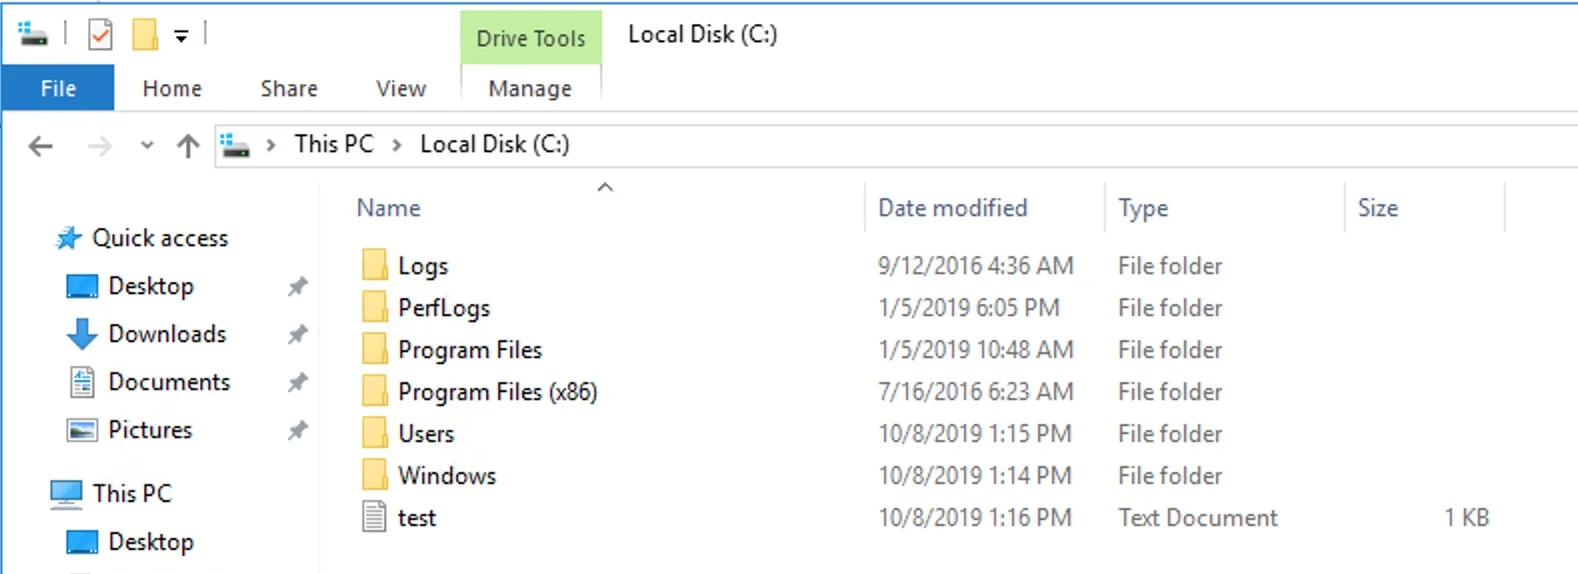
- After changing the password, verify:
- Hostname — Open a command prompt and run
hostnameto confirm the custom name was applied - Deployment file — Check
C:\deployment-info.txt(or your custom file path) for the content specified inwrite_files - User account — Confirm the Administrator account is active with the correct group membership
- Hostname — Open a command prompt and run
Troubleshooting
Cloudbase-Init Logs
If customization doesn’t work as expected, check the logs at:
C:\Program Files\Cloudbase Solutions\Cloudbase-Init\log\cloudbase-init.log
C:\Program Files\Cloudbase Solutions\Cloudbase-Init\log\cloudbase-init-unattend.log
Common Issues
| Issue | Cause | Solution |
|---|---|---|
| Hostname not set | SetHostNamePlugin not in unattend plugins list | Add SetHostNamePlugin to cloudbase-init-unattend.conf plugins |
| Password not working | Password doesn’t meet Windows policy | Use a password with uppercase, lowercase, number, and special character |
| User-data script not executing | Wrong first-line header | Ensure the first line is #ps1_sysnative, #cloud-config, etc. |
| Metadata not found | VMware Tools not installed | Install VMware Tools on the template before Cloudbase-Init |
| Sysprep hangs | Installer corruption | Re-download and reinstall Cloudbase-Init |
| Logs show “iterating metadata services” | Multiple metadata_services listed | Set only OvfService in the metadata_services line |
Checking the OVF Environment
To verify that VMware Tools is properly transporting OVF metadata, you can check the OVF environment XML on the guest:
# Check if OVF environment is available
Get-Content "C:\Program Files\VMware\VMware Tools\OvfEnvironment.xml" -ErrorAction SilentlyContinue
Advanced Configurations
Adding Custom Scripts to LocalScripts
You can place PowerShell or batch scripts in the LocalScripts directory that Cloudbase-Init will execute at boot:
C:\Program Files\Cloudbase Solutions\Cloudbase-Init\LocalScripts\
Scripts in this directory are executed in alphabetical order. This is useful for scripts that need to run on every boot rather than just the first boot.
Using Cloudbase-Init with Packer
For fully automated template creation with HashiCorp Packer, add a provisioner step:
provisioner "powershell" {
  inline = [
    "Invoke-WebRequest -Uri 'https://cloudbase.it/downloads/CloudbaseInitSetup_x64.msi' -OutFile 'C:\\CloudbaseInitSetup_x64.msi'",
    "Start-Process msiexec -ArgumentList '/i C:\\CloudbaseInitSetup_x64.msi /qn LOGGINGSERIALPORTNAME=COM1 USERNAME=Administrator INJECTMETADATAPASSWORD=TRUE LOCALSYSTEMSERVICE=TRUE' -Wait",
  ]
}

provisioner "file" {
  source      = "conf/cloudbase-init.conf"
  destination = "C:\\Program Files\\Cloudbase Solutions\\Cloudbase-Init\\conf\\cloudbase-init.conf"
}

provisioner "file" {
  source      = "conf/cloudbase-init-unattend.conf"
  destination = "C:\\Program Files\\Cloudbase Solutions\\Cloudbase-Init\\conf\\cloudbase-init-unattend.conf"
}
Multi-Cloud Blueprints
One of the biggest advantages of Cloudbase-Init is cloud-agnostic blueprints. The same blueprint and cloudConfig work across vCenter, Azure, AWS, and GCP cloud accounts — Cloudbase-Init automatically detects the appropriate metadata service for each cloud provider.
For vCenter-only deployments, specifying OvfService alone in the configuration is recommended for cleaner logs and faster initialization.
Summary
Cloudbase-Init is a powerful and flexible tool for Windows guest customization in VCF Automation environments. By following this guide, you have:
- ✅ Installed Cloudbase-Init on a Windows Server VM
- ✅ Configured both
cloudbase-init-unattend.conf(specialize phase) andcloudbase-init.conf(first logon phase) for OvfService - ✅ Prepared a generalized Windows template via Sysprep
- ✅ Created a cloud-agnostic blueprint with
remoteAccessandcloudConfigproperties - ✅ Deployed and verified the customized Windows instance
This approach gives you consistent, repeatable Windows provisioning with the flexibility to customize user accounts, hostnames, file creation, and script execution — all without manual intervention.
References
- Cloudbase-Init Documentation
- Cloudbase-Init GitHub Repository
- Cloudbase-Init OvfService Documentation
- Cloudbase-Init Plugins Reference
- Cloudbase-Init UserData Reference
- VMware Blog — Windows Guest Initialization with Cloudbase-Init (Archived)
- Michael Poore — Installing Cloudbase-Init on Windows for vRA Customisation