
Are you looking to streamline configuration management in your VMware by Broadcom Aria Automation environment? SaltStack Config 8.17, integrated into Aria Automation 8.18, offers powerful tools for automating and securing your infrastructure. In this guide, I’ll walk you through deploying SaltStack Config 8.17 using VMware Aria Suite Lifecycle Manager in an existing Aria Automation 8.18 setup. Whether you’re a solutions architect or IT administrator, this step-by-step tutorial will help you get started efficiently.
Prerequisites for Deploying SaltStack Config 8.17
Before diving in, ensure you’ve downloaded the SaltStack Config 8.17 binaries and have an operational Aria Automation 8.18 environment managed by Aria Suite Lifecycle Manager 8.18. Here’s what you’ll need:
- Aria Automation 8.18: Already deployed in your environment.
- Aria Suite Lifecycle Manager 8.18: Configured and connected to your VMware by Broadcom account.
- Binaries: SaltStack Config 8.18 installation package downloaded via Lifecycle Manager. Binaries can be downloaded from here.
- Permissions: Admin access to Lifecycle Manager and Aria Automation.
For a smooth deployment, verify compatibility using the VMware by Broadcom Interoperability Matrix.
Step-by-Step Guide to Deploy SaltStack Config 8.17
Assuming your binaries are ready, let’s deploy SaltStack Config 8.18 into your Aria Automation environment.
Step 1: Access Lifecycle Manager and Select Your Environment
- Log in to VMware Aria Suite Lifecycle Manager.
- Navigate to Environments in the left-hand menu.
- Locate your Aria Automation 8.18 environment, click the Menu (three dots), and select Add Product.

This opens the product addition wizard, where you’ll integrate SaltStack Config.
Step 2: Add SaltStack Config to Your Environment
- In the product list, check the box next to VMware Aria Automation SaltStack Config.
- Make sure the box for Automation-Integrated is selected.
- Click Next to proceed.
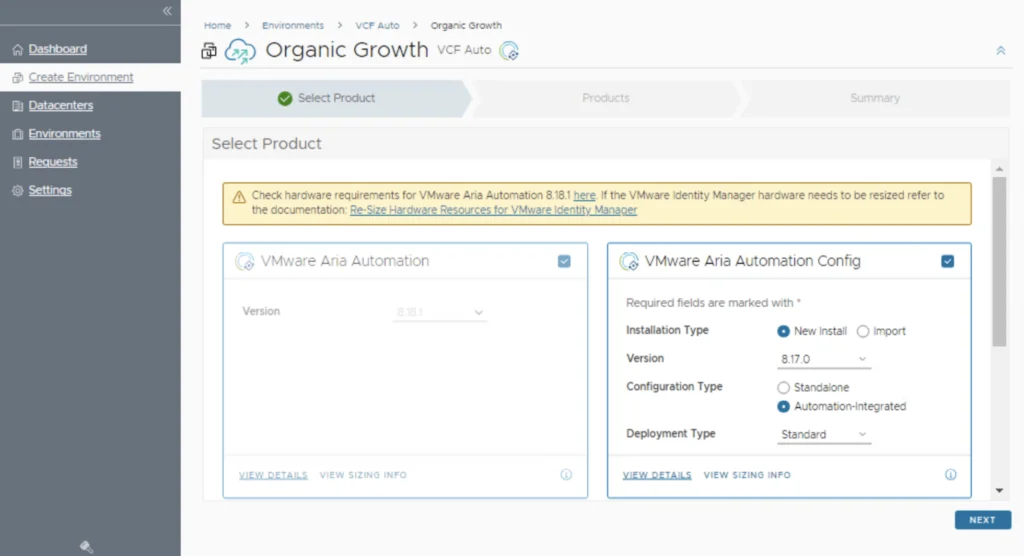
This action ties SaltStack Config 8.17 to your existing Aria Automation deployment, enhancing its configuration management capabilities.
Step 3: Accept the End User License Agreement (EULA)
- Review the EULA for SaltStack Config 8.17.
- Scroll to the bottom, check the Agree box, and click Next.
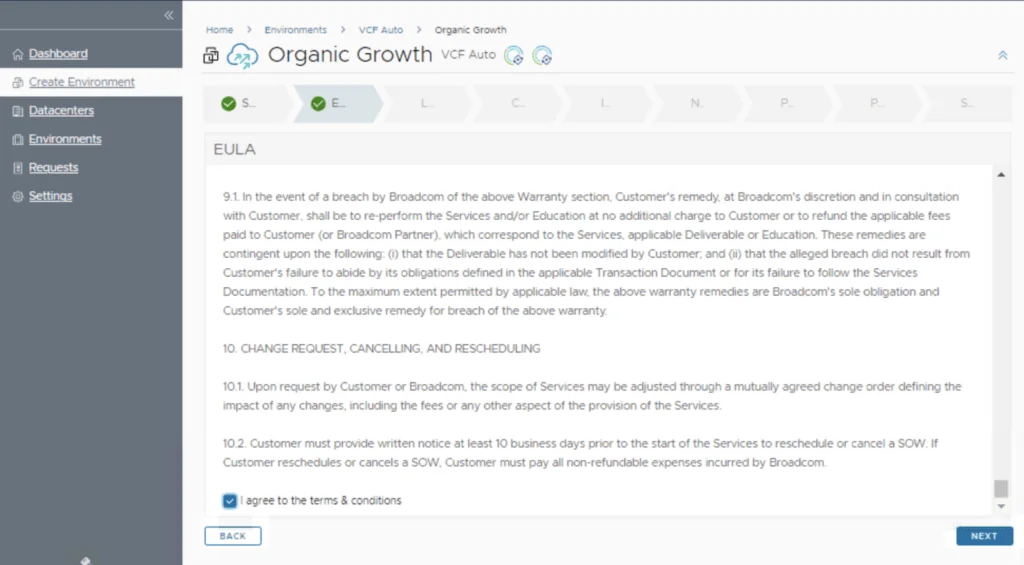
Read the EULA to understand the licensing terms
Step 4: Select Your License
- Click Select to choose your Aria Config license.
- Pick your license.
- Hit the Validate button to confirm compatibility, then click Next.
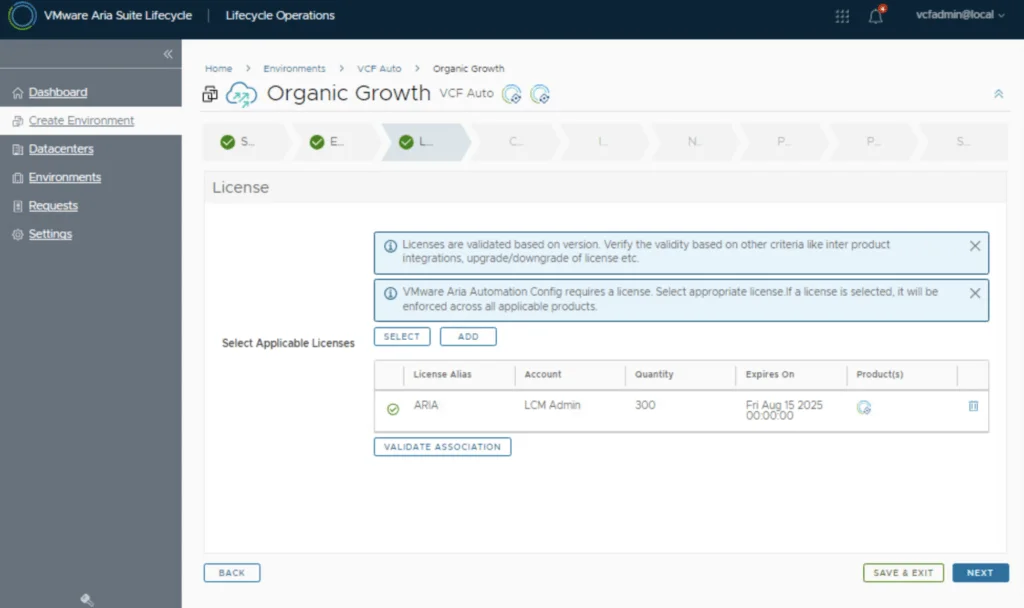
Validation ensures your environment supports SaltStack Config 8.17 without licensing issues.
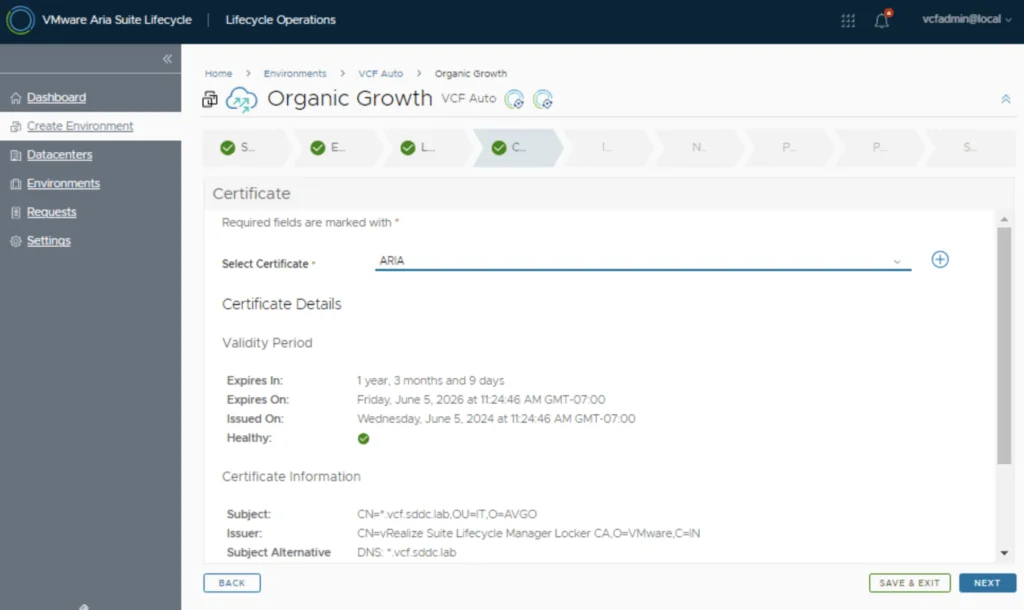
Step 5: Configure Certificates
- Choose an existing certificate from the list or generate a new one:
- To create a new certificate, click the + icon.
- Fill in the required fields (e.g., CN, SAN) and generate it.
- Once your certificate is ready, select it and click Next.
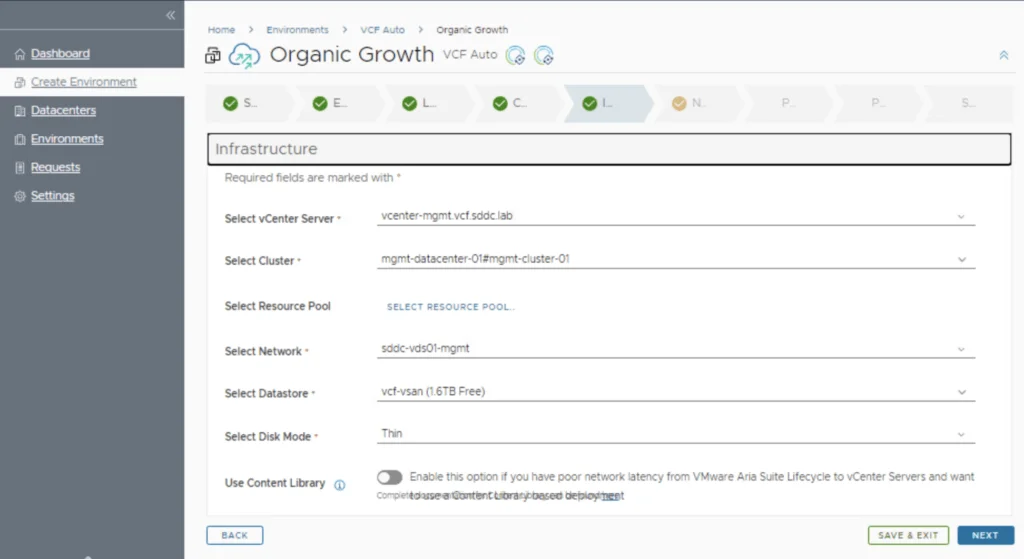
Step 6: Infrastructure Selection
- Select a vCenter Server, Cluster, Network, Datastore
- Click Next to navigate to configure the network.
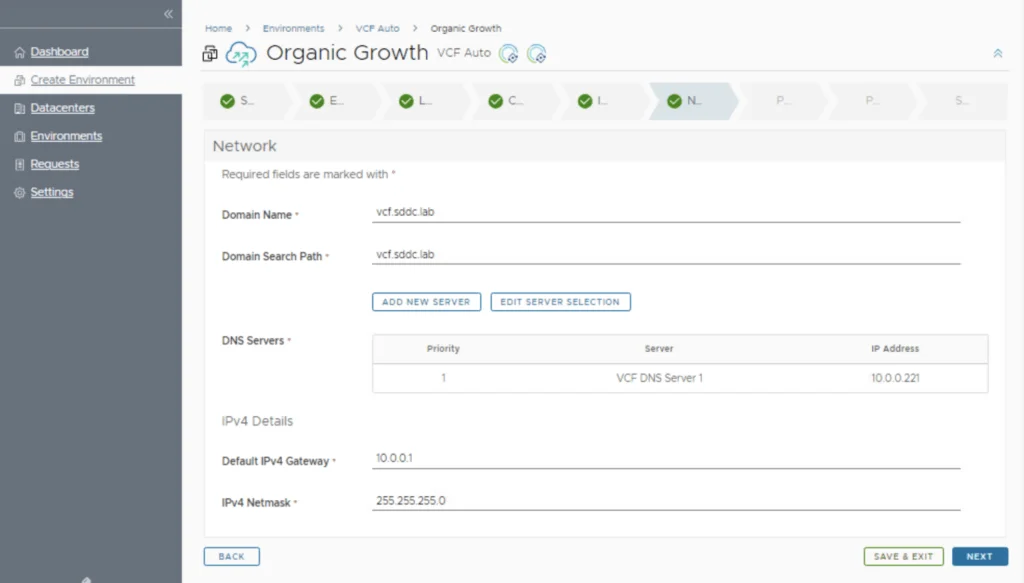
Step 7: Network Details
- Complete the network details.
- Click Next to navigate to the Products configuration page.
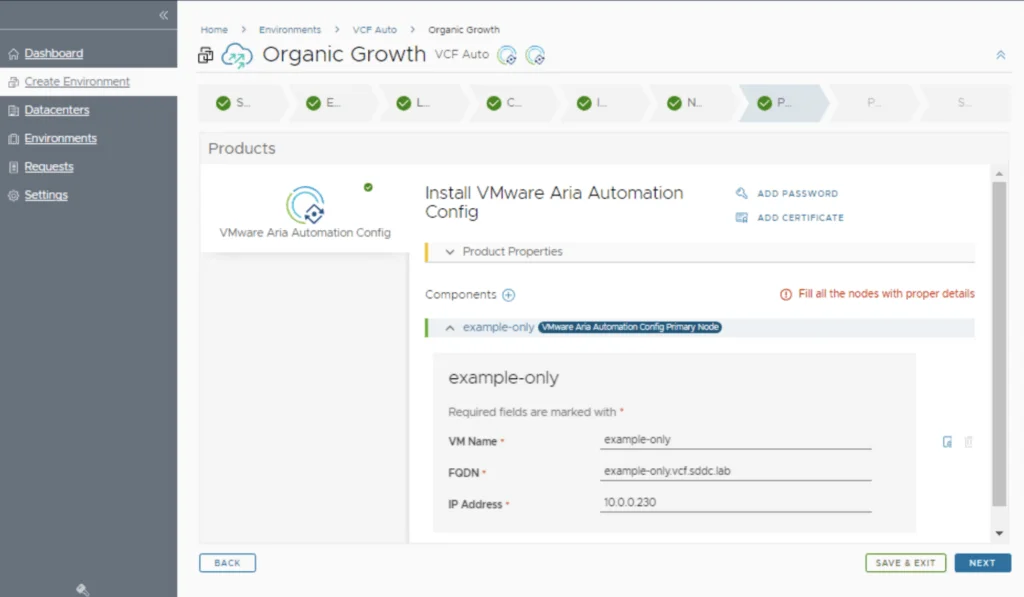
Step 8: Product Configuration
- Review your configuration settings (VM Name, certificate, FQDN, etc.).
- Click Next to navigate to the Precheck.
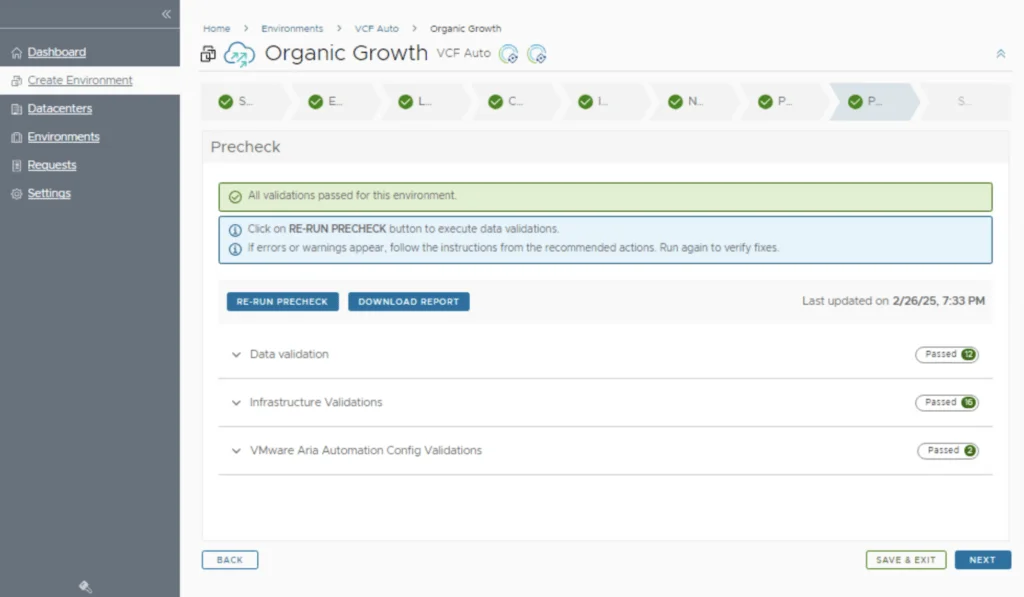
Step 9: Validate Precheck
- Click Run Precheck to initiate a recheck of the inputed configuration.
- Click Next to navigate to the Deployment review
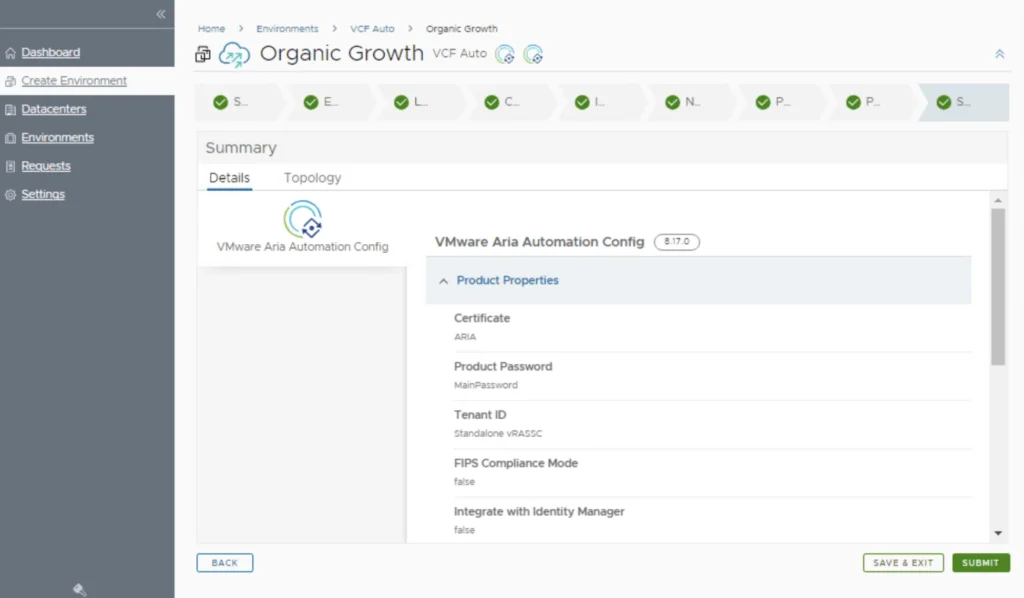
Step 10: Review and Submit the Deployment
- Review your configuration settings (product version, certificate, etc.).
- Click Submit to initiate the deployment.
Lifecycle Manager will now deploy SaltStack Config 8.17. You can monitor progress under the Requests tab.
Post-Deployment: Validation and Next Steps
After deployment, SaltStack Config 8.17 will appear in your Aria Automation environment. To validate:
- Log in to Aria Automation and confirm SaltStack Config is accessible via the UI.
- Test a basic job (e.g.,
test.ping) to ensure connectivity with managed nodes.
For advanced configuration, explore the VMware by Broadcom SaltStack Config Documentation or check out my other posts for tips on maintaining your setup.
Conclusion
Deploying SaltStack Config 8.17 via VMware Aria Suite Lifecycle Manager is a straightforward process that supercharges your Aria Automation 8.18 environment with robust configuration management. By following this guide, you’ll have it up and running in no time.
Related Posts: