Last year, when VCF 9.0 shipped, I covered the VCF Installer in three posts: deploying the appliance, configuring it, and deploying a VCF 9 instance. With VCF 9.1 generally available since May 12, 2026, it was time to run the whole flow again in the lab, and enough has changed that it earns a fresh walkthrough. This post covers the complete path in one go: downloading and deploying the 9.1 installer appliance, connecting the depot, downloading binaries, and deploying a new VCF fleet on top of an existing vCenter. I used the 9.1.0.0400 installer from the July 2026 refresh.
What changed since the 9.0 posts
The overall shape is the same (deploy the OVA, connect a depot, download binaries, run the deployment wizard) but 9.1 moves a few important pieces, per the official What’s New for the VCF Installer and the depot KBs:
- The download token is gone. Depot authentication now uses a Download Service ID + Activation Code obtained from the VCF Business Services console. The token flow from my 9.0 configuration post no longer applies. See KB 443647.
- VCF Management Services are deployed by default. The installer now provisions the VCF services runtime, fleet lifecycle, identity broker, software depot, Salt RaaS, telemetry, and the centralized License Server as part of a new deployment.
- Integrated planning workflow. The wizard generates CPU, memory, storage, VLAN, and FQDN requirements up front and validates your infrastructure against them, including a Pre-fill generated FQDNs button.
- Auto-generated passwords. The installer can generate the component passwords for you, retrievable after deployment.
- Dual-stack support. The appliance OVA now asks for an IP Address Version (IPv4 only, or IPv4 and IPv6), and existing dual-stack environments are supported, though wizard-driven deployments on an existing vCenter remain IPv4-only; dual-stack goes through a JSON spec.
- Lowercase FQDNs are now formalized. The 9.1 planning docs state do not use capital letters in the FQDN, and uppercase component FQDNs are a documented deployment-failure known issue.
Download the VCF Installer
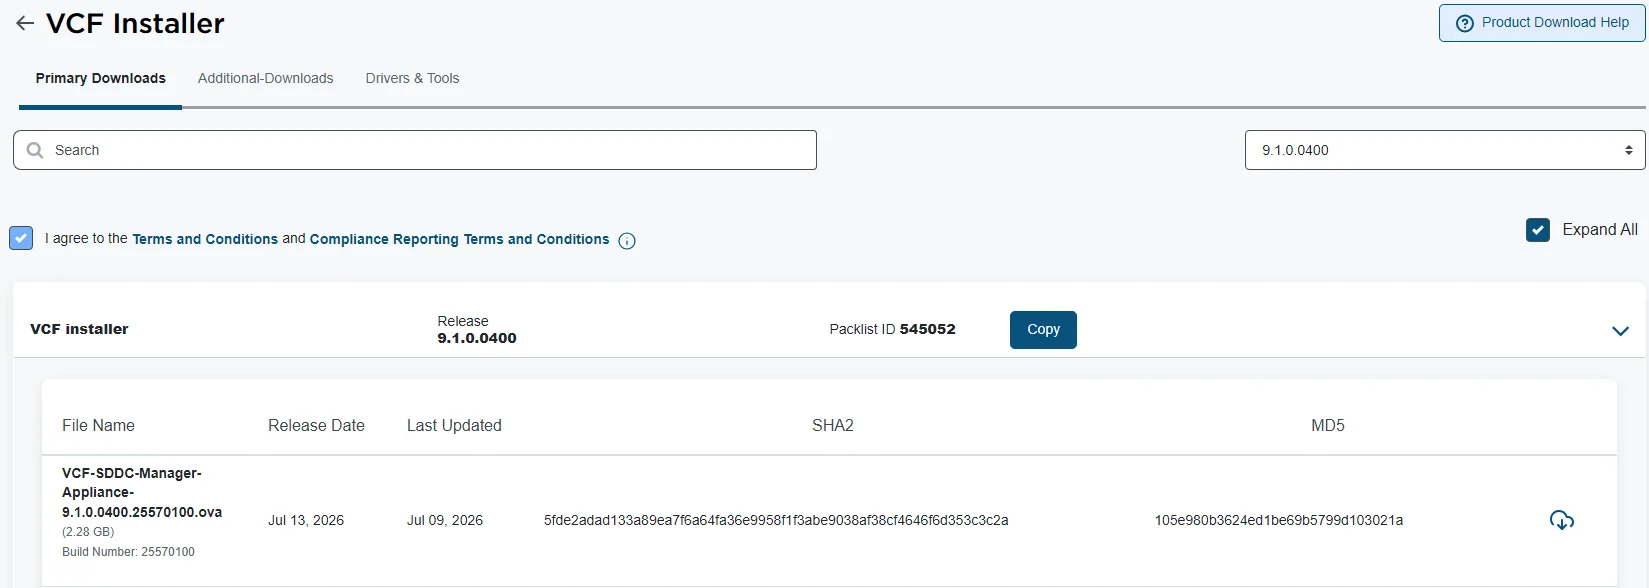
The appliance OVA comes from the Broadcom Support Portal at support.broadcom.com: select the VMware Cloud Foundations division, go to My Downloads, and pick VMware Cloud Foundation 9 with your target release. If the portal navigation fights you, KB 401497 walks through it.
- Select the release. I grabbed 9.1.0.0400 from the July 2026 patch wave
- Agree to the Terms and Conditions
- Download VCF-SDDC-Manager-Appliance-9.1.0.0400.25570100.ova (2.28 GB) and verify the checksum
Deploy the VCF Installer appliance
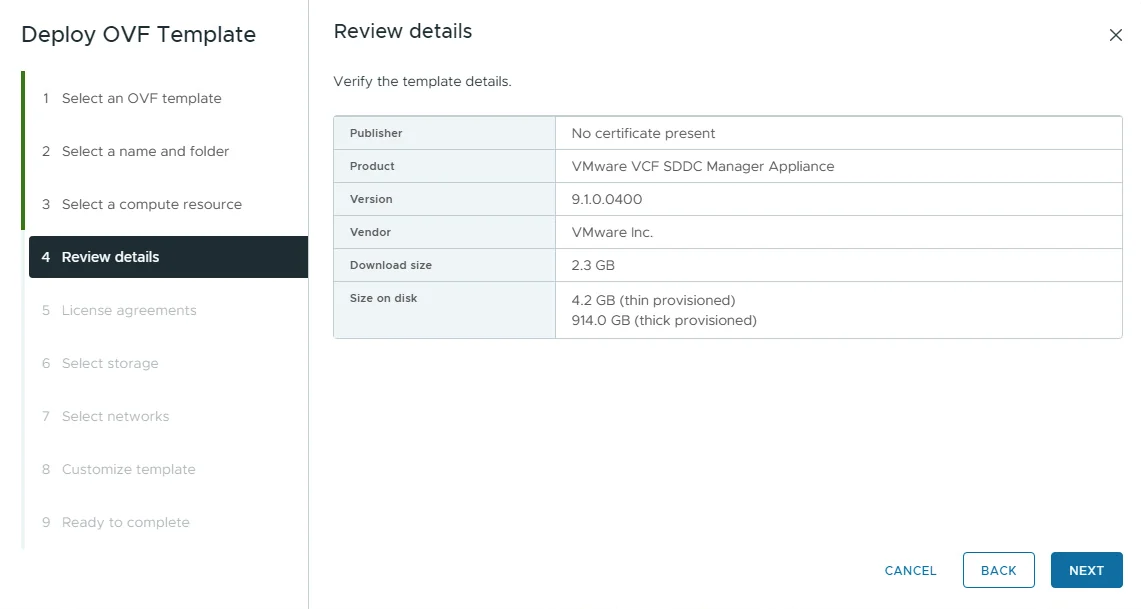
Sizing is unchanged from 9.0: 4 vCPUs, 16 GB RAM, and 914 GB storage (thin provisioning keeps that honest), per the official deployment page. The docs describe two placement options: on one of the ESX hosts that will form the management domain (the appliance is converted into SDDC Manager during deployment), or outside the management infrastructure entirely, where one appliance can deploy multiple platforms. As in the 9.0 post, I am deploying the OVA through an existing vCenter.
- Log in to vCenter with a user that can deploy an OVF
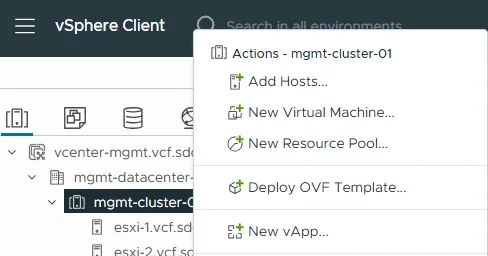
- Right click the cluster and click Deploy OVF Template
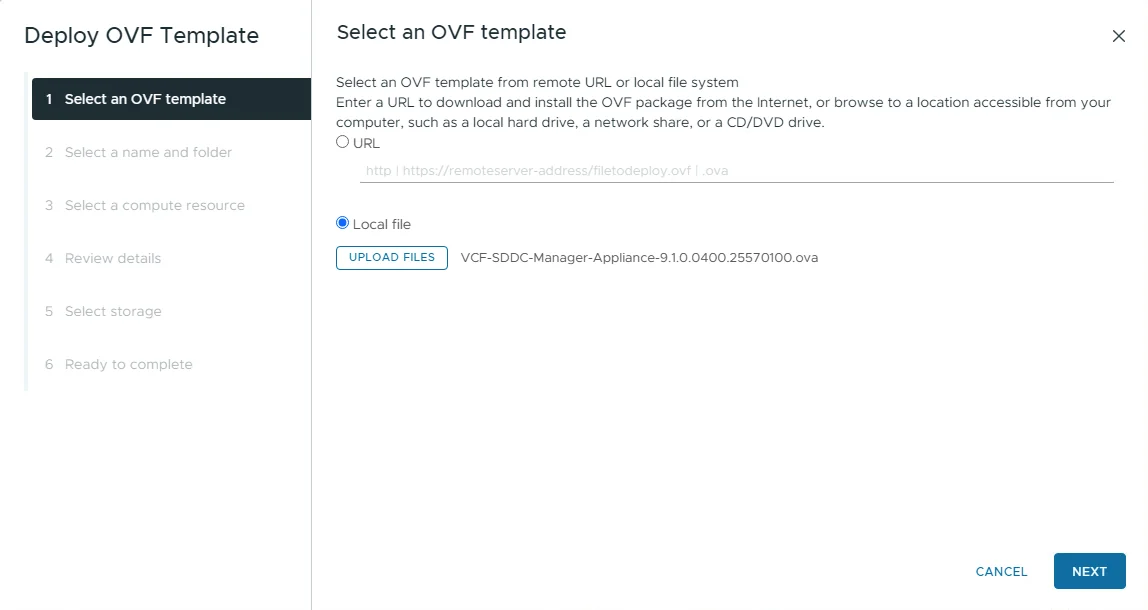
- Select Local file and upload the installer OVA
- Click Next
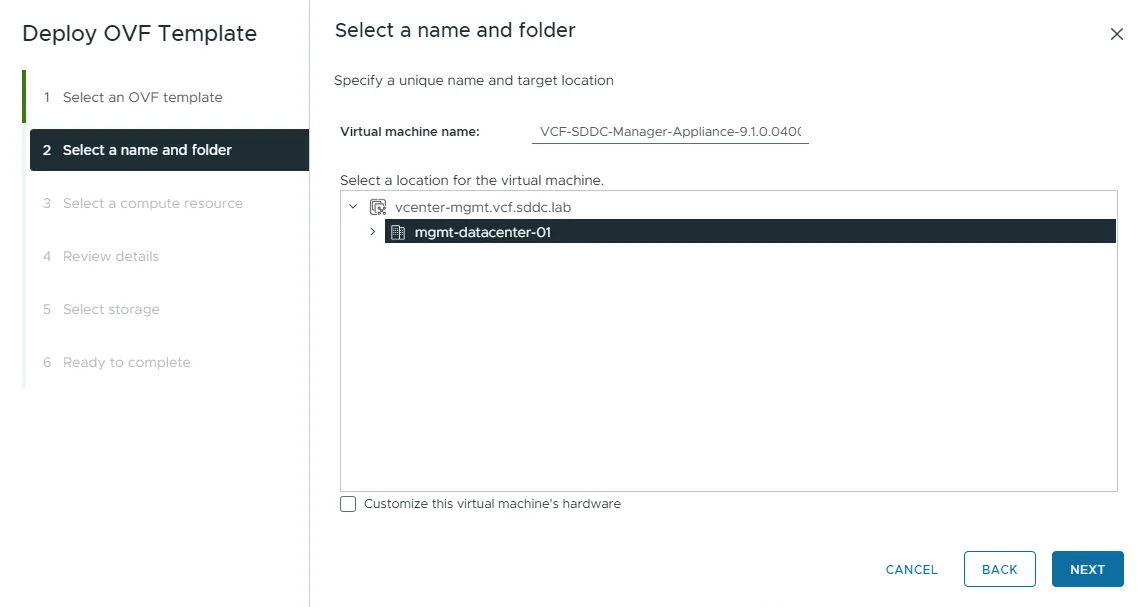
- Give the appliance a name
- Select a deployment location
- Click Next
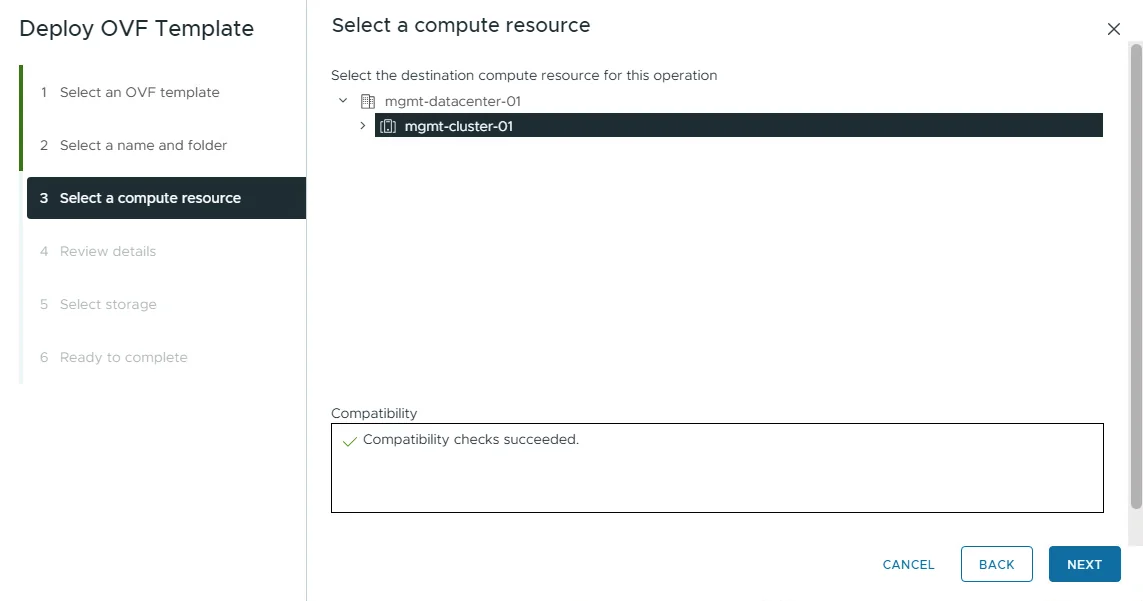
- Select a compute resource and wait for the compatibility checks
- Click Next
- Review the deployment details, note the 914 GB thick footprint vs 4.2 GB thin
- Click Next
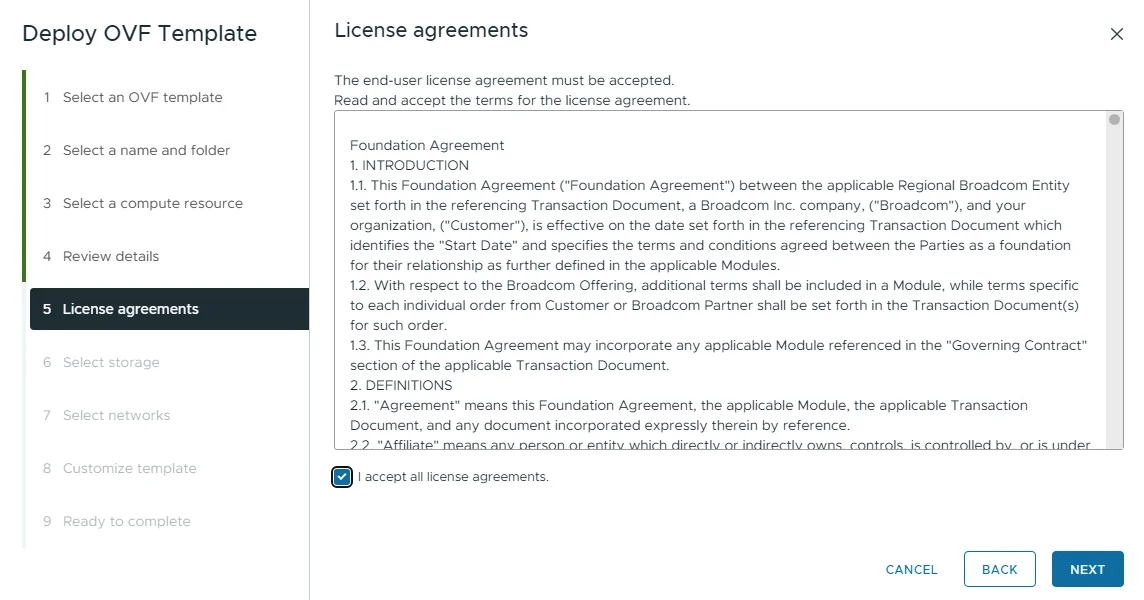
- Read and accept the license agreements
- Click Next
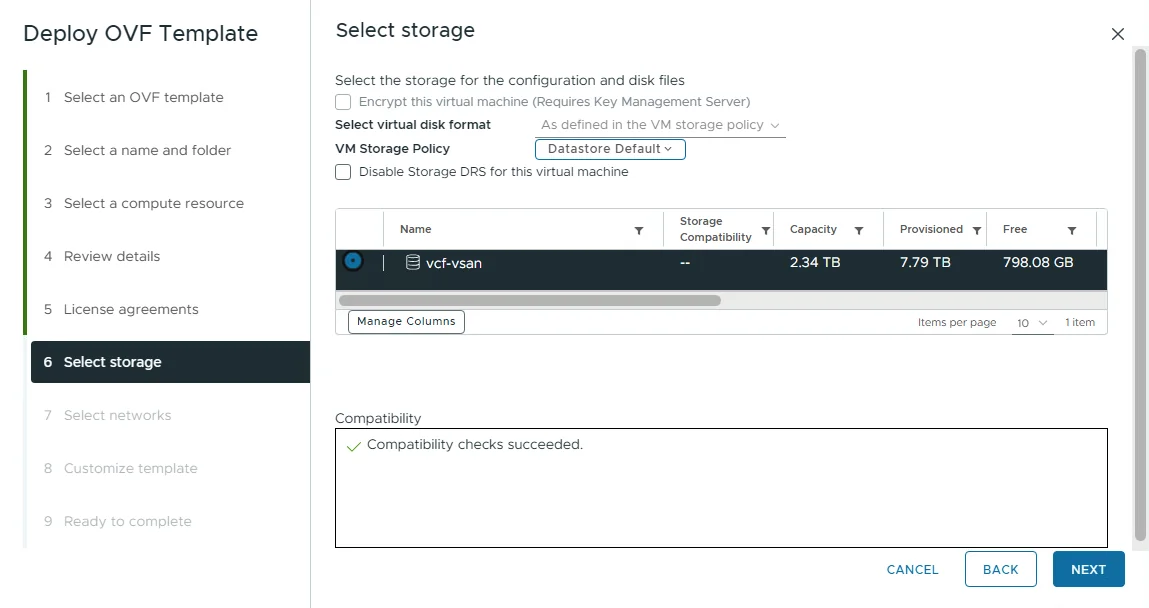
- Select a datastore for the deployment
- Click Next
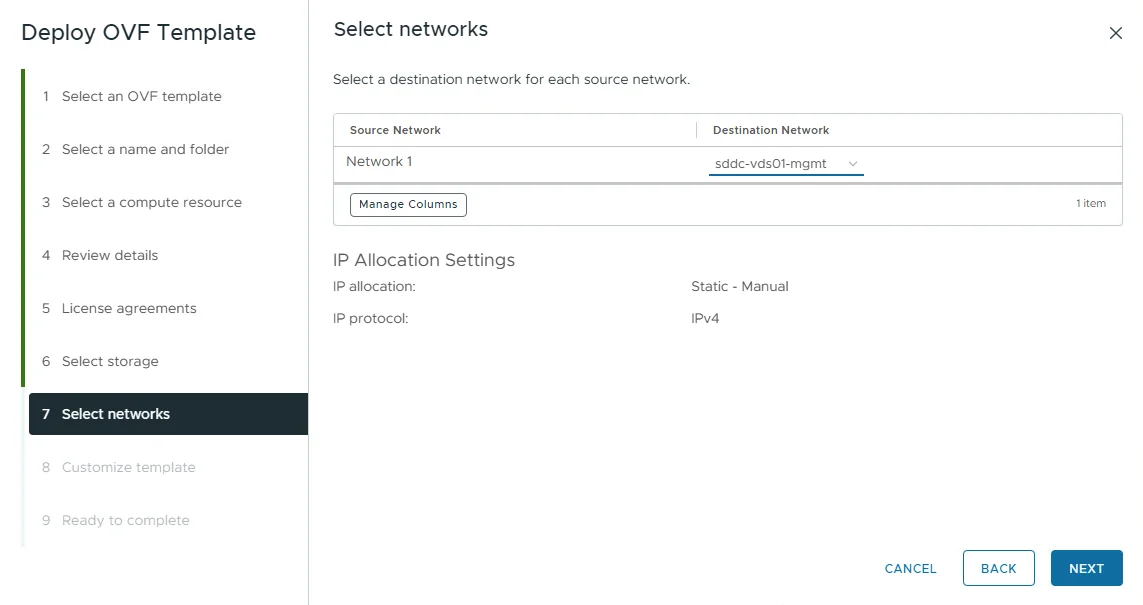
- Select the destination network: the appliance needs to reach the ESX hosts, the VM management network, DNS, and NTP
- Click Next
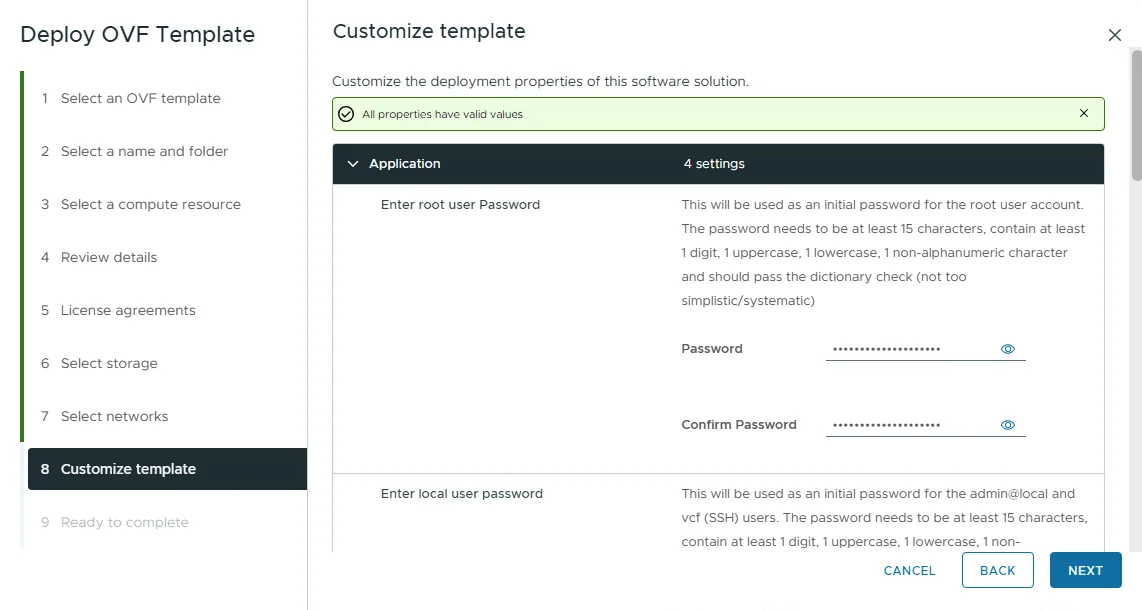
- Fill in the template customization: root and local user passwords (minimum 15 characters with the usual complexity rules; the local password is what you will use for admin@local in the UI and vcf over SSH), hostname, networking, DNS, and NTP
- Click Next
This is also where 9.1 differs from 9.0: the networking section now starts with an IP Address Version selector, with IPv6 address, prefix length, and gateway fields if you go dual-stack.
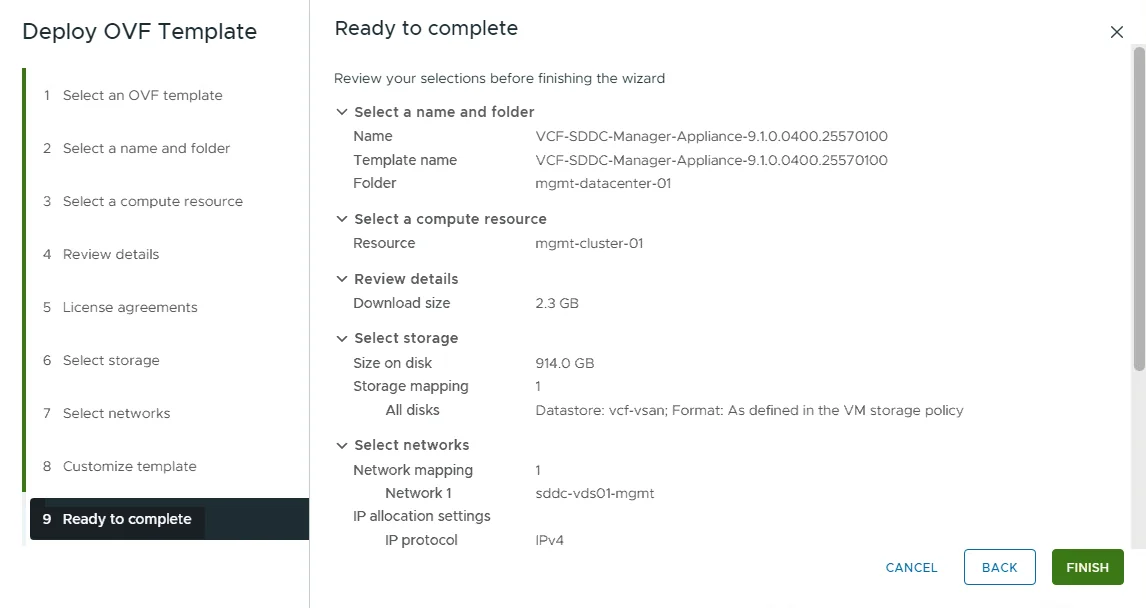
- Review the summary
- Click Finish and wait for the deployment to complete
Log in and connect the depot
Once the appliance is up, navigate to https://ip_address/ui or https://hostname/ui. Same as 9.0, the services take a few minutes to start after first boot.
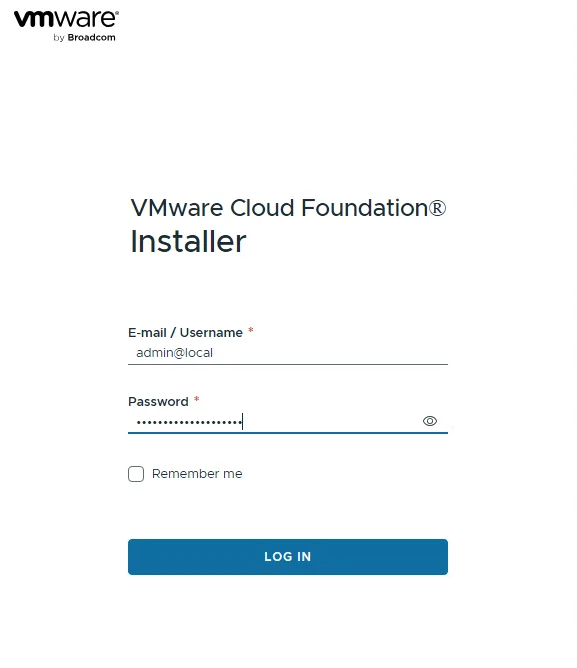
- For username use admin@local
- Enter the local user password from the OVA deployment
- Click Log in
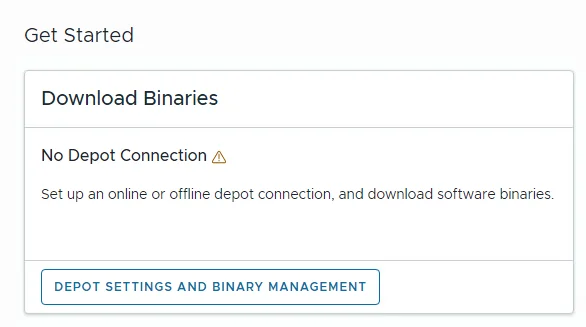
The Get Started page opens with the Download Binaries card flagging No Depot Connection.
- Click Depot Settings and Binary Management
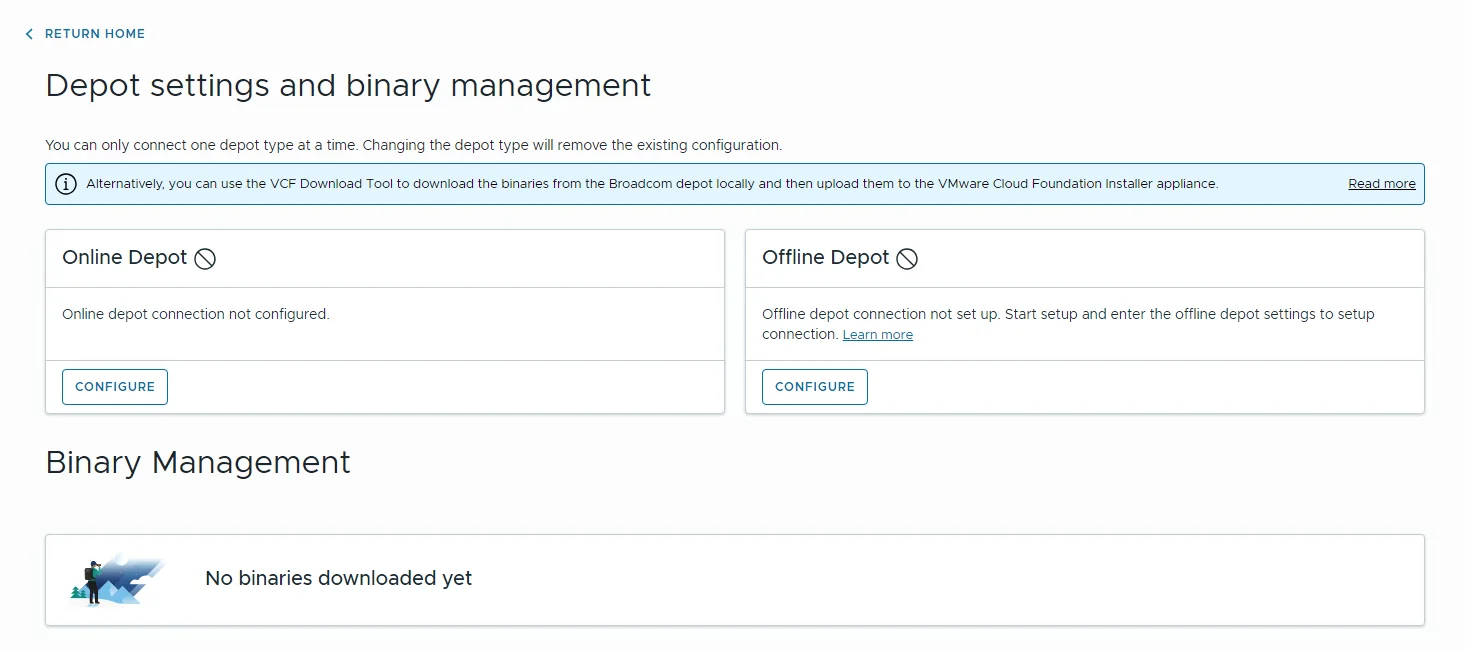
Both depot types are available: online (direct or via proxy) and offline, fed by the VCF Download Tool, only one can be connected at a time. For air-gapped environments the official offline depot procedure covers the Download Tool flow; William Lam also documented the new HTTP offline depot support in 9.1.
- Click Configure under the Online Depot tile
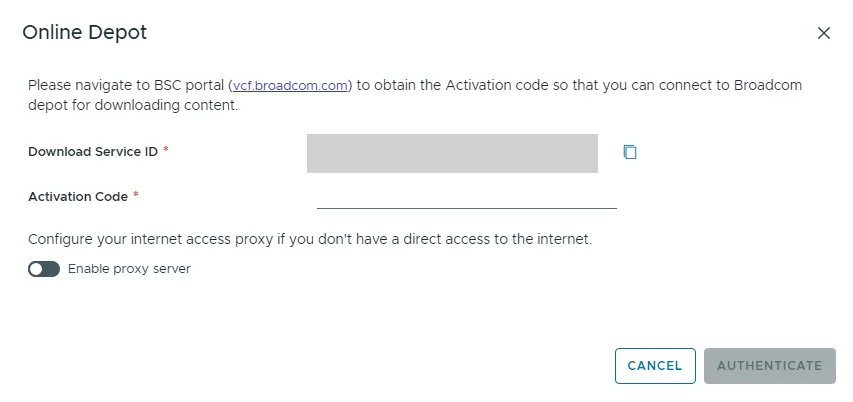
Here is the big change from 9.0: instead of pasting a download token, the dialog shows the appliance’s Download Service ID (the docs and KB call it the Software Depot ID). Take that ID to the BSC portal at vcf.broadcom.com, register it, and you get an Activation Code back; the full flow is in the official depot procedure and KB 443647. The download token from KB 390098 that we used in the 9.0 post is not used here anymore.
- Copy the Download Service ID and register it in the BSC portal to obtain the Activation Code
- Enter the Activation Code (enable the proxy toggle if you need one)
- Click Authenticate
Download the binaries
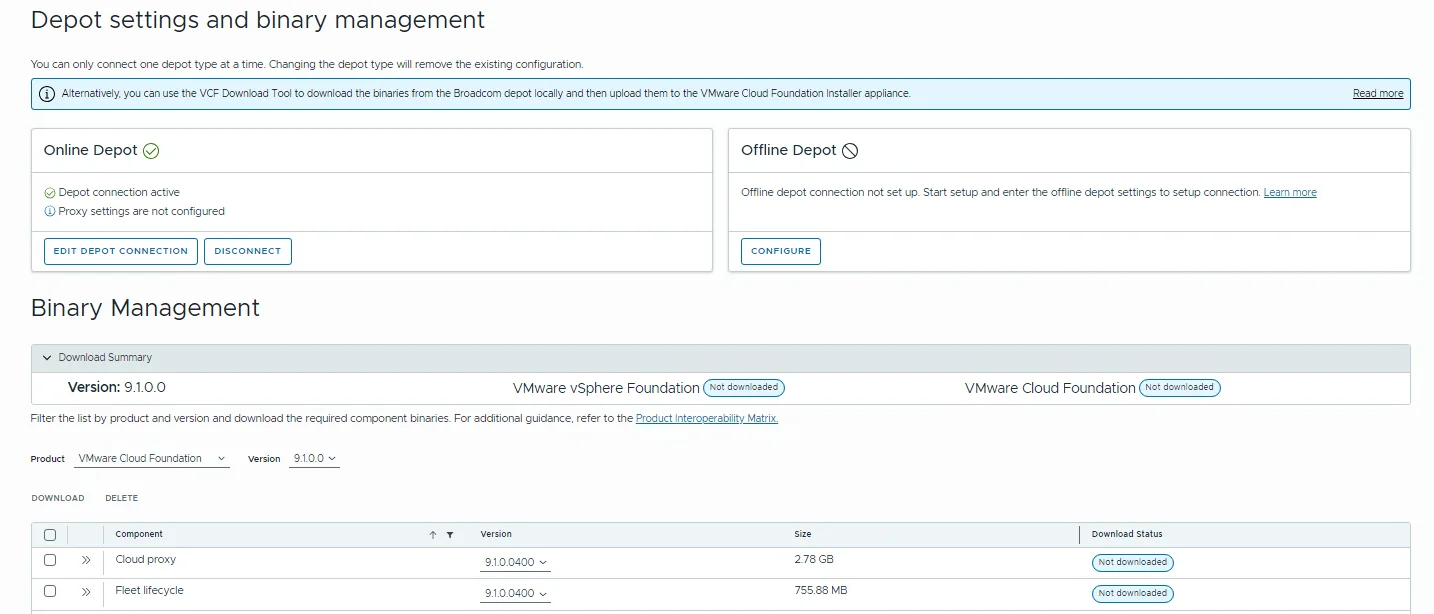
With the depot connected, the Binary Management section lists everything available for the release.
- Confirm the Online Depot tile shows Depot connection active
- In Binary Management, select the product and version, VMware Cloud Foundation 9.1.0.0 in my case
- Select the binaries and click Download
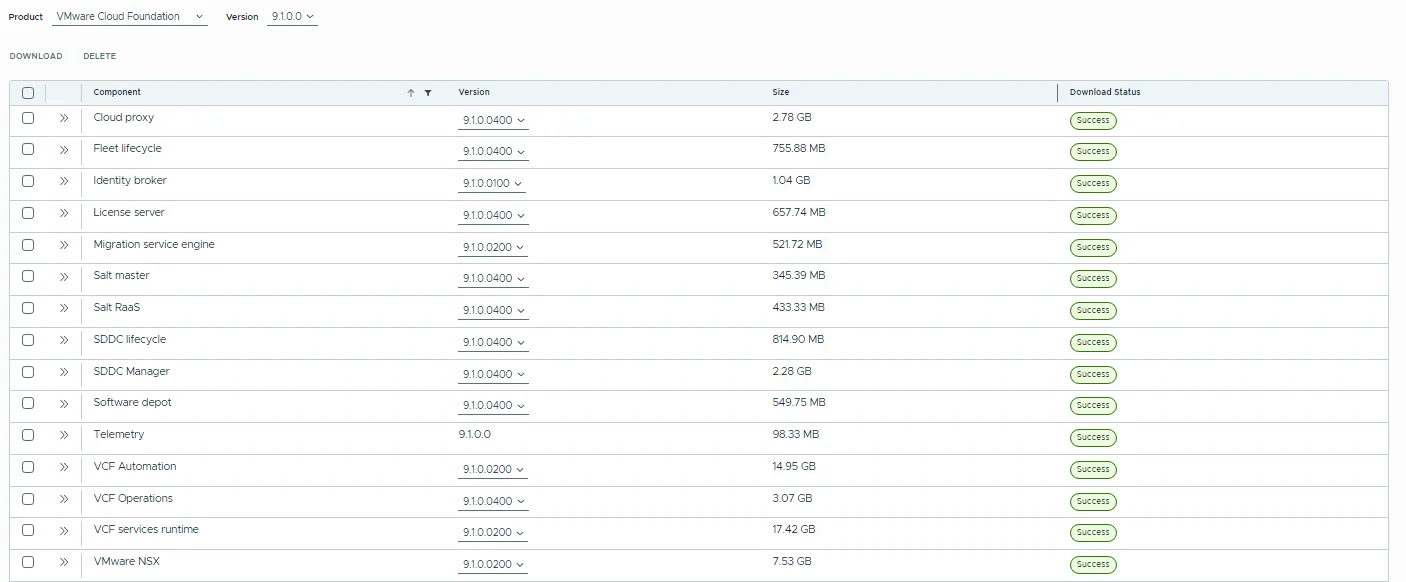
The component list is a good illustration of how 9.1 patch waves work: the installer pulls the latest patch of each component rather than a single uniform build: SDDC Manager 9.1.0.0400, NSX 9.1.0.0200, VCF Automation 9.1.0.0200, VCF Operations 9.1.0.0400, and so on. William Lam has a good write-up of this default behavior if you need to pin earlier versions. Also note the sizes, VCF services runtime alone is 17.42 GB and VCF Automation 14.95 GB, so give the downloads some time.
Start the Deployment Wizard
- Click Return Home: the Deploy card sits next to Download Binaries. Progress in the wizard is saved locally in the browser after each step, so you can safely step away
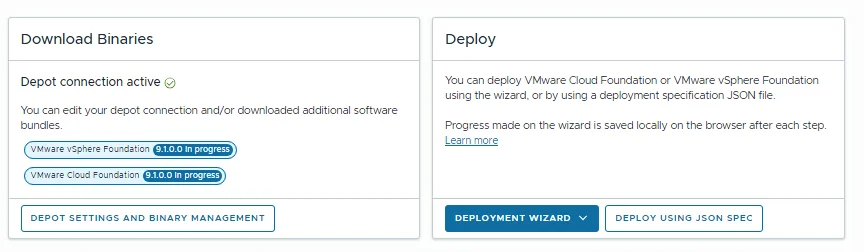
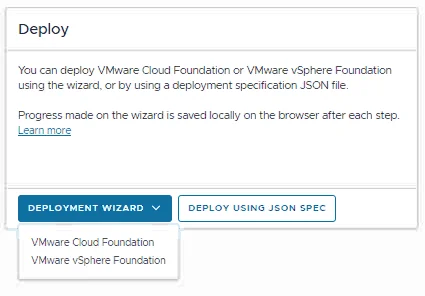
- Click Deployment Wizard and select VMware Cloud Foundation
The dropdown also offers VMware vSphere Foundation: the 9.1 installer deploys VVF through the same wizard framework, with a reduced flow (no NSX Manager or SDDC Manager steps). That is a post for another day; everything below follows the VCF path.
Deploy VMware Cloud Foundation
The wizard runs through four phases: Introduction, Plan, Prepare, Deploy; the official procedure is Start a New VCF Fleet or a New VCF Instance Deployment.
Introduction
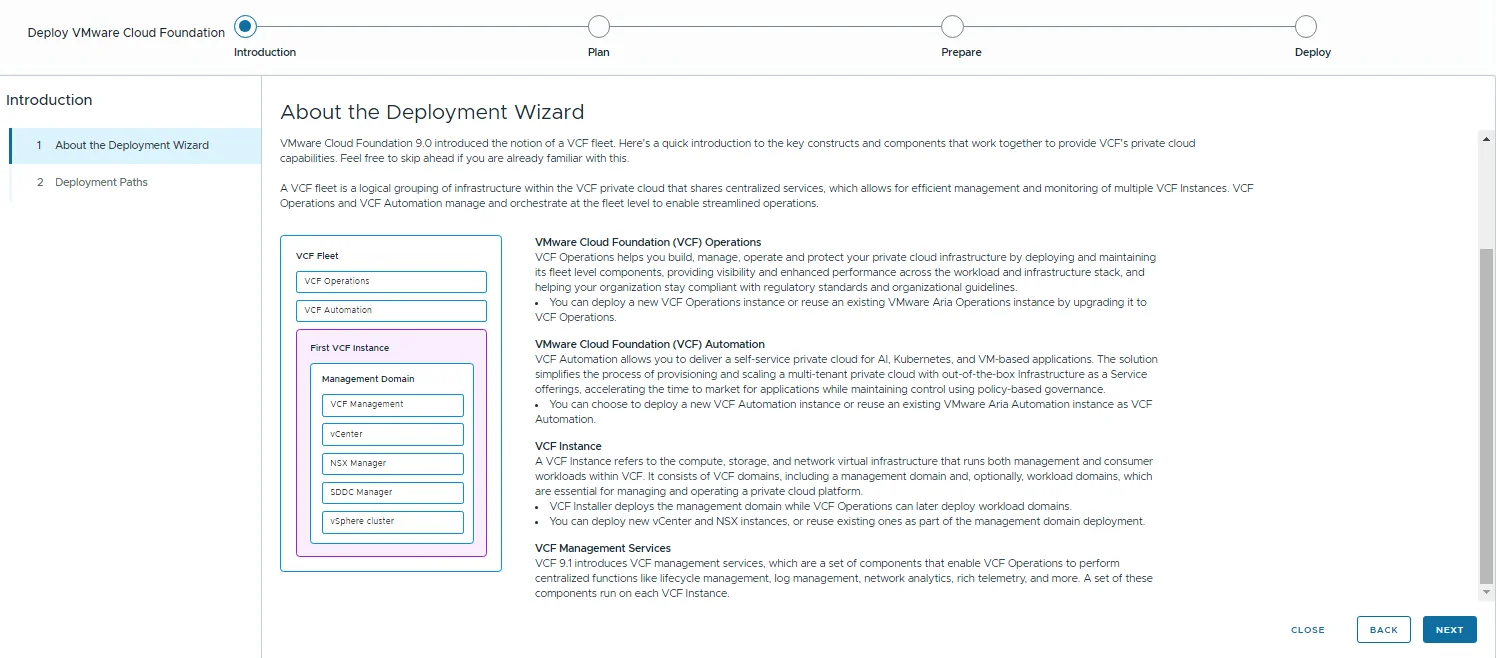
The About page is worth an actual read: it diagrams the VCF fleet concept and calls out that VCF 9.1 introduces VCF management services inside the management domain, next to vCenter, NSX Manager, and SDDC Manager. The installer deploys the management domain; workload domains come later from VCF Operations.

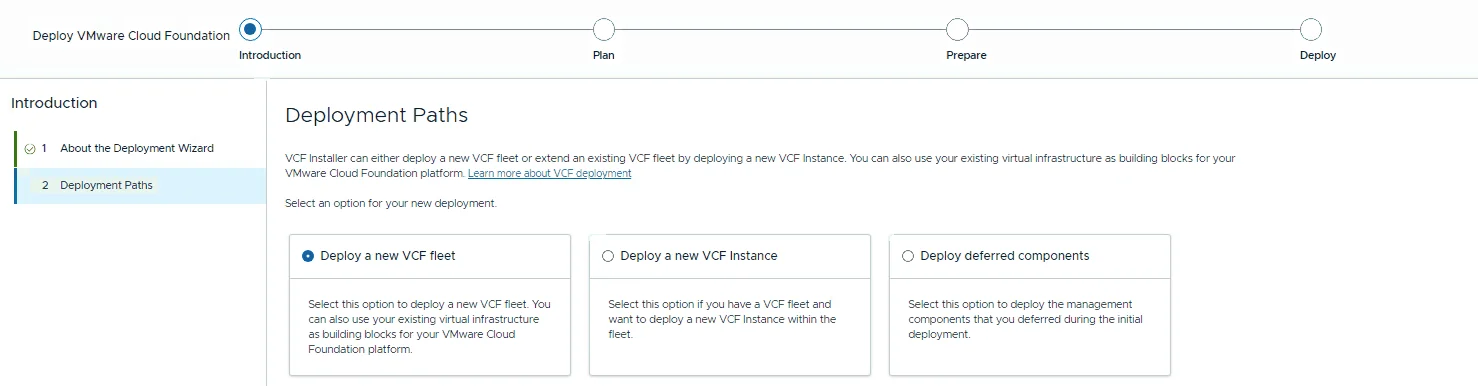
Three deployment paths are offered: a new VCF fleet, a new VCF instance joining an existing fleet’s VCF Operations, or deploying deferred components. Same as in my 9.0 fleet post, this lab is a fresh start.
- Select Deploy a new VCF fleet
- Click Next
Plan
- Check I have an existing vCenter instance: the wizard will collect and validate the details later
- Click Next
You can also flag an existing VCF Operations 9.1 instance or an NSX-registered vCenter here. VCF Automation is no longer a hard requirement at deployment time; it can be connected or deployed later as a day-N operation.
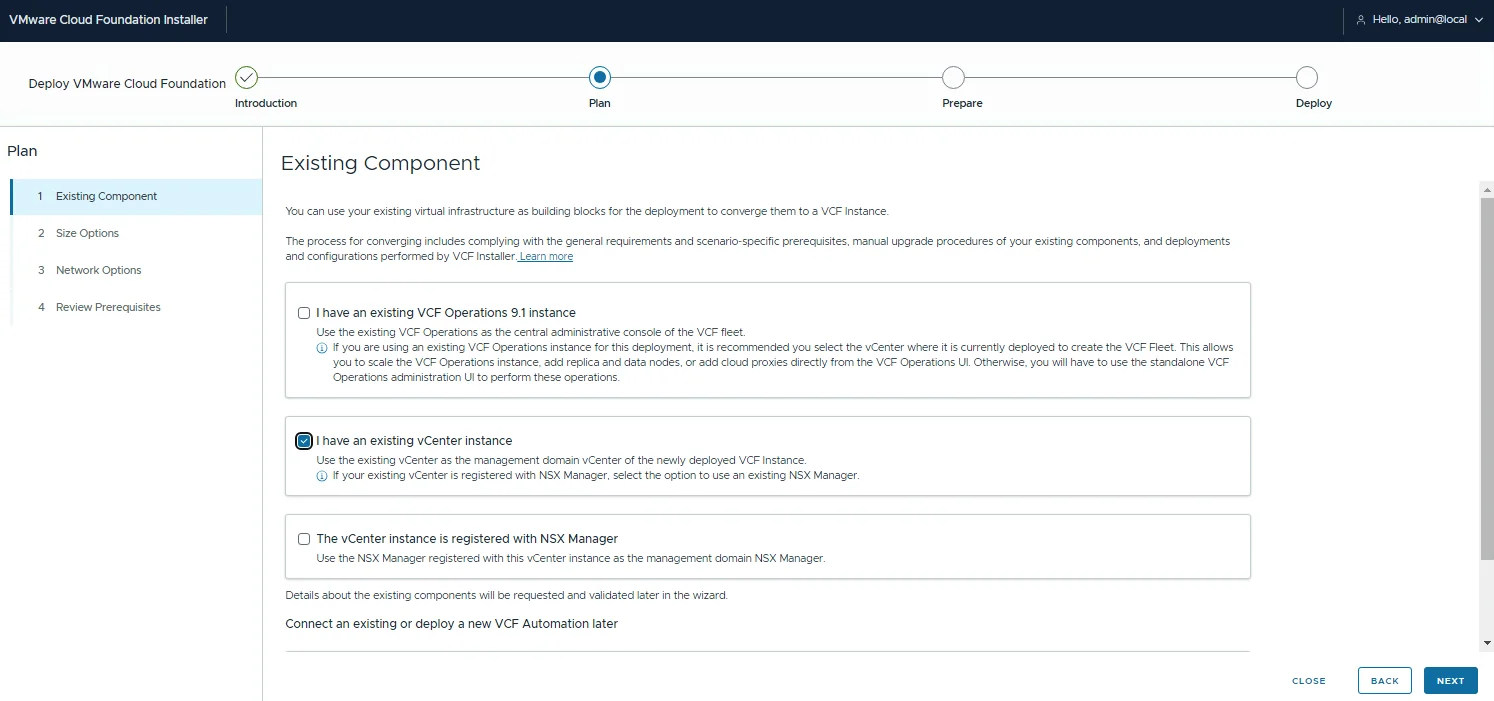
- Select the Deployment model. I went with Simple, which locks the size to Small
- Review the component sizing table and click Next
The sizing table is part of the new integrated planning workflow, and it is worth pausing on: VCF management services alone ask for 40 vCPUs, 82 GB RAM, and 3 TB of disk in this smallest configuration.
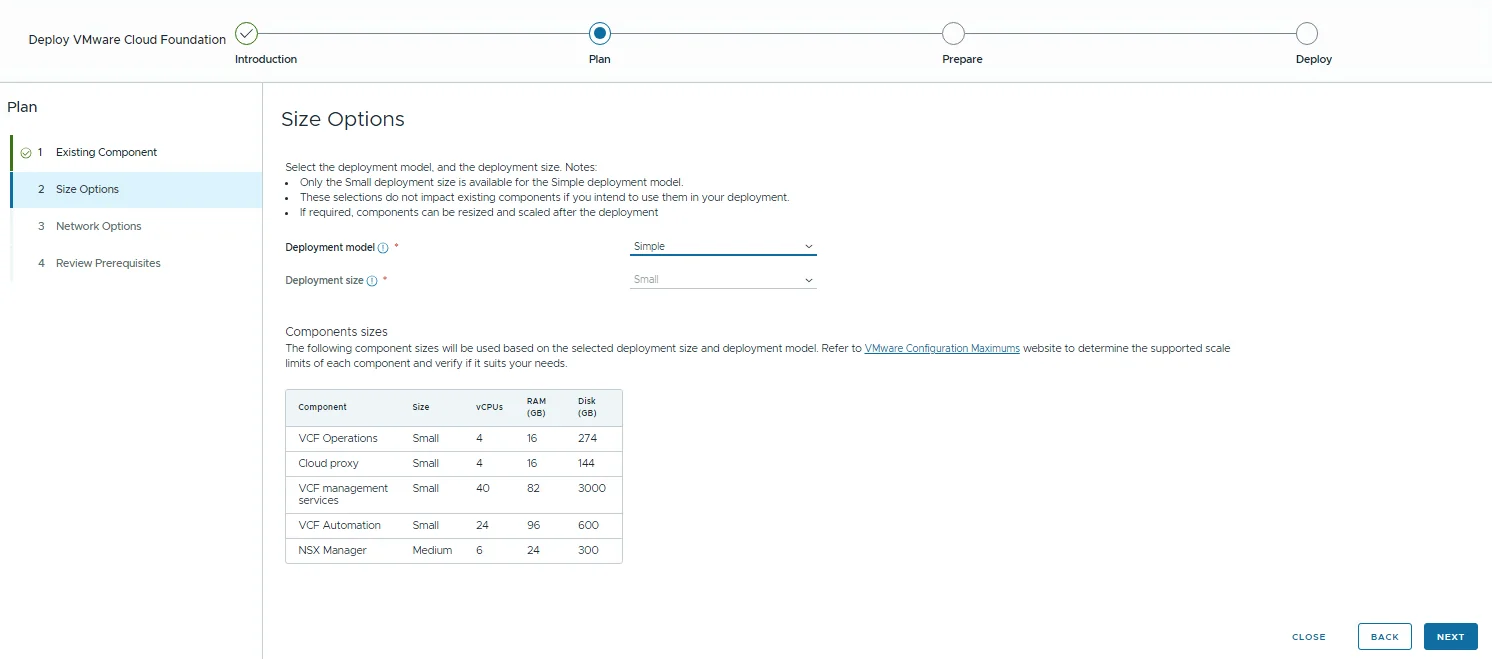
- Review the Network Options: by default VCF Operations, VCF Automation, and the management services land on the VM management network, and a distributed Transit Gateway is configured to make the domain VPC-ready
- Click Next (or Customize if you need separate networks)
One caveat straight from the wizard: with an existing vCenter the wizard supports IPv4-only; dual-stack deployments have to go through a JSON spec.
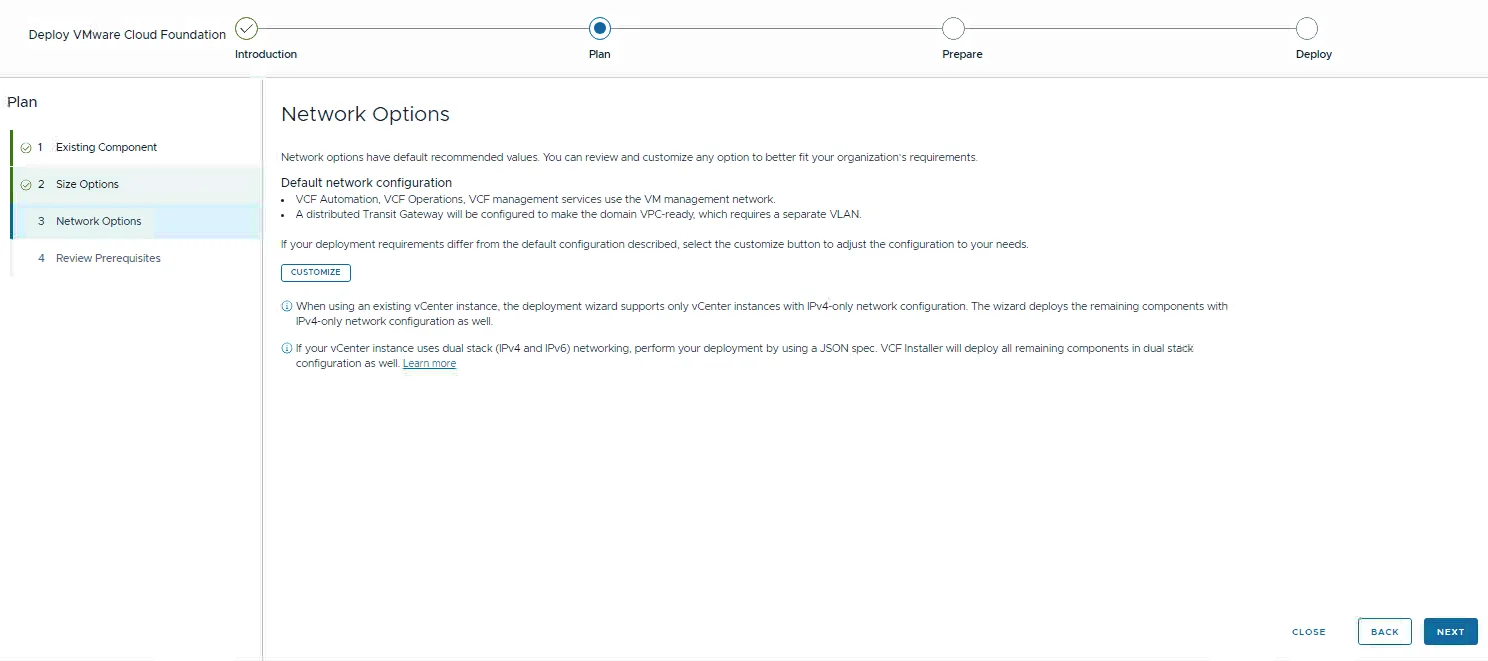
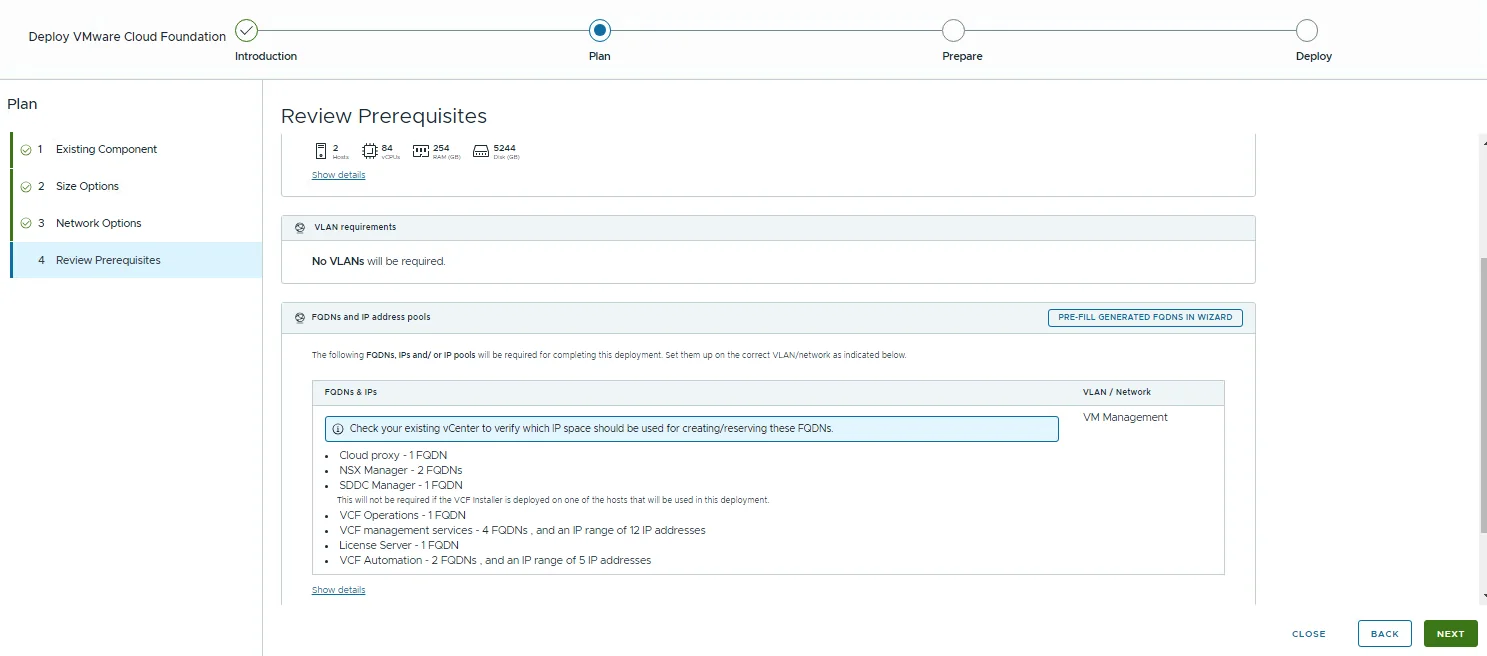
The Review Prerequisites step is the payoff of the planning workflow: capacity totals (2 hosts, 84 vCPUs, 254 GB RAM, 5,244 GB disk for my configuration), VLAN requirements (none for this path), and the exact FQDN and IP requirements: 12 IPs for the management services pool, 5 for VCF Automation, plus FQDNs for Cloud proxy, NSX Manager, VCF Operations, and the License Server. The Pre-fill generated FQDNs in wizard button carries these into the later steps. Remember: lowercase only, forward and reverse resolvable.
- Create the DNS records and reserve the IP ranges
- Click Next
Prepare
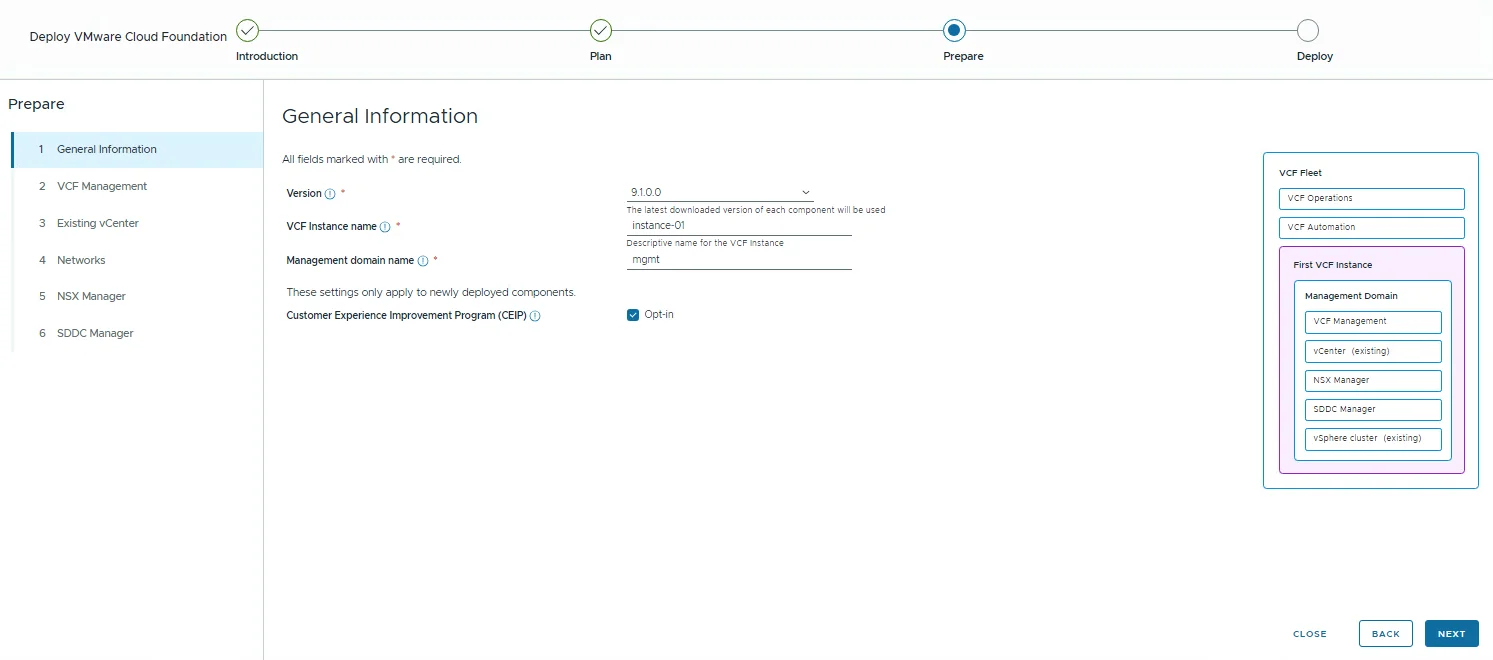
- Select the Version: 9.1.0.0, with the latest downloaded patch of each component applied automatically
- Name the VCF instance and the management domain
- Click Next
The VCF Management step collects the FQDNs for VCF Operations, the License Server, and the fleet, instance, and services-runtime components; this is where the pre-filled FQDNs from the Plan phase save the typing.
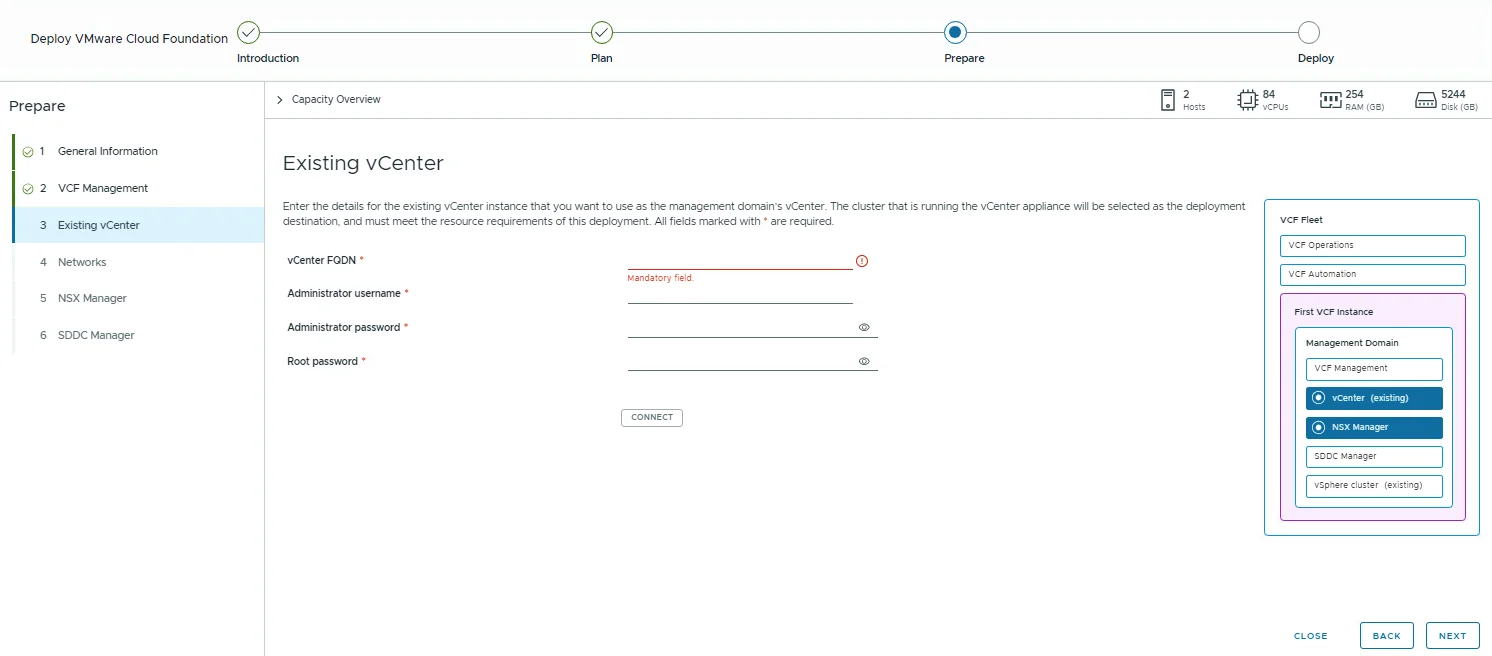
- Enter the details of the existing vCenter: FQDN, administrator, and root credentials
- Click Connect: the cluster running the vCenter appliance is selected as the deployment destination
- Click Next
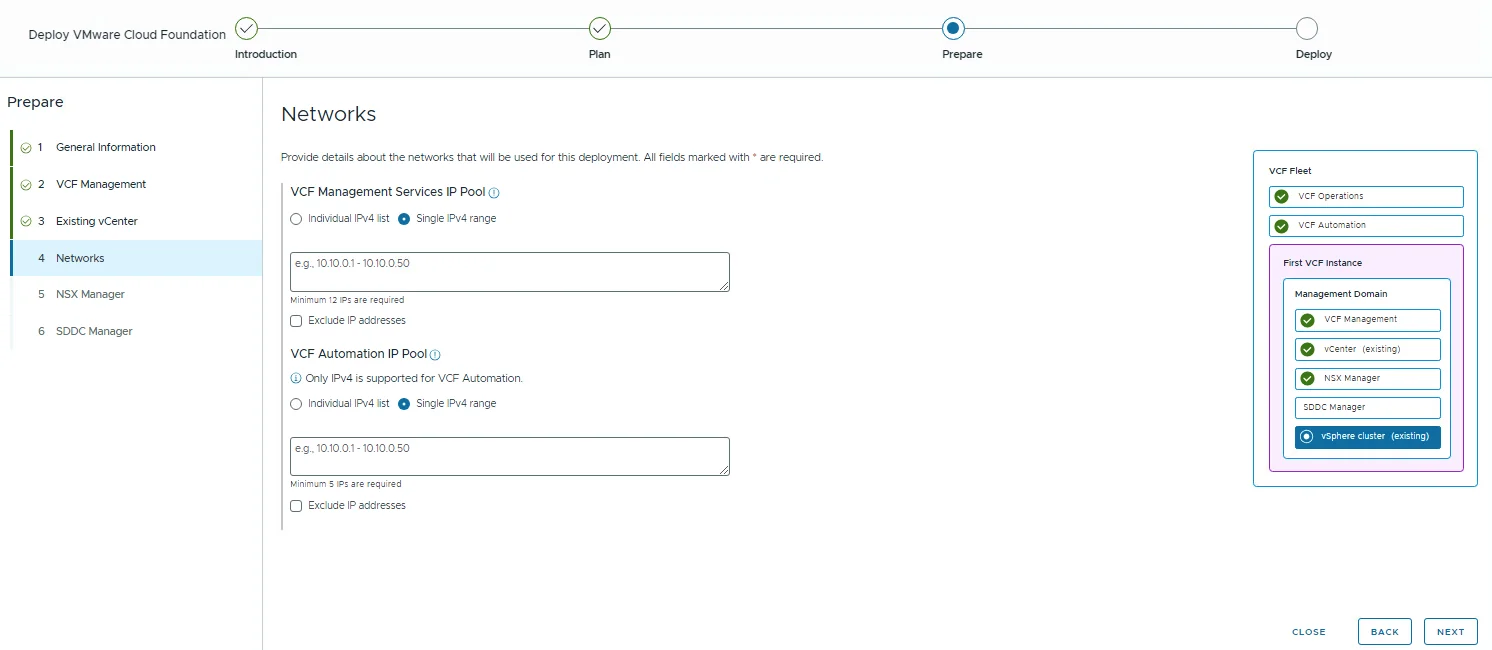
- Provide the IP pools, a single IPv4 range works for both: minimum 12 addresses for the VCF Management Services pool and 5 for the VCF Automation pool
- Click Next
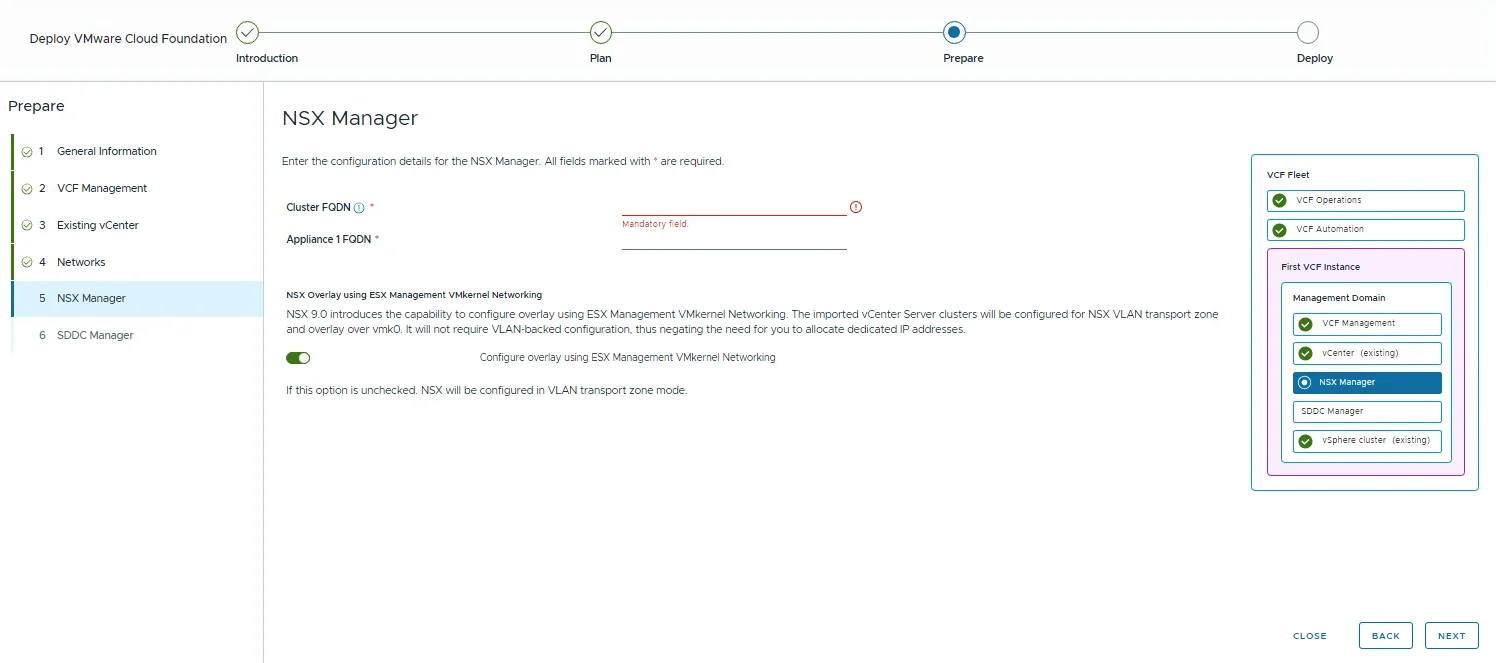
- Enter the NSX Manager cluster and appliance FQDNs
- Decide on the overlay networking mode
- Click Next
The Configure overlay using ESX Management VMkernel Networking toggle is one of my favorite quality-of-life items in 9.x: NSX 9 can run overlay over the ESX management VMkernel network without a VLAN-backed transport configuration. Unchecked, NSX is configured in VLAN transport zone mode instead.
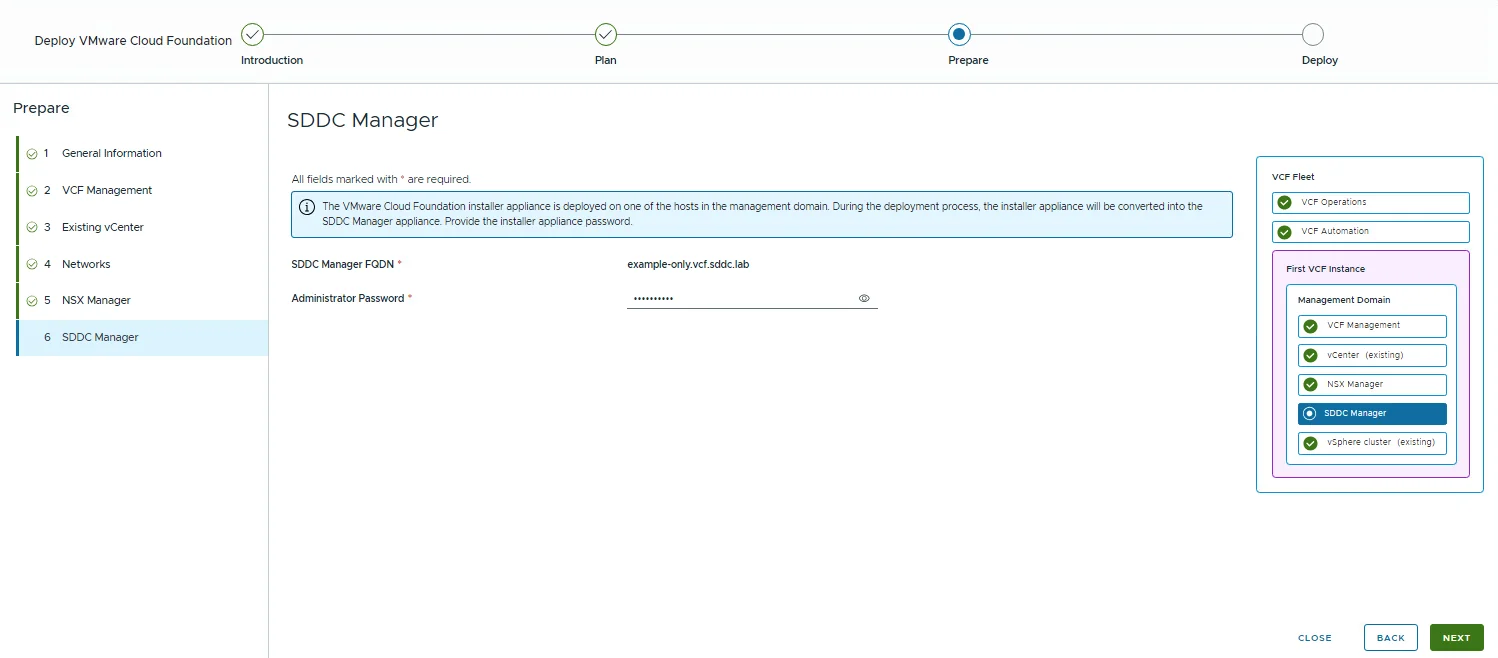
- Enter the SDDC Manager FQDN and the installer appliance password
- Click Next
The info banner explains why the appliance password is requested: when the installer appliance runs on one of the management domain hosts, it is converted into the SDDC Manager appliance during deployment: the same appliance transition the official docs describe, and the reason the prerequisites page noted the SDDC Manager FQDN is optional in that placement.
Deploy
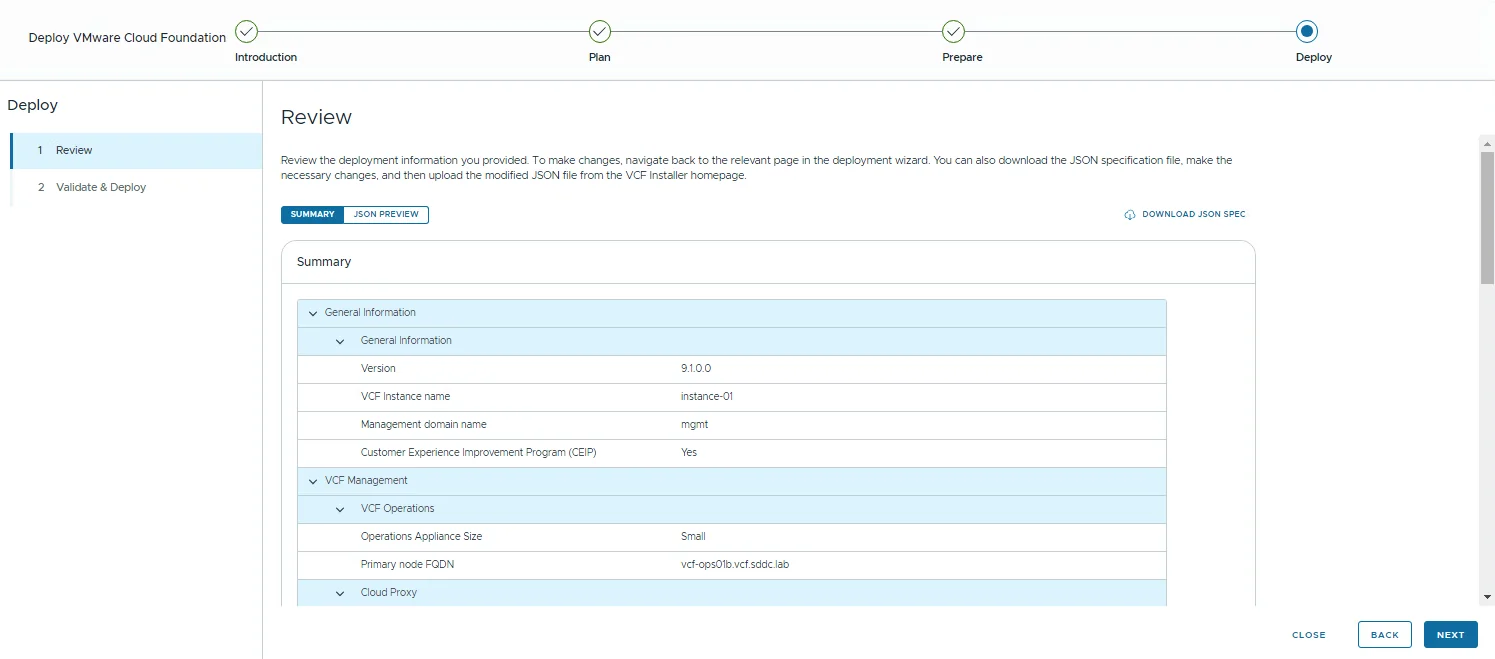
- Review the summary, every section from the wizard is expandable here
- Optionally click Download JSON Spec
- Click Next
The JSON preview tab and the downloadable spec make the whole deployment repeatable: the same file drives API-based deployments, and it is the vehicle for the options the wizard does not expose, like dual-stack networking or an alternative internal cluster CIDR.
- Wait for the 11 validation checks to complete: deployment specification, security configuration, DNS resolution, versions and bundles, existing SDDC Manager configuration, password policies, network configuration, existing components, and the capacity calculations
- Resolve any errors, acknowledge warnings if appropriate, and click Deploy
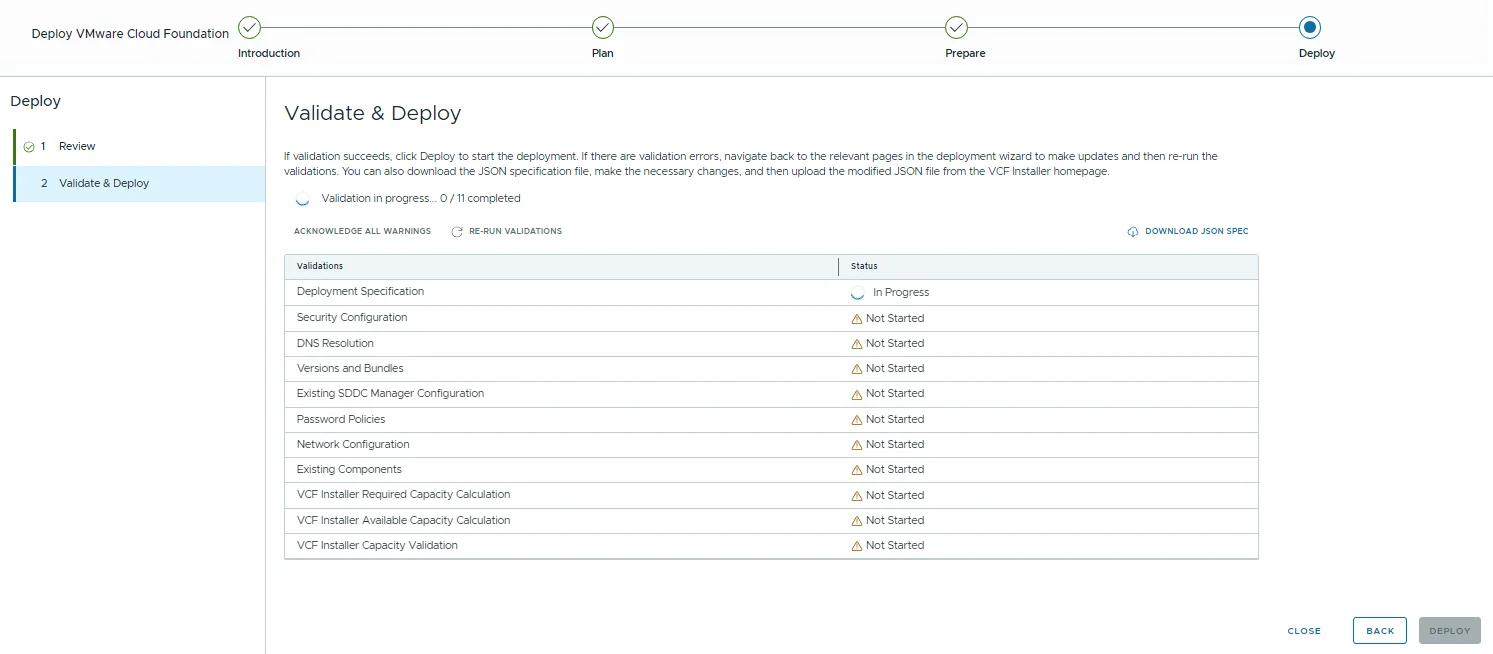
From here the installer takes over: management services, VCF Operations, NSX, SDDC Manager conversion, and the rest of the management domain roll out in sequence. Depending on hardware, expect this to run for a few hours.
If validation or deployment fails
A few 9.1-specific failure modes worth knowing before you hit Deploy:
- “Deploy and configure VCF Management Platform” fails: the management services use an internal cluster CIDR of 198.18.0.0/15 by default; if that overlaps your network, KB 440541 covers switching it to 240.0.0.0/15 or 250.0.0.0/15 via the JSON spec.
- “VCF Management Services Deployment Task” fails on NTP: the NTP server must be reachable over UDP 123 from the deployed appliances, not just from the installer: KB 439240.
- vMotion / vSAN network connectivity validations fail: the installer does not recognize standby uplinks; set the vmnics active/active or disable the check per KB 437248.
- Uppercase FQDNs: deployment fails for fleet components, identity broker, services runtime, and VCF Automation; lowercase everything (known issues).
For nested labs, William Lam maintains a comprehensive set of installer workarounds for 9.1 (pNIC speed, vSAN HCL, and MTU prechecks included. And a neat trick from the same source: the installer doubles as a standalone pre-check tool) you can run the full validation suite against your infrastructure without deploying anything.
References
Official documentation
- Deploying a New VCF or vSphere Foundation Platform (9.1)
- Deploy VCF Installer (9.1)
- Downloading Binaries to VCF Installer (9.1)
- Connect VCF Installer to Broadcom or an Offline Depot (9.1)
- Start a New VCF Fleet or a New VCF Instance Deployment (9.1)
- First VCF Instance FQDNs and IP Addresses (9.1 planning)
- VCF 9.1 Release Notes · Bill of Materials · What’s New - VCF Installer · VCF Installer Known Issues
Broadcom KBs
- KB 443647 - Download token replaced by Activation Code in VCF Installer 9.1
- KB 401497 - VCF/VVF downloads in the Broadcom Support Portal
- KB 440541 - VCF 9.1 fails at Deploy and configure VCF Management Platform
- KB 439240 - VCF 9.1 installer fails at VCF Management Services Deployment Task
- KB 437248 - VCF 9.1 installer fails on vMotion/vSAN network connectivity
My VCF 9.0 installer series