I wanted to give my users the capability to create a snapshot but limit them to only 1 snapshot and have a predefined description from the snapshot so I can know that it was taken from vRA.
For the purpose of this I will be using a customer workflow in Orchestrator and Resource Actions and in Cloud Assembly.
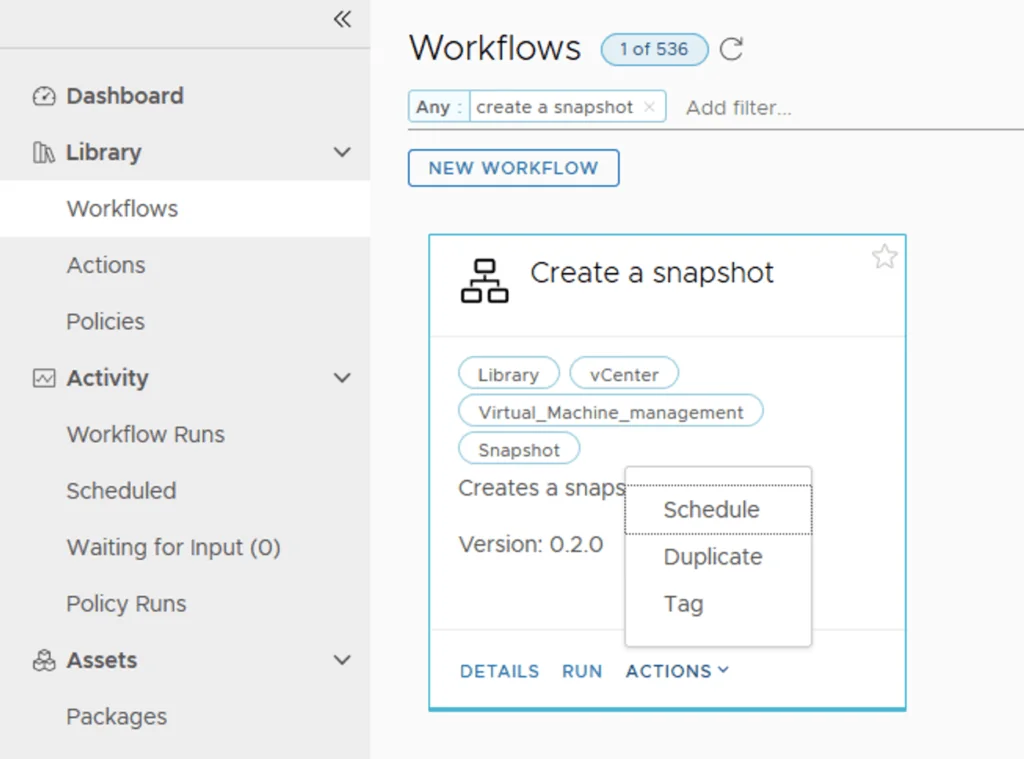
Since Orchestrator comes with a number of pre defined workflows in always like to jump start by find something thats similar with what im trying to do. For the purpose of this we will be using the Create Snapshot Workflow.
Duplicating the Create a Snapshot Workflow
To get started we can go to Orchestrator -> Workflows -> search for Create a snapshot. Once found we can click on Actions -> Duplicate

We can see that a Copy has been created. We will modify this so it can fit the custom specifications required.
Click on Open on the Copy:

Change the name to something more meaningful like VM Snapshot

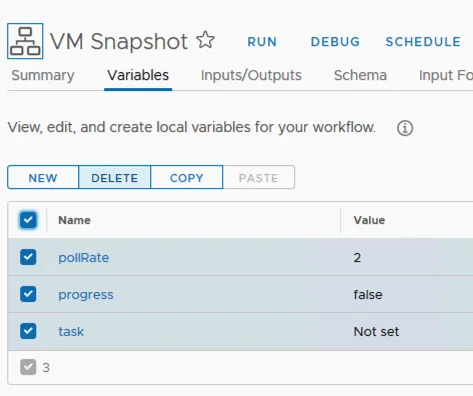
Setting Up the Workflow Variables
Click on Variables, select all the variables and click Delete
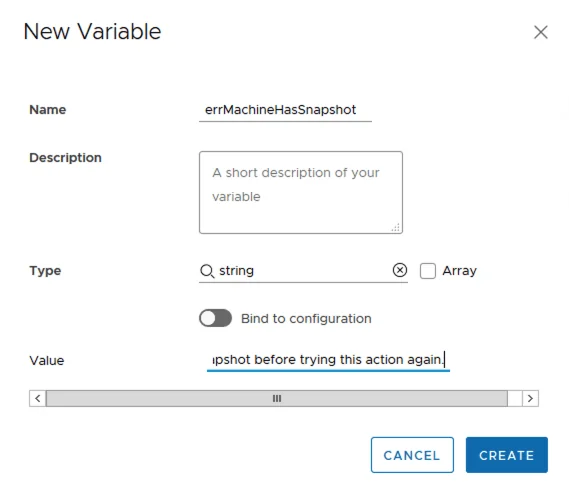
Click on New, give it a title like errMachineHasSnapshot and a value thatw ill displayed if a VM has an existing snapshot like The virtual machine already has a snaphost. Please delete this snapshot before trying this action again. Click Create
Building the Workflow Schema
Click on the Schema tab and delete the existing items by clicking on the red x on the top right corner
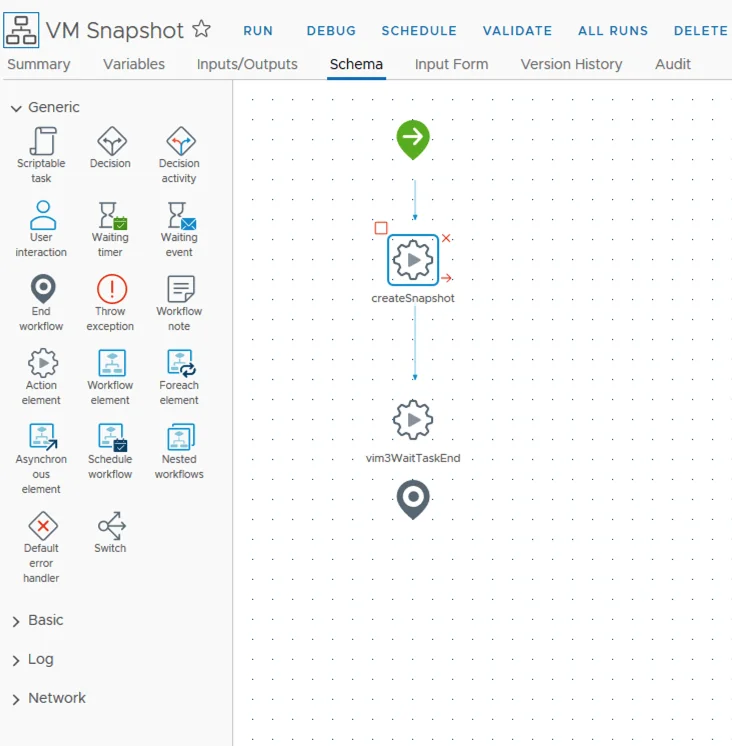
Drag and drop from the left a Decision, throw exception and a workflow element in to the canvas
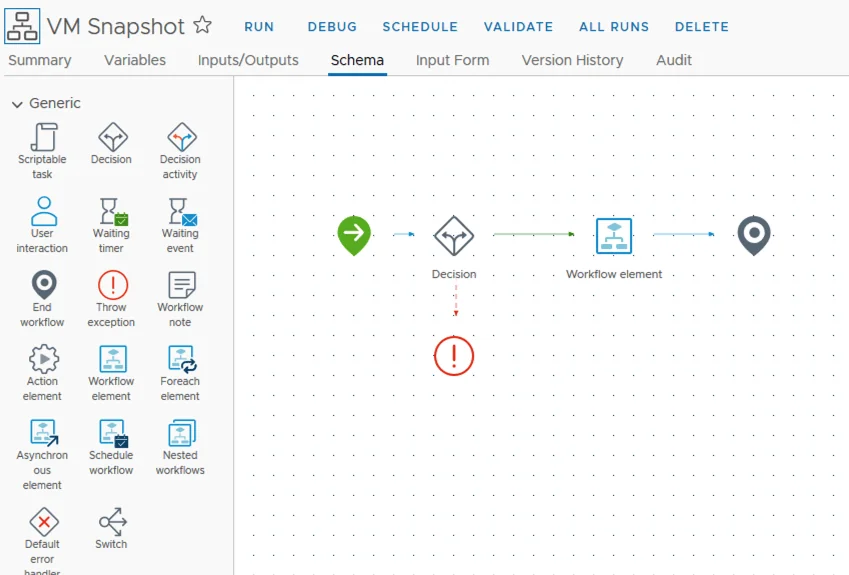
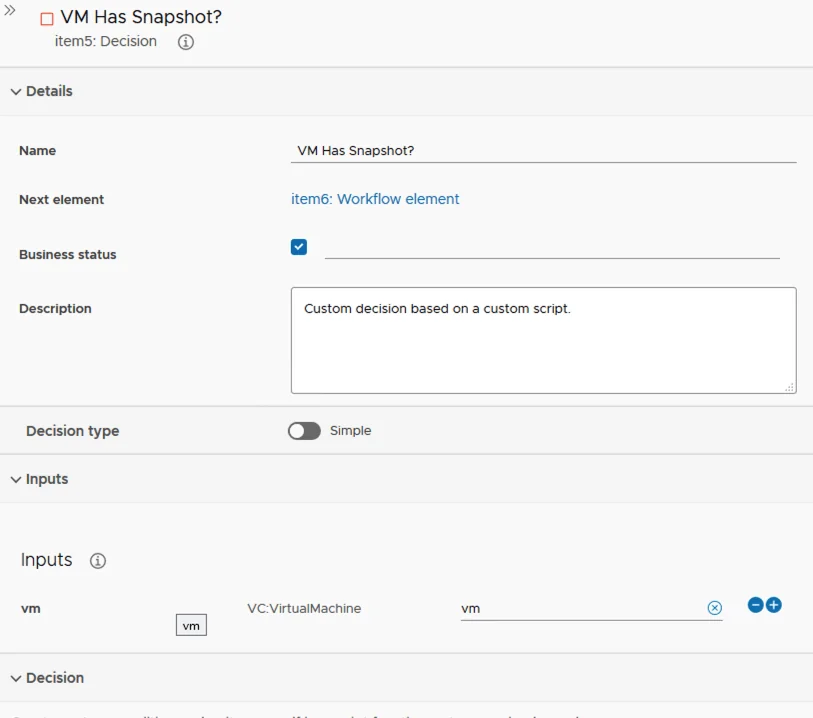
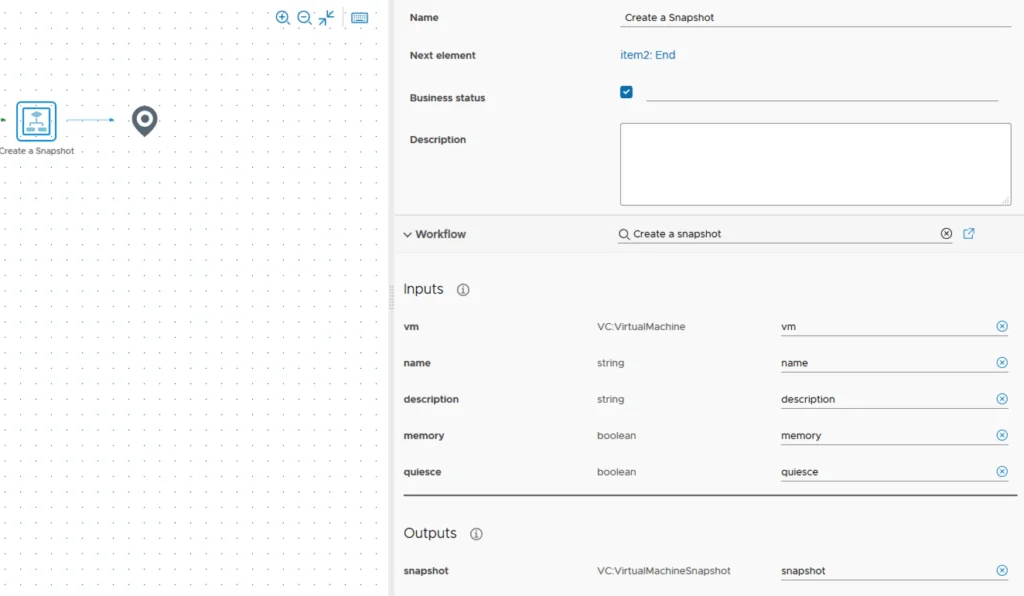
I named the first step VM Has Snapshot?. Under inputs I added vm. It would look like the screenshot below
Under the javascript we will be using this code
    var snapshots = System.getModule("com.vmware.library.vc.vm.snapshot").getAllSnapshotsOfVM(vm) ;
    if (snapshots == null || snapshots.length == 0) {
      // No snapshots found; proceed with creating a new one
      return true;
    } else {
      // Found at least one snapshot; end the workflow
      return false;
    }
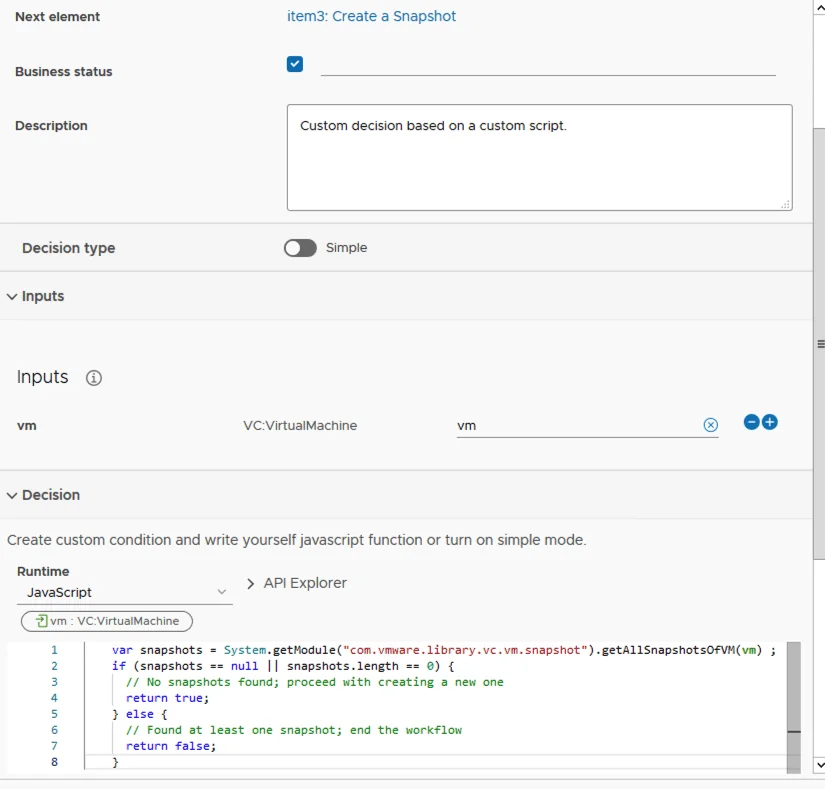
The error handling Exception Handling we will be using the previously created errMachineHasSnapshot
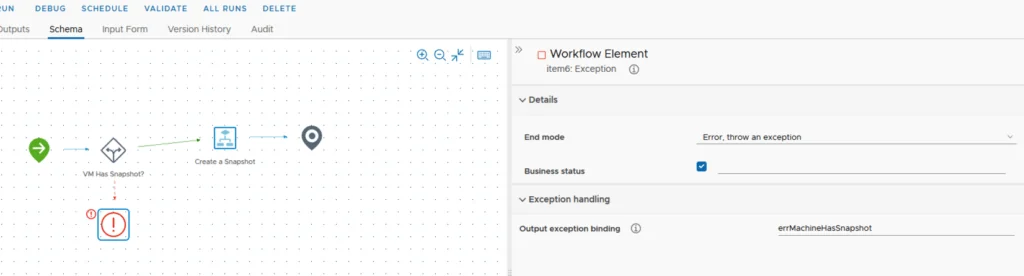
The workflow element should look like this after selecting the Workflow Create a snapshot
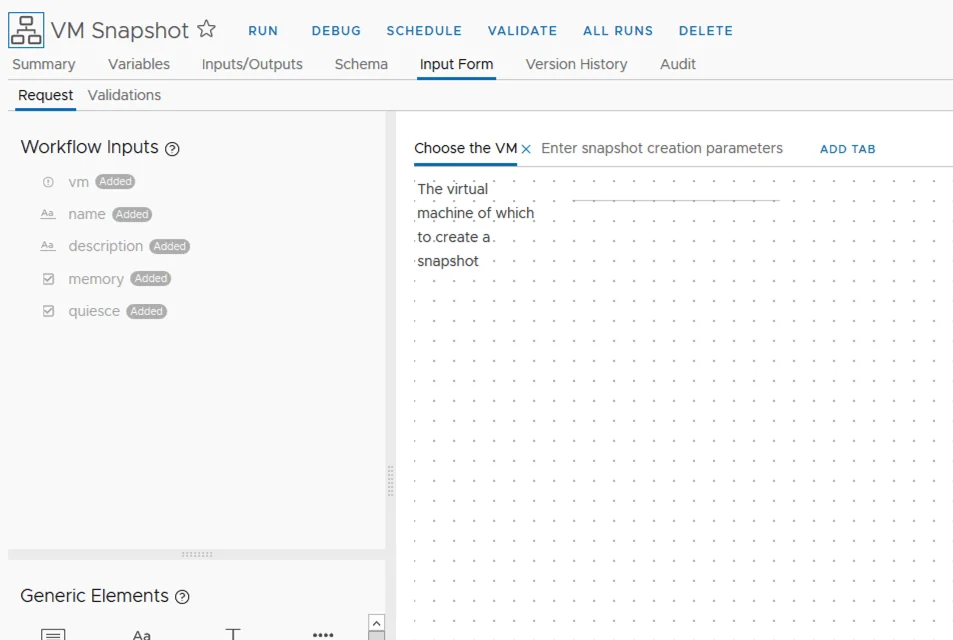
Configuring the Input Form
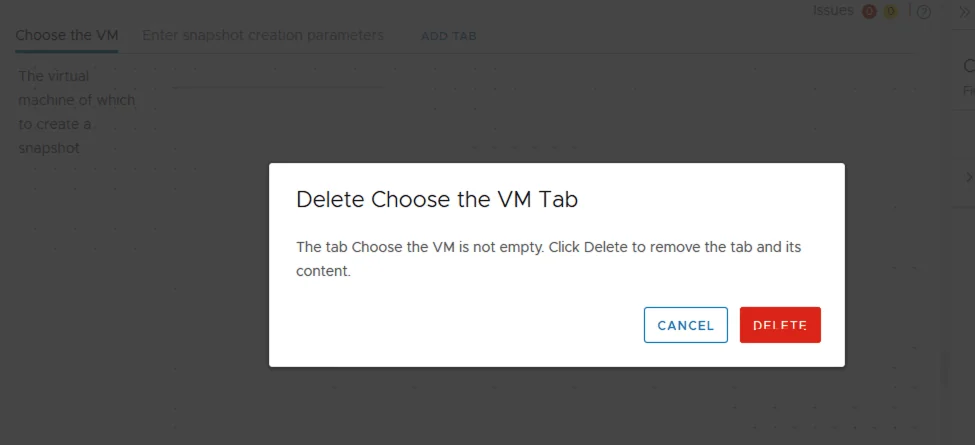
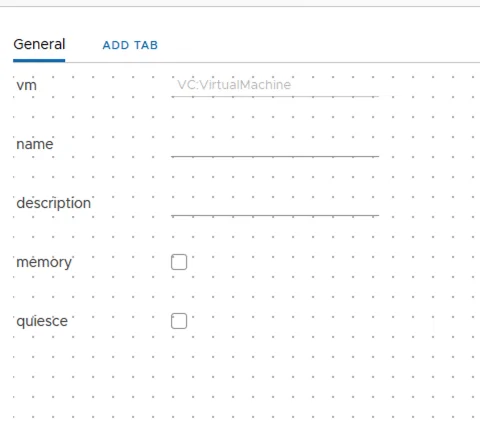
The next step is to fix the inputs. We will be removing the Choose the VM tab by clicking on the x
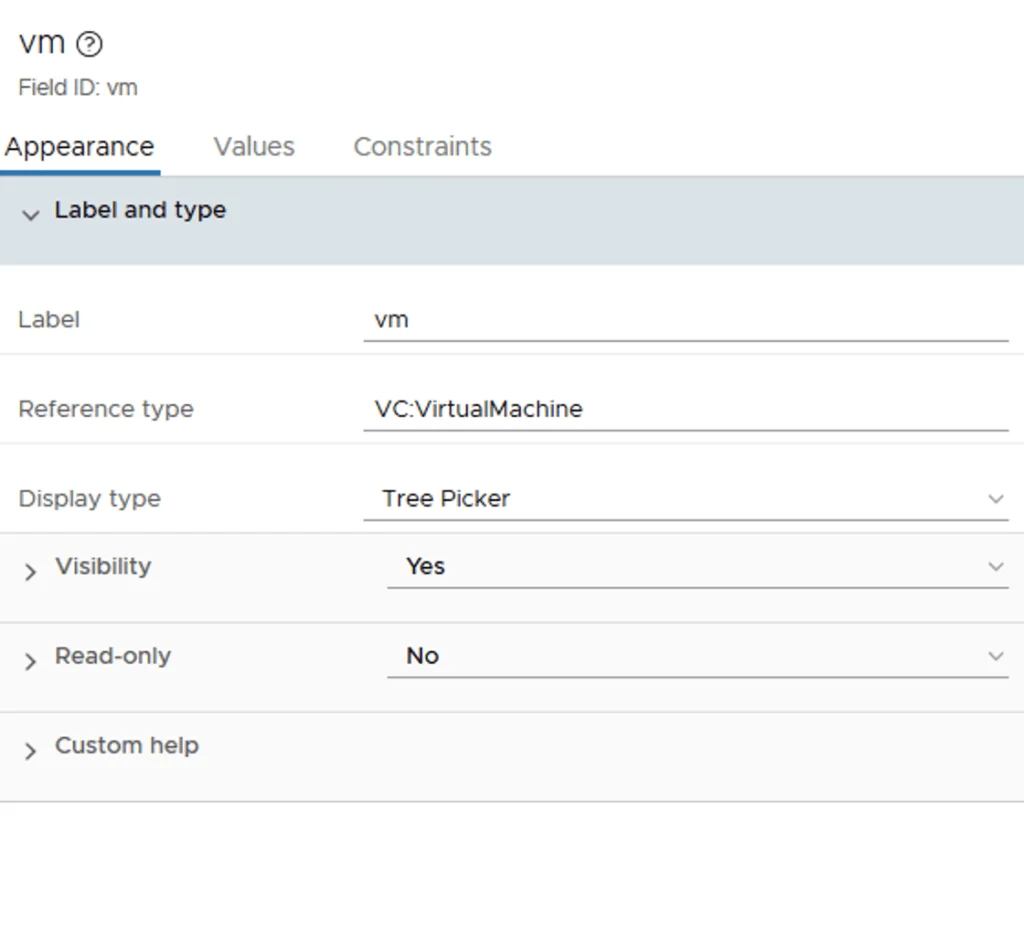
We will be replacing the first item with vm and the display type

It should look like this:
In the end we should have the following:
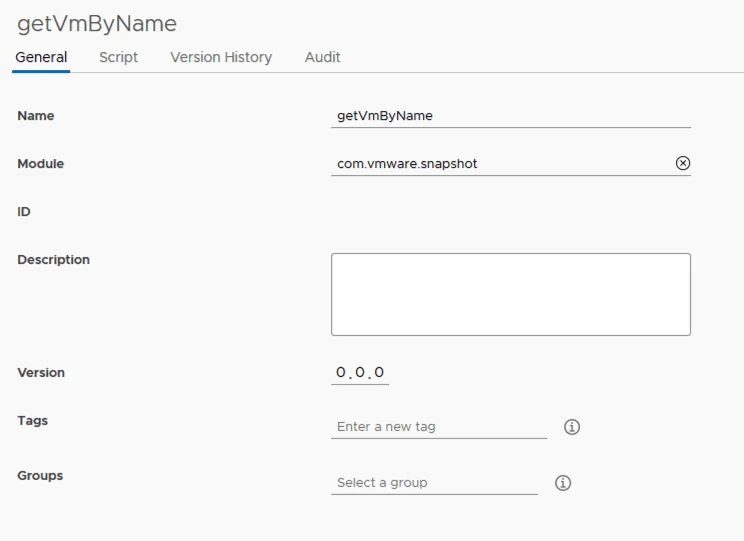
Creating the getVmByName Action
Next go to Actions and click on New Action

Give it a Name and a Module name
Under Script type in
var allVms = VcPlugin.getAllVirtualMachines();
for (var I in allVms) {
    if (allVms[I].name === name) {
        return allVms[I];
    }
}
return null;
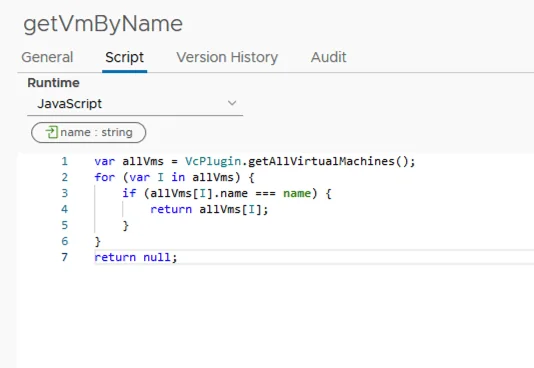
Under the Return type enter VC:VirtualMachine. Under the Inputs type in name and click Create on the bottom left

Once were done we can save it and move on to Cloud assembly to create the resource action
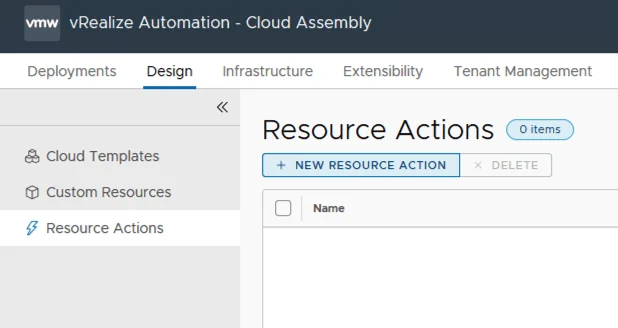
Creating the Resource Action in Cloud Assembly
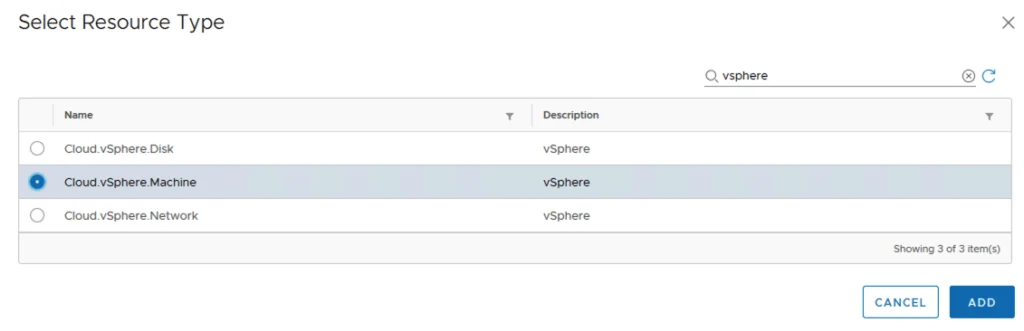
Go to Cloud Assembly -> Design -> Resource Actions click on new resource action
In the name field type something like CustomSnapshot, Display name VM Snapshot, give a description and toggle the activate switch to on

Under Resource type click on add pick Cloud.vSphere.Machine
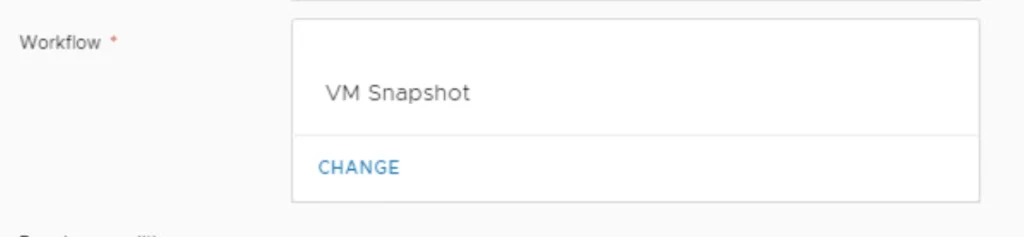
Under Workflow click Add and pick VM Snapshot
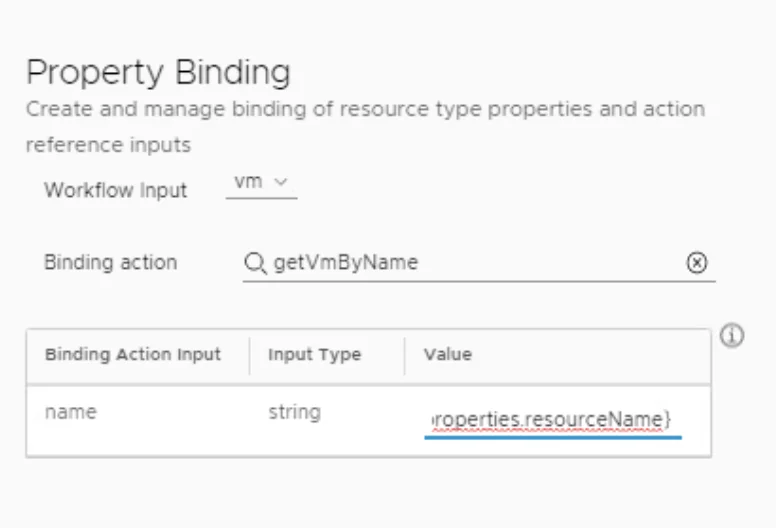
In the Property Binding pick getVmByName action and under string enter ${properties.resourceName}
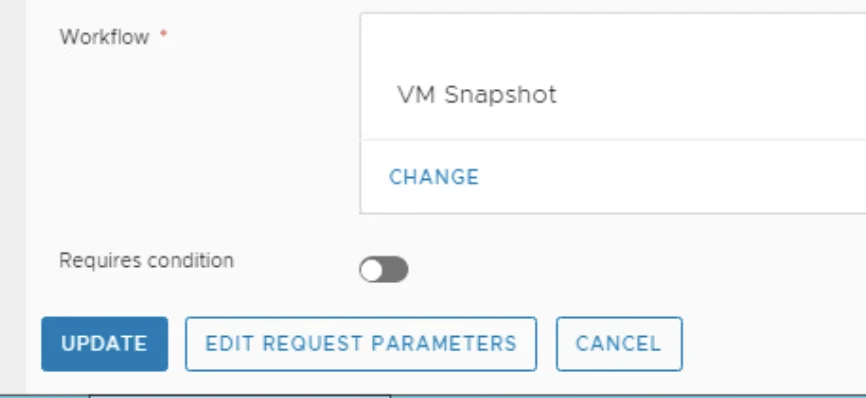
On the bottom click on edit request parameters
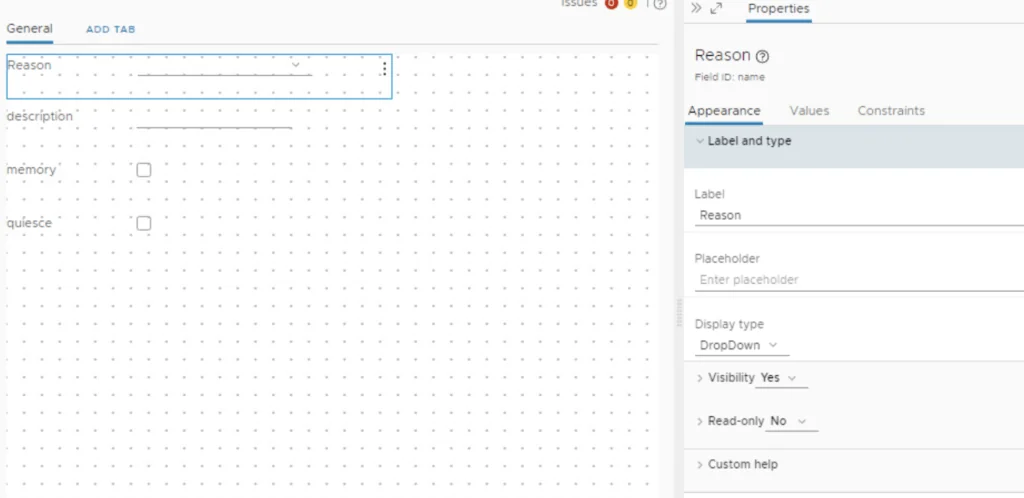
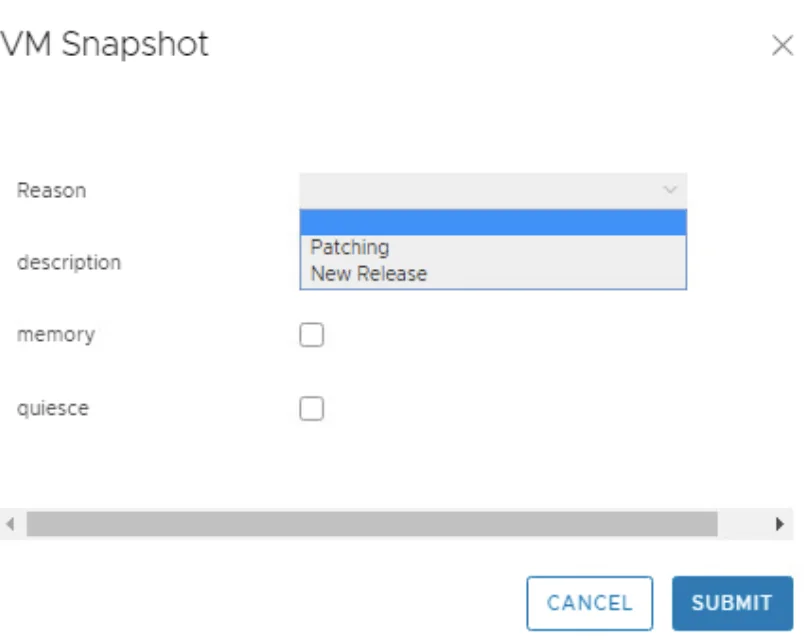
click on vm and change the Label to Reason and Display type to DropDown
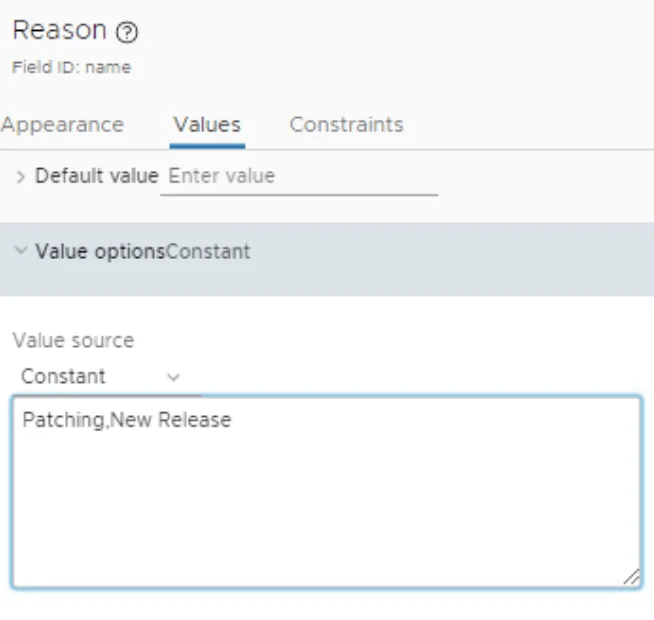
Under Values Type in the options that you want to have shown Separated by , ex: Patching,New Release
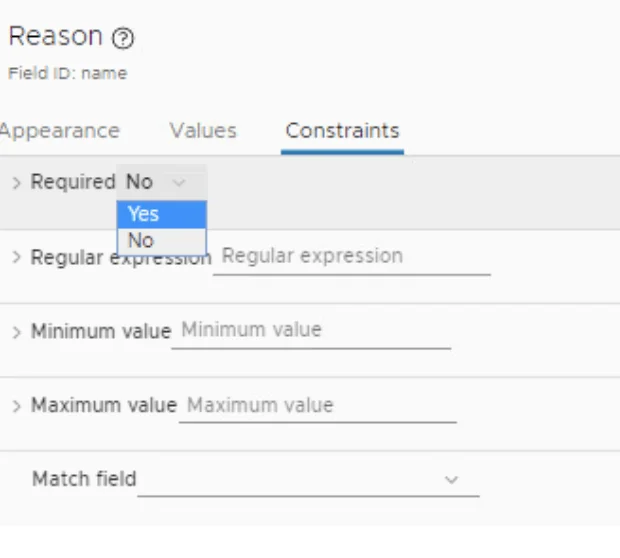
Under Constraints make it as required by Picking Yes in the required field
The other fields and options can be modified as needed
Testing the Day 2 Action
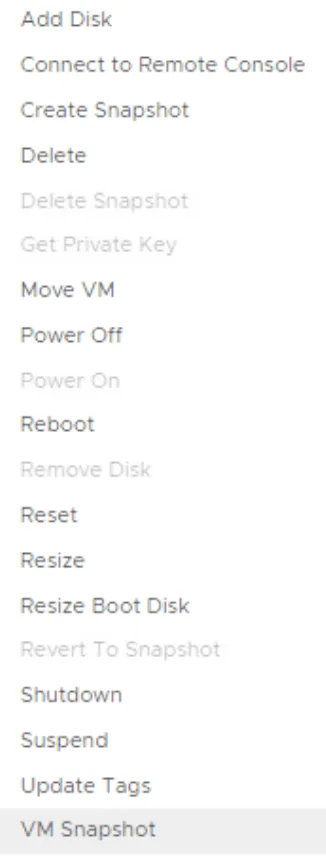
Once everything is saved we can test out the Day 2 action by going to an existing deployment and trying to create a snapshot. We can see in the menu an additional option all the way to the bottom:
When choosing the option we can see the custom form that we filled in earlier
If you also want to control how long snapshots stick around, I covered changing the Delete old snapshot restriction from 7 days in Automation Central in a separate post.