With the release of VCF 9 (Official What’s New blog can be found here) I wanted to get my lab environment upgraded so I can try out all of the new features.
In my previous post we went over the deployment of the appliance. In this post we will be covering the configuration.
Configure the VMware Cloud Foundation Installer appliance
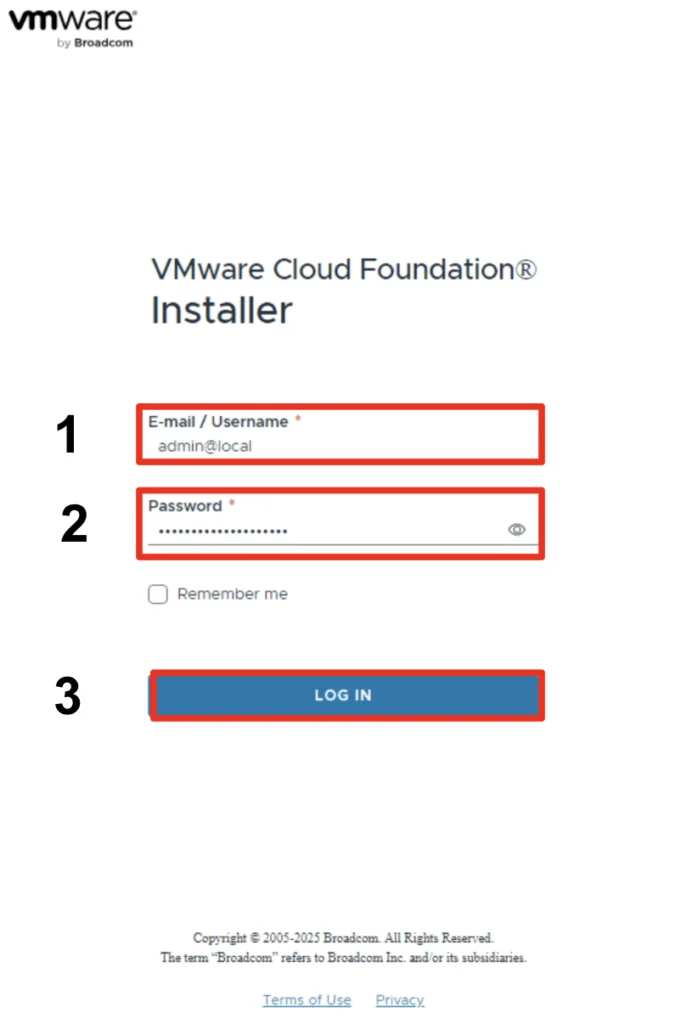
Once the appliance is deployed we can navigate to https://ip_address/ui or https://hostname/ui of the appliance. If everything is working properly we should be presented with a login screen.
- For username we will use admin@local
- For password enter the password provided in the previous steps.
- Click Log in

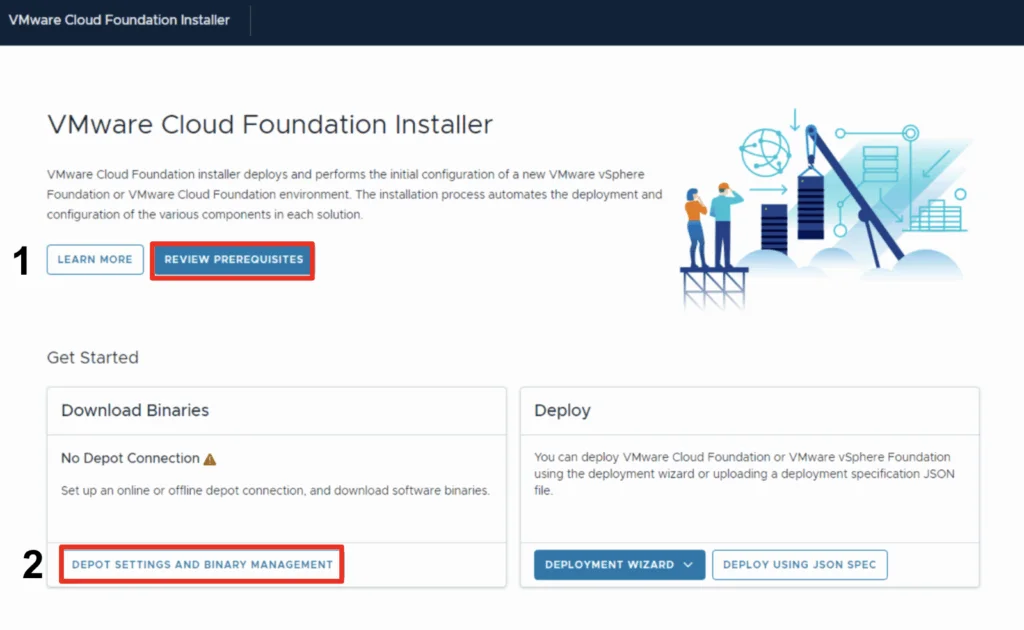
- Review the requirements by pressing the Review Prerequisites button
- Click on Depot Setting and Binary Management
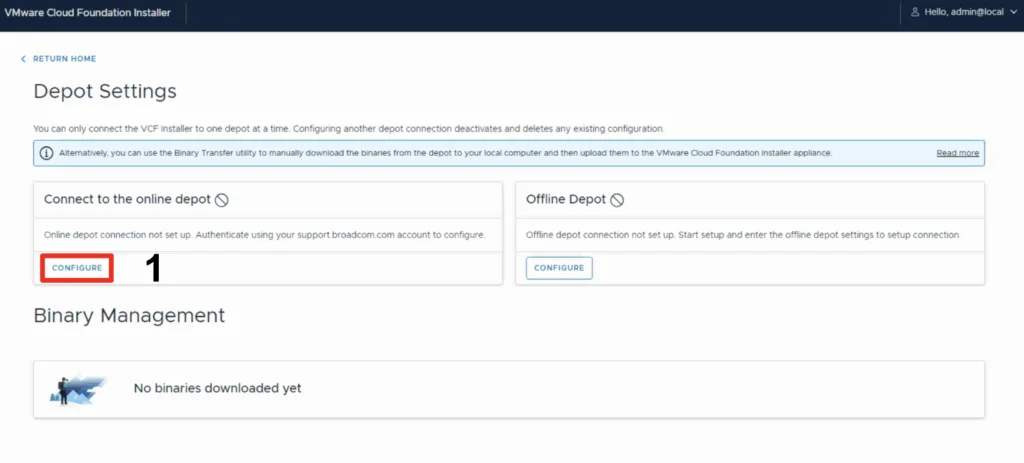
- Click on Configure under the Connect to online depot tile
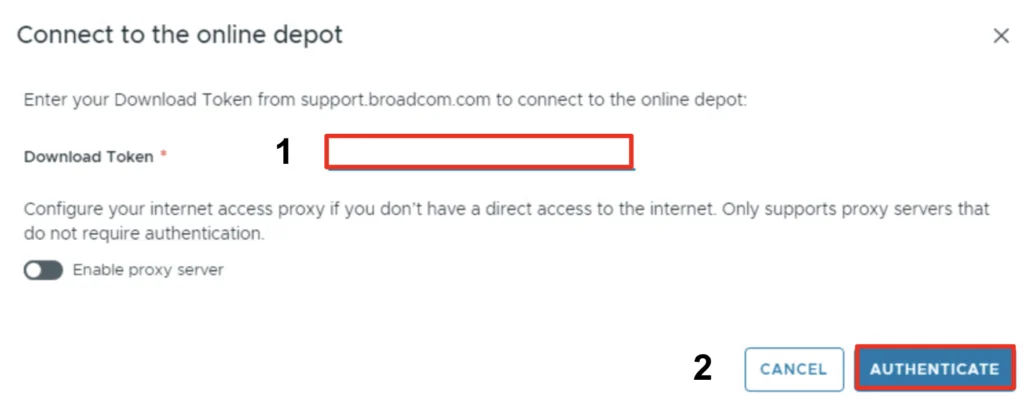
- Provide your download token. For information on obtaining the download token follow kb article 390098 here
- Click Authenticate
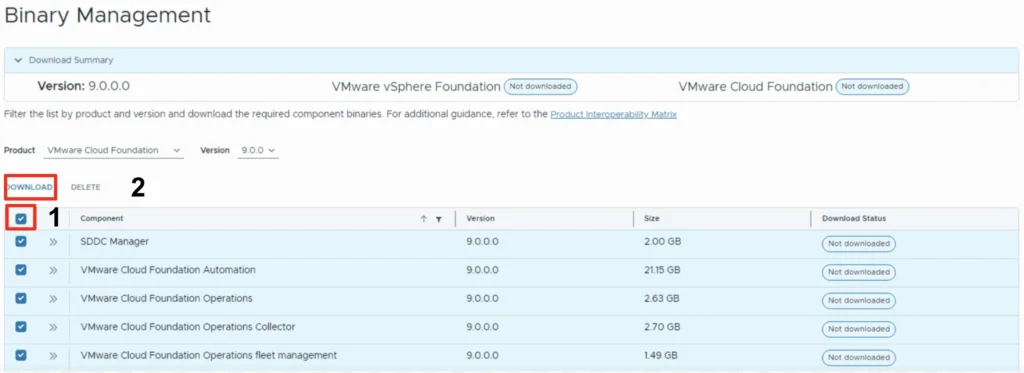
Once the system scans for bundles available we are presented with a list of downloads.
- Select the bundles that need to be downloaded
- Click Download
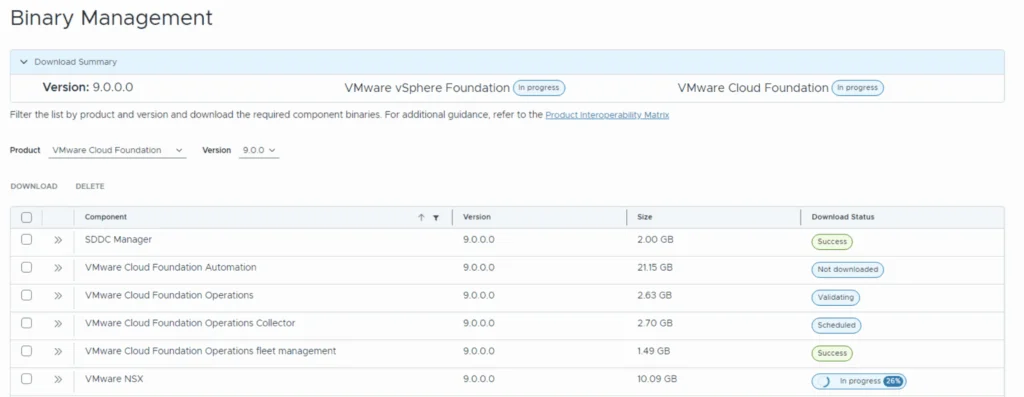
The installer will download the bundles and let us know when its completed
- On the top left of the screen click Return Home
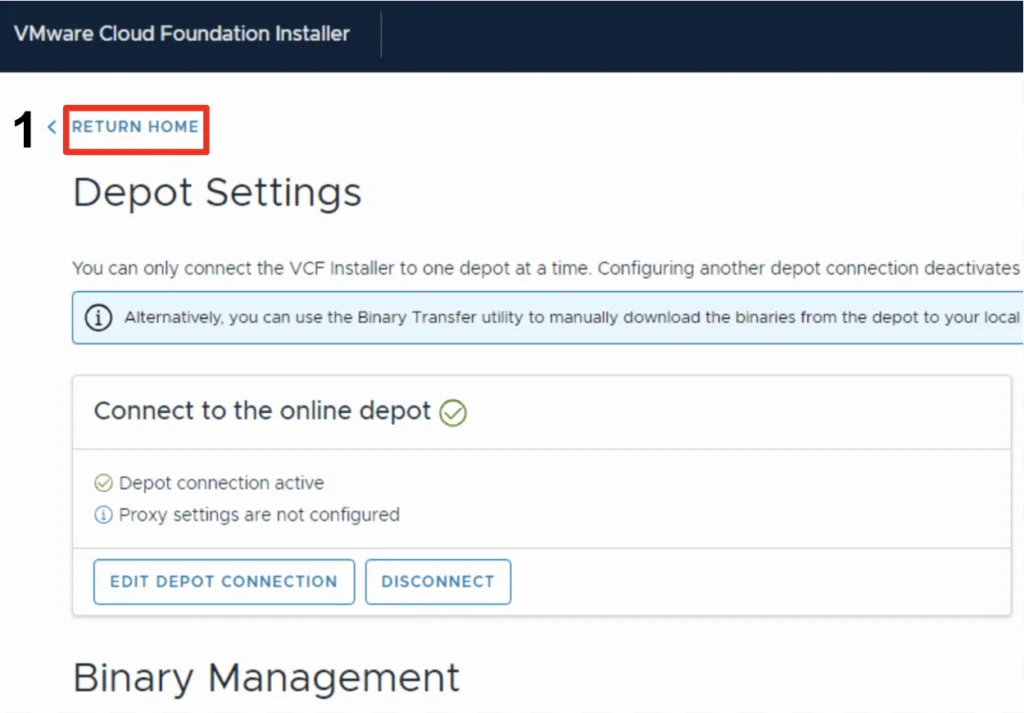
Here we can review the downloaded binaries and start a new deployment. I will cover the deployment in an upcoming blog post